
Today I am so happy to welcome Valerie Akkerman (@valerie_akkerman)as a guest lettering artist to share with you a really cool hand lettering project that I’m sure you will love to try!

Valerie Akkerman is a long-time lover of arts & crafts! In 2018, her son bought her a calligraphy pen and she was hooked! After years of homeschooling her twin boys, her love of brush lettering inspired her to go back to school to study Graphic Design. She is a self described do-it-yourself-er who enjoys making all sorts of projects and trying new things. Her husband is incredibly supportive of her ideas and is known to throw a surprise craft supply or brush pen in the shopping cart. She can often be found with a brush pen in one hand, a coffee in the other and her 2 dogs sleeping by her feet
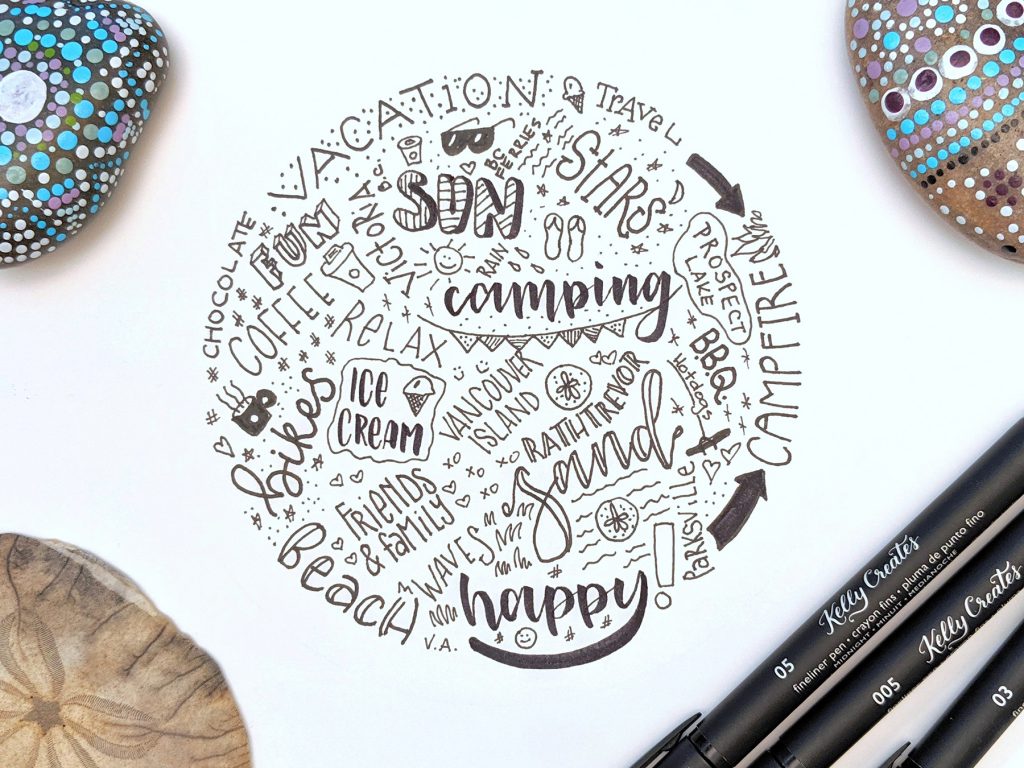
With summer in full swing, I’m excited to share with you a special way to capture your summer memories! You only need a few items to be able to recreate your own circle of memories.
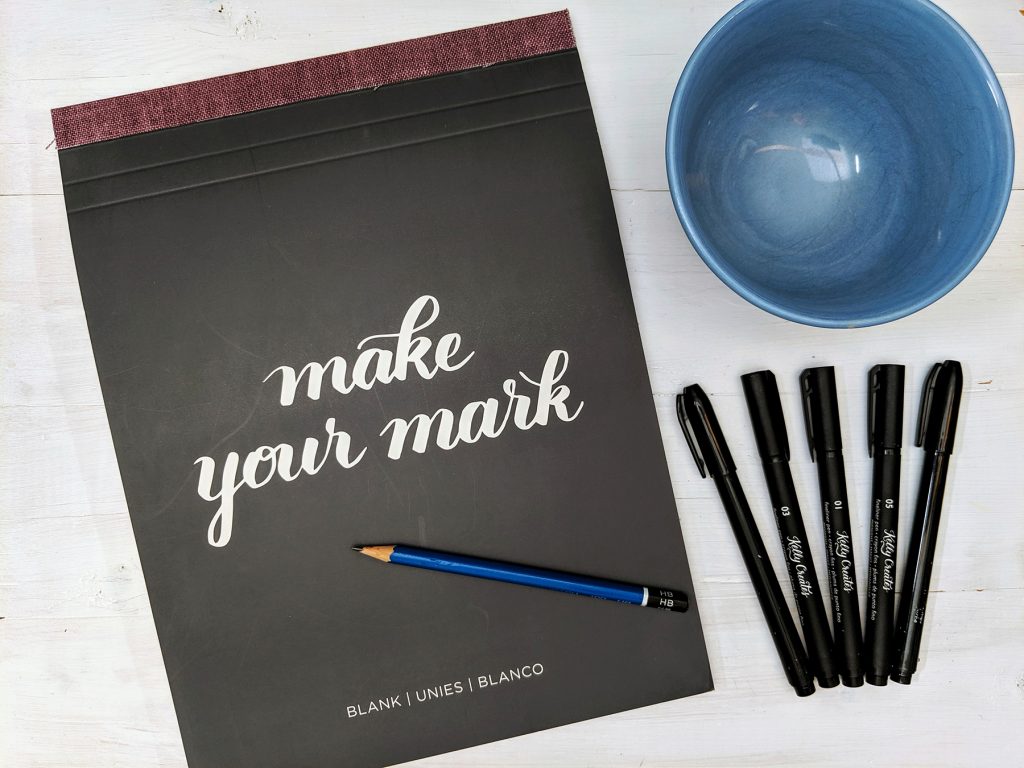
Here is a list of Kelly Creates Supplies that I used to design this project:
- Blank Paper Pad and Grid Paper Pad
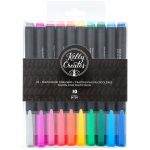
- Multicolor Small Brush pens
- Black Fineliners – a variety of sizes is helpful to create some variation
- A small bowl – any circular object you have on hand will work
- Pencil
- Eraser
TIP: You could also use heavy weight silky smooth white card stock from Kelly Creates Project Pad for the final project.
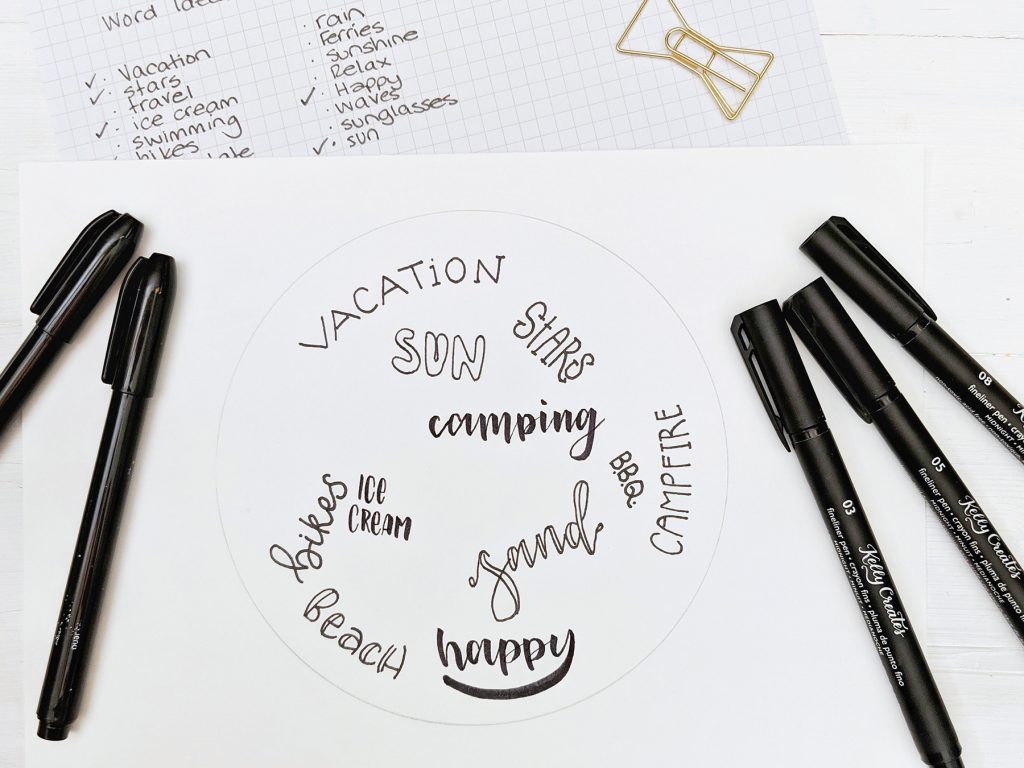
Start by brainstorming a list of words that you would like to include. Some ideas could be locations, weather, dates, modes of travel, activities and events.

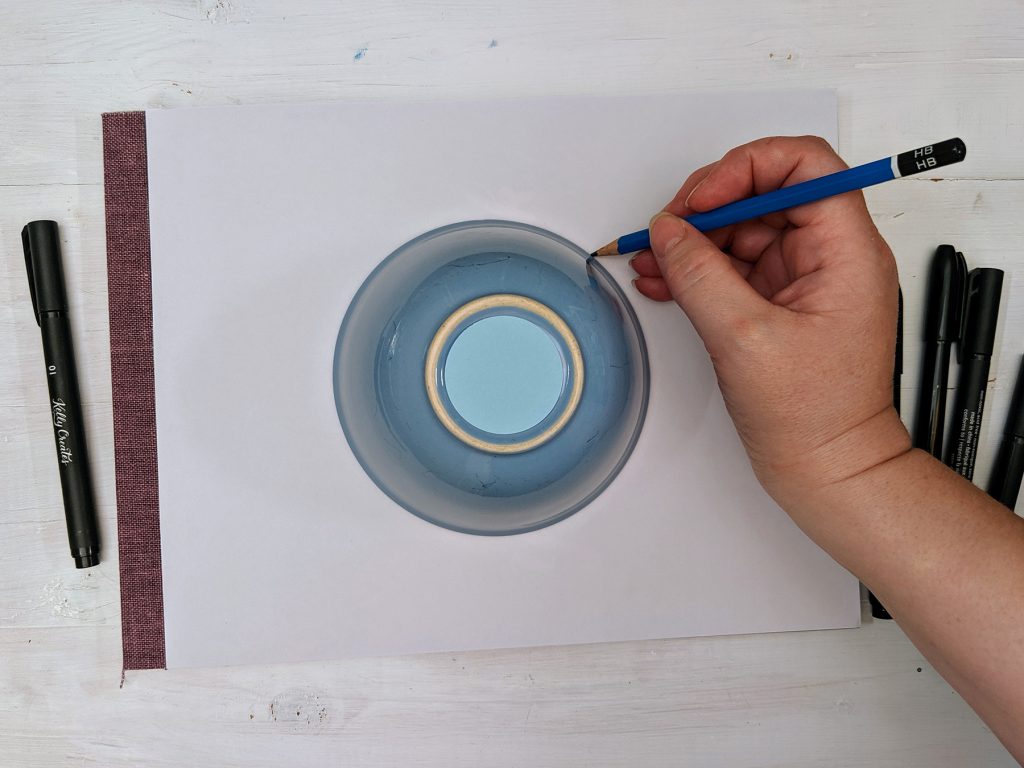
You will begin your project by centering the bowl in the middle of your paper. Gently trace the outer bowl with a very light hand using your pencil. You will be erasing this circle at the end of your project, so you will want to make sure you do not press very hard on your pencil.
I like to intuitively start placing my words. However, you can lightly pencil in your words to create an initial layout if you find that easier. Just make sure that you do not fill in all the space as we will be adding some embellishments later. You will need to erase any marks at the end, so ensure to keep a light touch on any pencil work that you do.
TIP: You can do a rough draft on practice paper before committing to the final project.

Now that we have done all the prep work, we can go ahead and start filling in some of our words with pens. I like to check off any words I have used in my list as I go, so that I don’t accidentally repeat them or miss any.
Try to alternate between the brush pens and the fineliners. This will create some variation in your lettering and different areas for your eyes to focus on. Remember, you don’t have to use only black ink…you can also make a colour version with Kelly Creates brush pens and Multicolour Fineliners!
Some ideas to help create variation:
- A mix of large and small lettering styles
- Alternate between brush script and print
- Mix capitals with small letters
- Try outlining a word
- Create shadows on some words
One thing I try to avoid is writing a word completely upside down. It makes it difficult for the reader. I do have a few words that are almost vertical but none that are completely upside down.
I find it easiest to position a few larger words in first, then slowly reduce my lettering size to start filling in any empty spaces.

I am happy with how my circle is starting to fill in, so I will keep adding my words in some more of the empty areas. Make sure you leave some blank areas so that you can add some decorative elements.
As you fill your circle, you can start writing in smaller words. Make sure that you are still keeping some white space to add some fun details.

Once you have finished writing all your words, you can start adding in some small details, like doodles and illustrated elements. Try drawing a wavy circle around a word, adding a drop shadow, use an arrow to point to something exciting, draw small images of coffee mugs, flip-flops, sunglasses, or other items that are unique to you. I have used things that are specific to my summer holiday. Look around for inspiration! You don’t have to be an artist to doodle simple images, and you can also search online for how to draw anything. I drew 3 coffee cups so apparently that was a very important part of my holiday!!

Now you want to fill in all those leftover areas with our smallest details. For this you will want to use your smallest Kelly Creates Black Fineliners. I have used Kelly’s #03, #01, #005. You want to fill in the areas, but you do not want them stand out. I drew dots, stars, # sign, hearts, waves, happy faces, rain drops!
When you are sure that the ink has fully dried, slowly and carefully erase any pencil marks.
Frame and hang your final piece on a wall then try creating another one! You can make a card for a friend, a bookmark, or add one to your planner, your art journal or scrapbook. You can also try different shapes – stars, squares, even a blob!
I hope you enjoy making your own!
~Valerie
This is such an awesome idea …. capturing your summer months on one piece of paper! I think a colour Circle of Memories would look amazing too! Plus, other themes would work, like vacation destinations, special occasions, such as Halloween, and more. Thank you for sharing your creativity with us, Valerie!
For more lettering inspiration, follow Valerie Akkerman on Instagram @valerie_akkerman
Shop the supplies Valerie used by clicking on the affiliate shopping links below:


PIN ME!

Linda Epstein
August 24, 2019 at 2:46 pm (6 years ago)A very cute idea. Thanks Valerie for sharing this.
Sue
August 25, 2019 at 8:01 am (6 years ago)Nice project, fun and you make it look so easy Valerie. I noticed the words, Victoria, BC (I live there) and Rathtrevor, beautiful place in Parksville BC Definitely put it on your bucketlist if you haven’t seen it. So many places to write about on Vancouver Island. Thanks for sharing this great fun project.
Katie Iddon
November 12, 2019 at 8:16 pm (6 years ago)Great project. I am on vacation relaxing in the sun and thinking up all the words I am going to use. Thanks for sharing xx