
Welcome back to Watercolour Wednesday! (I spell watercolour the Canadian way and sometimes the American way haha). Today I thought I would share a tutorial on how to use my Kelly Creates Paradise Watercolor Pencils for lettering.

Can I tell you how much I LOVE these Paradise Watercolor Pencils? If you feel like you need more control with watercolor and want quick, easy beautiful results, then definitely try them for lettering and colouring! They come in a set of 12 pretty colours and are water soluble on watercolor paper. Just add water with a brush and you have lovely watercolour!

I gave them cute tropical names, like “Turtle” and “Island” for the 2 green Paradise pencils, and there’s Dolphin, Mermaid, Starfish, Coral and more!
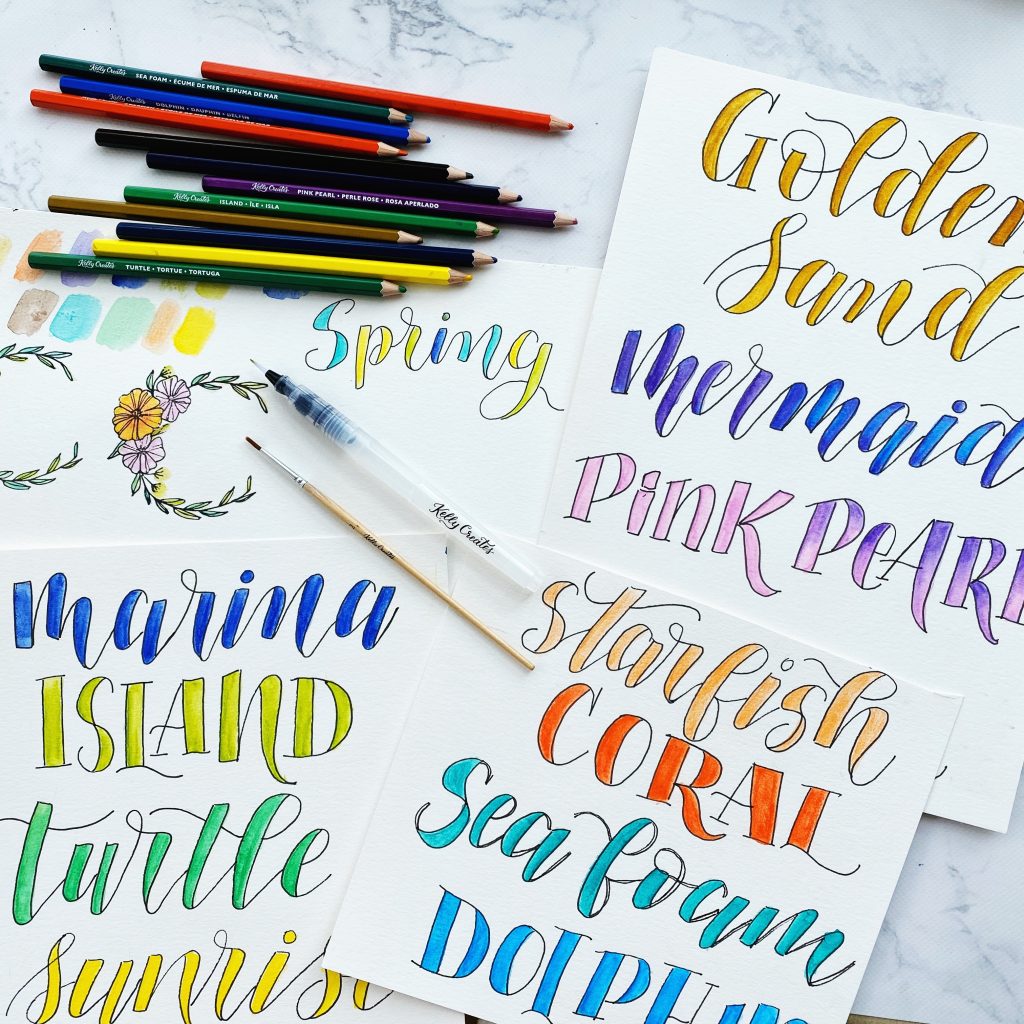
There’s many wonderful ways to hand letter with these Paradise Pencils, but you can use them for colouring stamped images or even sketching and creating a watercolour painting, too.

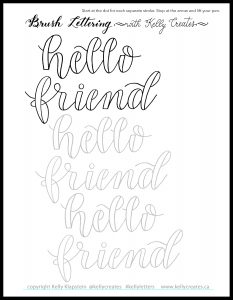
In this tutorial, I would like to show you a couple ways to letter with the Paradise Pencils in a ‘faux’ calligraphy style. I’ve designed a tracing template to help you practice too! Click HERE to download the printable template or click the image below.
For this technique, you will need to practice on watercolour paper. I recommend using a heavyweight cold pressed smooth paper that is at least 140lb/300gsm. I often practice with Canson watercolor paper, and then use my Kelly Creates Watercolor Paper Pad for the final projects.


You can use the Kelly Creates Watercolor Lettering brushes to ‘add’ water to the coloured letters. Click the images below to see the brushes and Paradise Pencils in my online store.


Here is a video tutorial that shows how to use the Paradise Watercolor Pencils to create beautiful, colourful lettering. Remember to subscribe to my YouTube channel too!
To shop for Kelly Creates watercolour art supplies, click HERE or visit http://www.KellyCreatesStore.com. You can also check my Store Locator HERE for a listing of lots of stores worldwide that carry my products.
PIN ME!
