
Bonnie @diamondandwillow has a wonderful tutorial on how to use flourishes to frame your hand lettering, which includes FREE printable worksheets of flourishes for you to trace and practice! (And take a look at the stunning floral illustration that Bonnie drew on her canvas Kelly Creates Deluxe Lettering Kit in the background of her photos!)
In this tutorial I want to introduce to a few different ways I use flourishes to add a frame around a lettered piece.

Kelly Creates Supplies: Deluxe Lettering Kit, Blank Paper Pad (or Project Pad), Black Fineliners set of 6
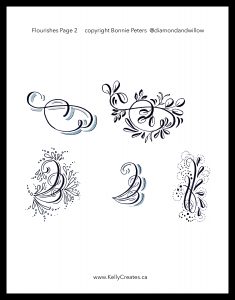
There are a vast array of flourishes you can draw, and I’ve showcased just a few for you to practice.
You can use both Kelly Creates Fineliners and brush pens, in various sizes and colours (although I used black), depending on the look your prefer and the weight of the lines you want to achieve.
With a brush pen, you apply pressure on your downstroke to create a thicker/heavier line, just as you would when doing calligraphy.
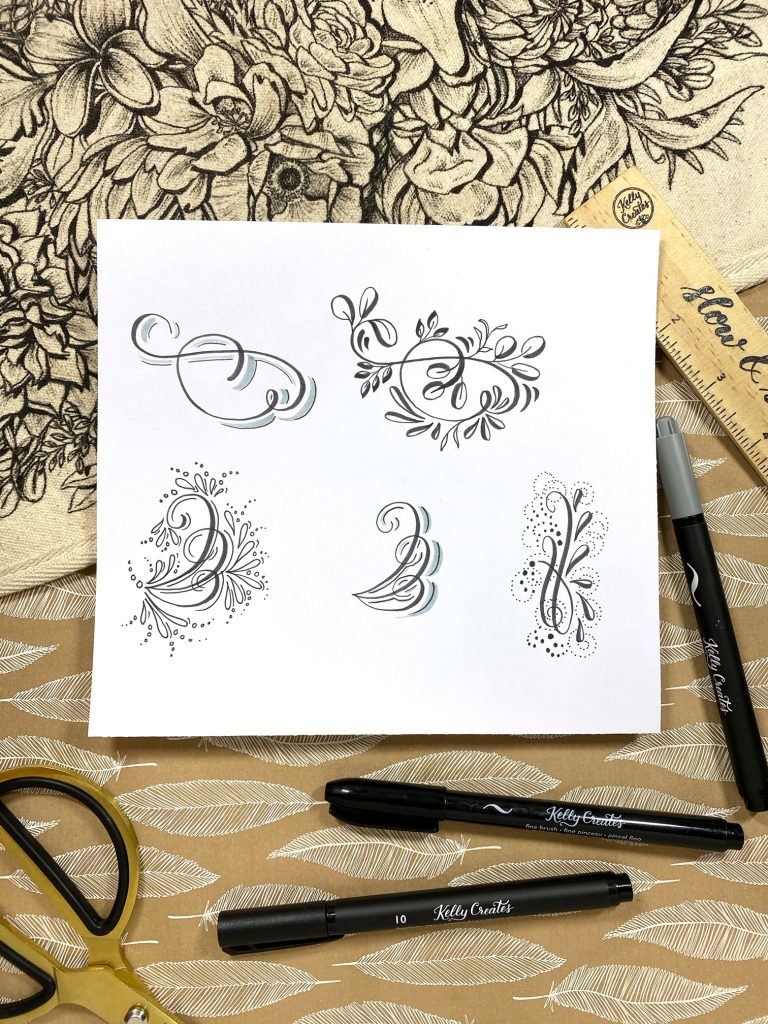
You can start with a few of the simple flourishes, and modify them with extra lines, leaves, dots or shadows.
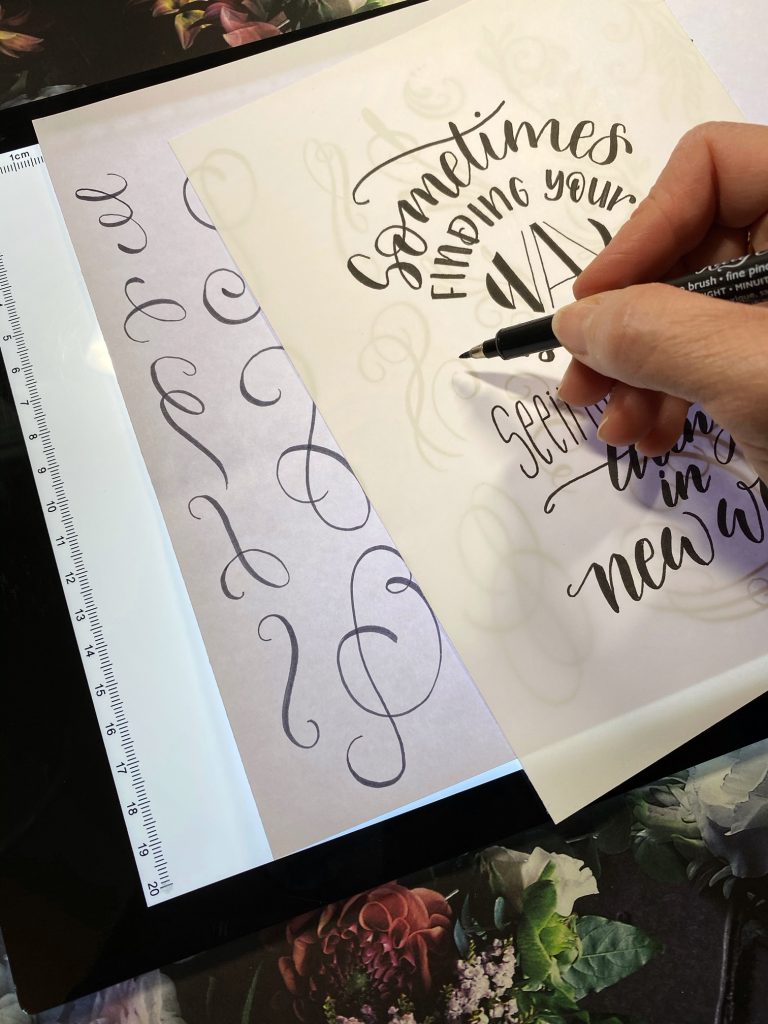
One of my favourite tricks is to design my lettered piece and then make copies. This way I can play with different flourishes and see which I prefer without worrying about ruining my final project.
Using a light box, lay the flourish samples page down, and place the lettered piece on top. Try moving it around to see which flourishes might work best in the empty spaces. (NOTE: If you don’t have a light box, you can tape the Flourishes pages to a window.)

Here I used the Kelly Creates Small black brush pen for the “splash” flourish. One side of this shape is heavier than the other, plus I added a grey shadow with the Kelly Creates Dream pen from the Deluxe Lettering Kit.

For this quote ‘You’re Never Alone,’ I kept it fairly simple. I extended the tail of the letter ‘Y’ and ‘R’ and repeated a similar swoosh at the bottom. A couple of splashes and a simple shadow line with a Kelly Creates 005 Fineliner and the left one was done.
For the one on the right, I added a little more of a border with the Kelly Creates Fineliners in 05 and a 005 to repeat the flourish. These were not replicated exactly, as to create a looser appearance.

For ‘No one can take your place,’ I randomly added in strokes and splashes with the Kelly Creates Black Fine tip brush pen until I had filled in what appears to be a frame around the lettering, going back in with the Kelly Creates grey Dream pen and adding in shadows.
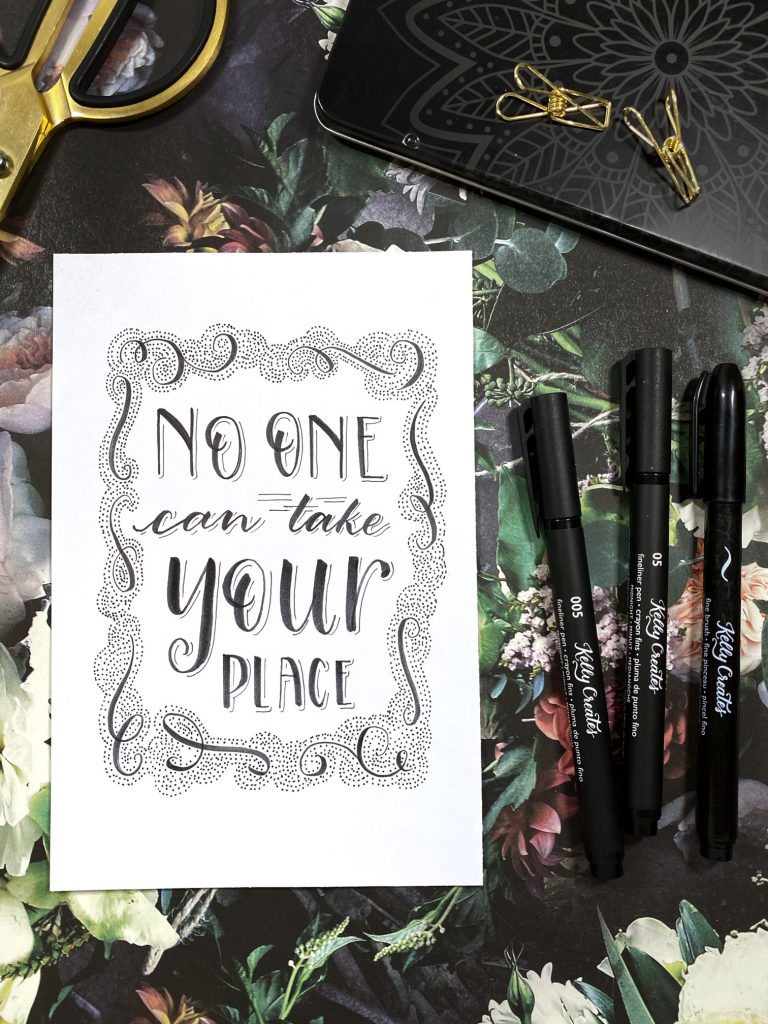
I framed the same quote, but this time with a few heavier swashes using the Kelly Creates small black brush pen, and then I got busy with a Kelly Creates 03 Fineliner to add dots. This created a ‘lacy’ frame.
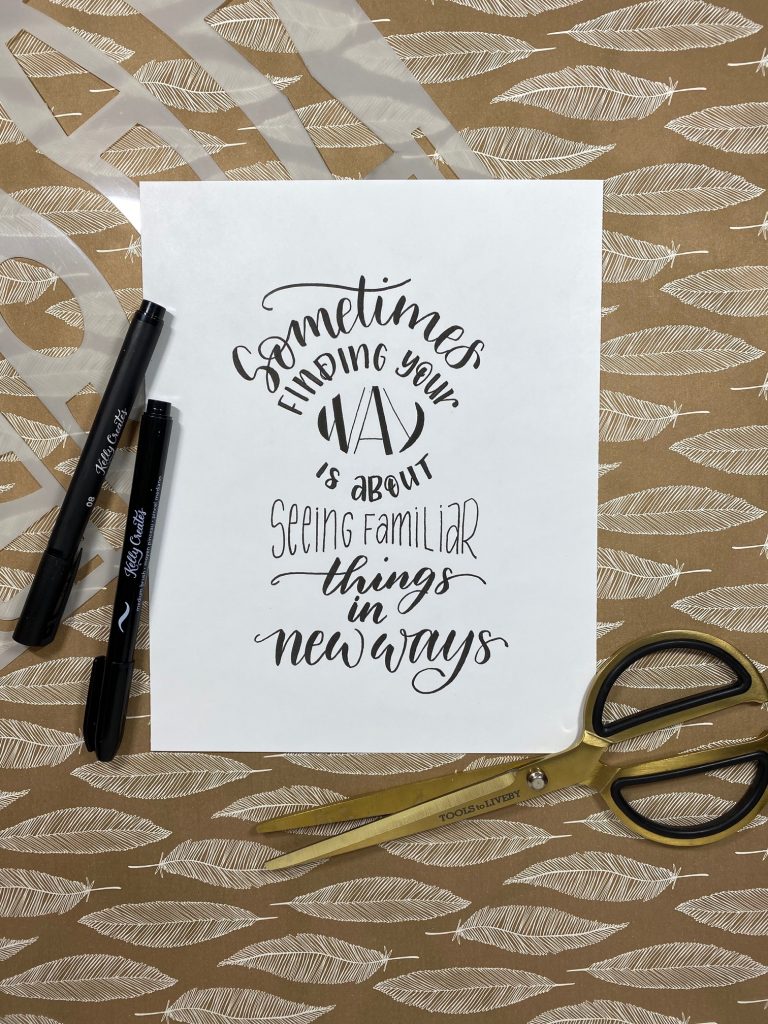
Here is one last example of a quote before any flourishes were added.

As this last quote suggests, sometimes we need only look at familiar things in new ways. You can practice by downloading and printing my Flourishes worksheets and then use Kelly Creates Tracing paper.
Now it’s your turn to see what kind of flourishes, borders or frames you can create! Click HERE to download Flourishes Page 1 and click HERE to download Flourishes Page 2. Or click the images below:

********************************************
For more artistic lettering inspiration, follow Bonnie Peters on Instagram @diamondandwillow and her Facebook Page “Diamond and Willow Artworks.”
To shop the supplies Bonnie used, click these affiliate links below or visit my online store http://www.KellyCreatesStore.com


PIN ME!

Linda Epstein
February 3, 2020 at 3:24 pm (4 years ago)Love this tutorial, Bonnie. Thanks so much for the downloads.
Chasity
February 3, 2020 at 3:56 pm (4 years ago)This is such an amazing Tutorial! Love this! Great job Bonnie!
Stephanie
February 3, 2020 at 6:03 pm (4 years ago)Gorgeous! Thank you – flourishing is something I feel I always struggle with and I like your tip on using another pages to find something that ‘fits’ without messing up your piece.
Dale
February 3, 2020 at 11:56 pm (4 years ago)Thank you so much for these flourishing printables Bonnie, and of course you too Kelly. I’m not a huge fan of flourishing, but I love the idea of using them as borders.
PS I love, love, love the florals on the KC Deluxe kit. I am going to get one of those one day.
CindyRa
March 17, 2020 at 12:47 pm (4 years ago)these are lovely. I can’t wait to try them with a brush marker. Thank you for your generous gift.
Neelam singh
May 11, 2021 at 11:15 am (3 years ago)Thank you for your help and support ?