
Today we have a special guest artist on the blog to share a lovely hand lettering tutorial with you. Gemma Hobson is from the UK, and she has been a member of my Facebook group for over 2 years. I noticed this project shared in our group last month, and I’m so grateful she agreed to show us all how to create it!
 Hello! I’m Gemma (@lettersflowersandtea)! I’m an eLearning developer and training manager from a small village in Suffolk, England. Many of my childhood memories involve being creative – drawing, colouring or painting along with my mum, who is an amazing watercolour artist. I rediscovered my love of art when I came across the group ‘Kelly Creates Art & Calligraphy’ in August 2017 and have been inspired ever since! I enjoy creating cards for my family and friends and most of my work includes flowers or lettering (or more than likely both!) and this is what I am going to share with you today… Here is my step by step tutorial on creating a ‘Floral Letter Birthday Card.’
Kelly Creates Supplies: Black Fineliners, Grid Practice Paper pad, Deluxe Lettering Kit, Project Pad (optional)
Other Supplies: Pre-Folded blank white card with envelope, Light Box (optional)

- Choose the card that you’ll be making your design on. I have used a pre-folded plain white card, but you could also cut your preferred size from white card stock, such as the Kelly Creates silky smooth Project Pad. On Kelly Creates Grid Paper draw out your letter. Measuring it first will ensure that it fits nicely on your card. You want to aim for neat edges too, so your design is clear when the outline is erased at the end. You can draw curved letters too and I’ll show you an example at the end of this tutorial.
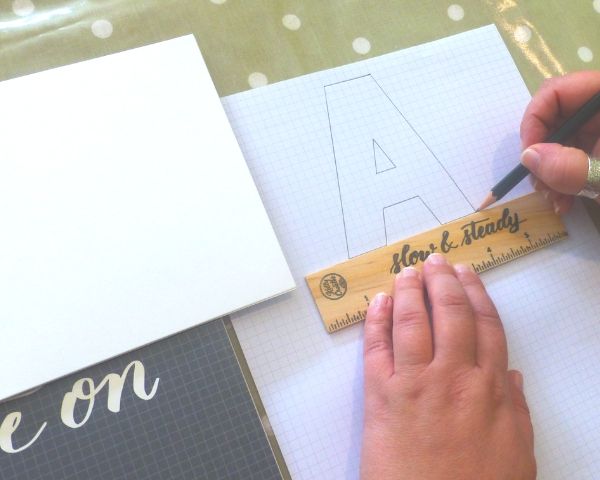
- Go over the letter outline with Kelly Creates Black Fineliner 10. This will make a good dark line so it is easier to copy.

- Trace the letter onto your card, remember to leave a space at the bottom for your message. You should only use very light pressure as you will be erasing the pencil lines completely when you have finished. I have used a light box but you could alternatively use transfer paper or you can draw the letter directly onto your card.

- Now the fun bit… time to fill your letter template with a beautiful floral design. Here’s some steps for creating some of the flowers I have used but feel free to add your own!
 5. I have used Kelly Creates Black Fineliner 03 for the main outline of the flowers and Fineliner 01 for the detail. Start by randomly drawing the florals inside your letter. Draw some flowers from the edge where you can only see part of the flower as well as some full flowers in the middle of a big space. Try overlapping some of the flowers too but ensure you leave a few spaces in between for adding the leaves.
TIP: draw light circles as placeholders for your flowers if you’d rather plan it out first.
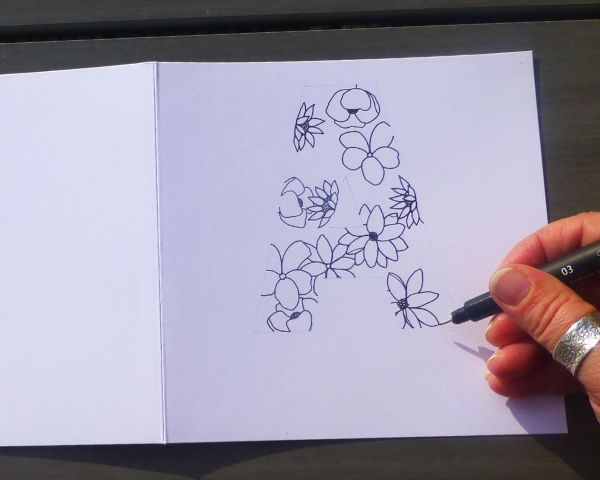
- Take your Kelly Creates Fineliner pen right up to the edge when drawing (see photo). This will help keep the formation of the letter shape.

- You are now going to fill the gaps with leaves; again I used the Kelly Creates Fineliner 03 for this step. Include a variety of leaves and draw them pointing in different directions.

- You can add some smaller leaves to fill any gaps.

- Next write Happy Birthday (or alternative sentiment e.g. Good Luck/Congratulations) at the centre bottom of the card. I used a thicker fineliner for this, Kelly Creates Black Fineliner 08. This can be in any style you wish.
TIP lightly draw pencil guidelines for your words or trace them using a light box.

- Once all the ink is dry, carefully erase all the pencil lines. The eraser from the Kelly Creates Deluxe Lettering Kit is perfect for this as you can be really precise.

- Your card is now complete ~ just add your message inside and give to the lucky recipient!
I really hope you’ll enjoy making a Floral Letter Card. You could really play around with this idea using different letters, colours and backgrounds. I can’t wait to see what you create! Share with us in our Facebook group or on Instagram and tag #kellycreates and me @lettersflowersandtea.
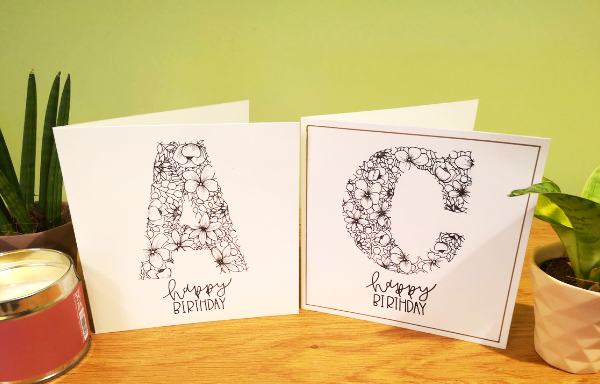
Aren’t these the prettiest letters? Thank you Gemma for sharing this beautiful project with us. I can see using this inspiration in so many ways….as a monthly cover page in my bullet journal and planner, as a title on a scrapbook page, and as a gift of framed home decor monogram.
Follow Gemma on Instagram for more creative lettering! @lettersflowersandtea
Shop the supplies Gemma used by clicking on the affiliate links below:


PIN ME!

Rosann DuChette
September 8, 2019 at 10:41 am (5 years ago)Love this! Will try when I return home next week
Neeta
September 8, 2019 at 7:01 pm (5 years ago)Beautiful style monogram… thank u for teaching how to make these..
Michelle
September 9, 2019 at 2:55 am (5 years ago)Thank you for this amazing tutorial! I’m looking forward to giving it a try.
Linda Epstein
September 11, 2019 at 4:02 pm (5 years ago)Nice tutorial, Gemma. Thanks so much for sharing it with us.