
So many people love the ‘bouncy’ style of modern calligraphy. Stephanie (@simplystephlettering) has a quick photo tutorial to help you learn her cute bounce lettering style with brush pens for a card or other project!

Happy February! Even though it is below freezing temperatures outside, I am feeling warmth and love in my heart because it is almost Valentine’s Day. I absolutely LOVE Valentine’s Day! I love celebrating the people I love, from my husband and family to my amazing students. What better way to show someone how much you love and care about them than with a handmade card? One of the many wonderful things that hand lettering has given me is the ability to make all of my own cards. I love being able to choose quotes and sayings that fit the occasion and use my own bounce lettering to create something beautiful.
Bounce lettering is exactly what the name implies: lettering that bounces! Bounce lettering is a way to be creative with your calligraphy by having some of your letters move above and below your guidelines. In many tutorials, you will see lots of technical terms like “ascender line” and “descender line” and “x-height”, but I am going to simplify it for you. In this tutorial, I am going to give you some simple tips and teach you in a few easy steps how to bounce your letters for all of those awesome Valentine’s Day cards you will be making this month! 
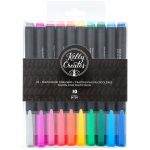
Kelly Creates Supplies: Lined Practice Pad, Multicolor 1.0 Bullet Tip Pens, Black Brush Pen Set, Multicolor Small Brush Pens, Dream Pens, Moonlight Markers, Project Pad
Other Supplies: Pink card stock, adhesive, paper trimmer
There are only two lines I want you to worry about in this tutorial, and those are your top waistline and your bottom baseline. I consider these two lines to be the most important lines when learning to do bounce lettering because you will essentially be ignoring these lines for the letters you decide to “bounce” (seems odd that they are important, but you ignore them…just trust me!). That’s why I love the Kelly Creates Lined Practice Pad…it is perfect for learning to bounce letters. First, highlight your top waistline and bottom baseline on your Lined Practice Pad page. I used the Kelly Creates Multicolor 1.0 Bullet Tip Pens in the color Palm for my top line and Wildflower for my bottom line.

Next, staying within those lines, letter your practice word. Make sure to keep all of your letters within these two lines. Remember, thick down strokes, thin up strokes! I call this “linear lettering” since all of the letters are in line with one another. This lettered word will be important to compare to your bounce lettering at the end of the tutorial. I chose to letter the word “valentines” as my practice word and I’m using the Kelly Creates Medium Black Brush pen from the 3-pack (or Deluxe Lettering Kit).

Next, I am going to jump down a few lines and highlight a second waistline and a second bottom baseline. Again, I used my Multicolor Bullet Tip Pens in Palm and Wildflower to highlight the top and bottom baselines, so you can clearly see when I ignore these lines for the bounced letters. For the first letter, “v”, keep the first downstroke within the lines, then bounce the next upstroke above the top line. For the next letter, “a”, keep the first stroke within the lines, then bounce the next downstroke below the baseline.
You’ll notice I bounced above my top line for the first letter, then below the bottom line for my next letter – you can make your bounces random or consistent but overall, the word should look balanced. Try to have a mix of both up and down bounces to make your lettering more dynamic!

For the next two letters, “l” and “e”, keep them in line with the bottom baseline. I keep the main structure of my letters relatively consistent. Consistency comes with practice, so make sure to letter every day!

Now, for “n”, keep the first downstroke within the baselines, bounce the next upstroke slightly above the top waistline, then bounce the following downstroke below the baseline.
For “t”, begin the top of the downstroke a little higher than the previously highest letter, “l”, and end the bottom of the downstroke slightly above the baseline.
For “i”, keep the letter in line with the baseline. 
For the next letter “n”, similar to the first “n”, keep the first downstroke within the lines, bounce the next upstroke slightly above the top waistline, then bounce the following downstroke below the baseline.
For “e”, keep the letter in line with the baseline, and finally for “s”, bounce the top of the letter above the waistline, then dip the downstroke below the bottom baseline. 
There you have it! Bounce lettering! Compare the two words (the linear lettering and the bounce lettering). You can clearly see the movement and bounce in the second word. Don’t quite like the look of your bouncy letters? The best part about using the Lined Practice Pad is that great word, “practice.” Write the word again. Practice makes progress!
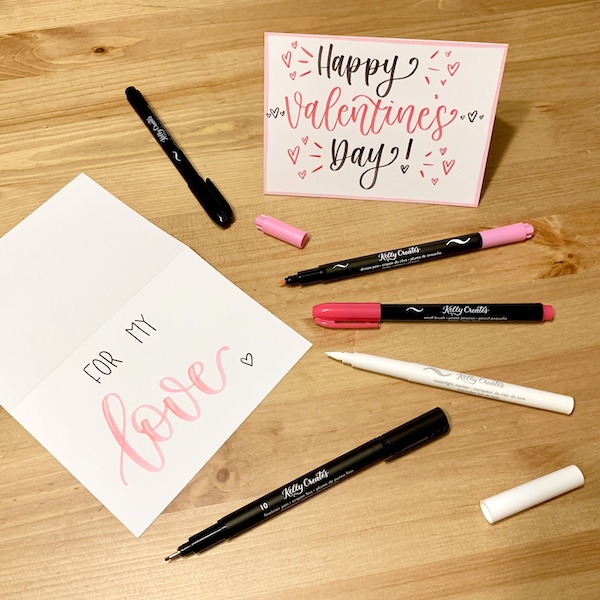
Now you can create some beautiful Valentine’s Day cards with your bounce lettering! I made these two cards using paper from the Kelly Creates Project Paper Pad, plus the Kelly Creates Dream Pen in Petal from Set 2 “Meadow”, Small Multicolor Brush Pens in Berry and Black, Black Fineliner Pen in size 1.0, and the Moonlight Marker. Happy Bounce Lettering…. And Happy Valentine’s Day!
Stephanie has broken down the technique of Bounce Lettering into easy to follow steps…thanks so much Steph!
For more lettering inspiration from Stephanie, you can follow her Instagram @simplystephlettering and Facebook page.
To shop for supplies used in this tutorial, click on the affiliate shopping links below:


Linda Epstein
February 12, 2019 at 12:16 pm (5 years ago)Nice lettering and tutorial. Thanks for sharing.
Maureen Vickery
February 12, 2019 at 1:05 pm (5 years ago)What a great explanation of bounce lettering!
GabriellaB
February 19, 2019 at 3:53 am (5 years ago)TY for e planning what bounce lettering is , I was wondering what the difference was. Love seeing you use those new colors.
Megjs
July 2, 2021 at 9:35 am (3 years ago)Its amazing n way u explsjn
Kelly
July 21, 2021 at 8:25 am (3 years ago)Thank you!