
Love is in the air…and you can make this cute DIY Valentine’s Day banner by following Erica’s instructions!

Kelly Creates Supplies: Dream Pens, Aqua Brushes, Metallic Jewel Brush Pens, Fineliners, white card stock from the Project Pad, Galaxy Specialty Paper Pad, Deluxe Lettering Kit (ruler, pencil)
Other Supplies: baker’s twine, hole punch, scissors
If you have read most of my tutorials to this point, you’ve likely figured out that I like to craft. And I like to find ways to marry crafting and lettering. It’s the best of both worlds for me! Since we are coming up on February, I wanted to create a little something for Valentine’s Day.
We aren’t huge Valentine’s Day gift givers at our house, but I love to decorate for it. I’m a fan of how fresh pinks and reds break up the dreary winter colors. When I was deciding on a tutorial this month, I realized I have a perfect spot for a Valentine’s Day banner. So that’s what we are going to make today!
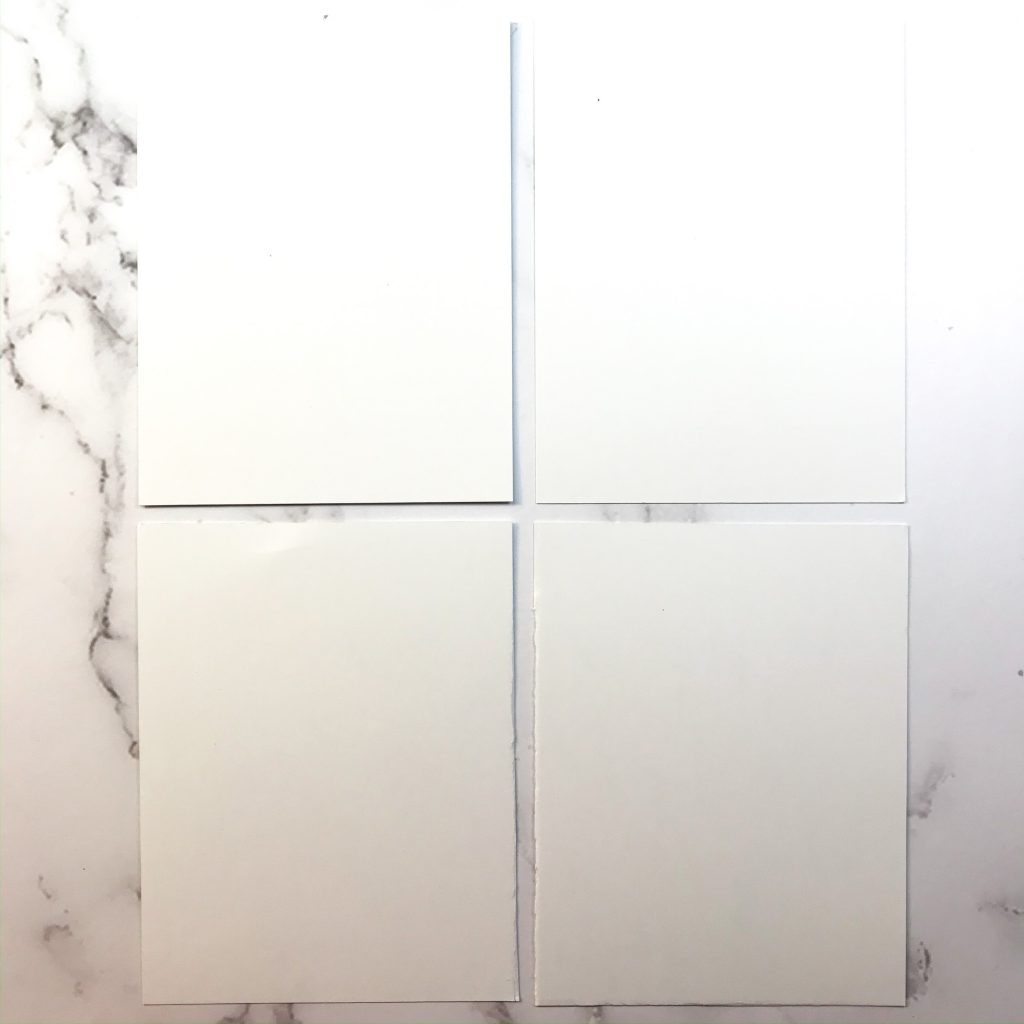
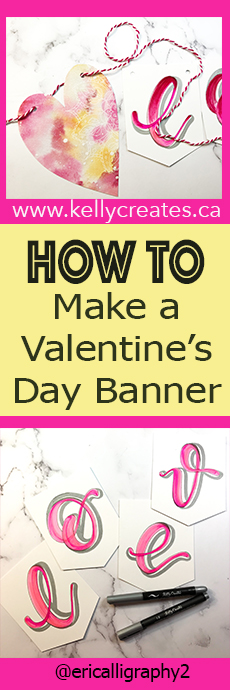
Begin by cutting a sheet of the Kelly Creates silky smooth white cardstock from the Kelly Creates Project Pad into 4 pieces, each measuring 4.25” x 5.5”.
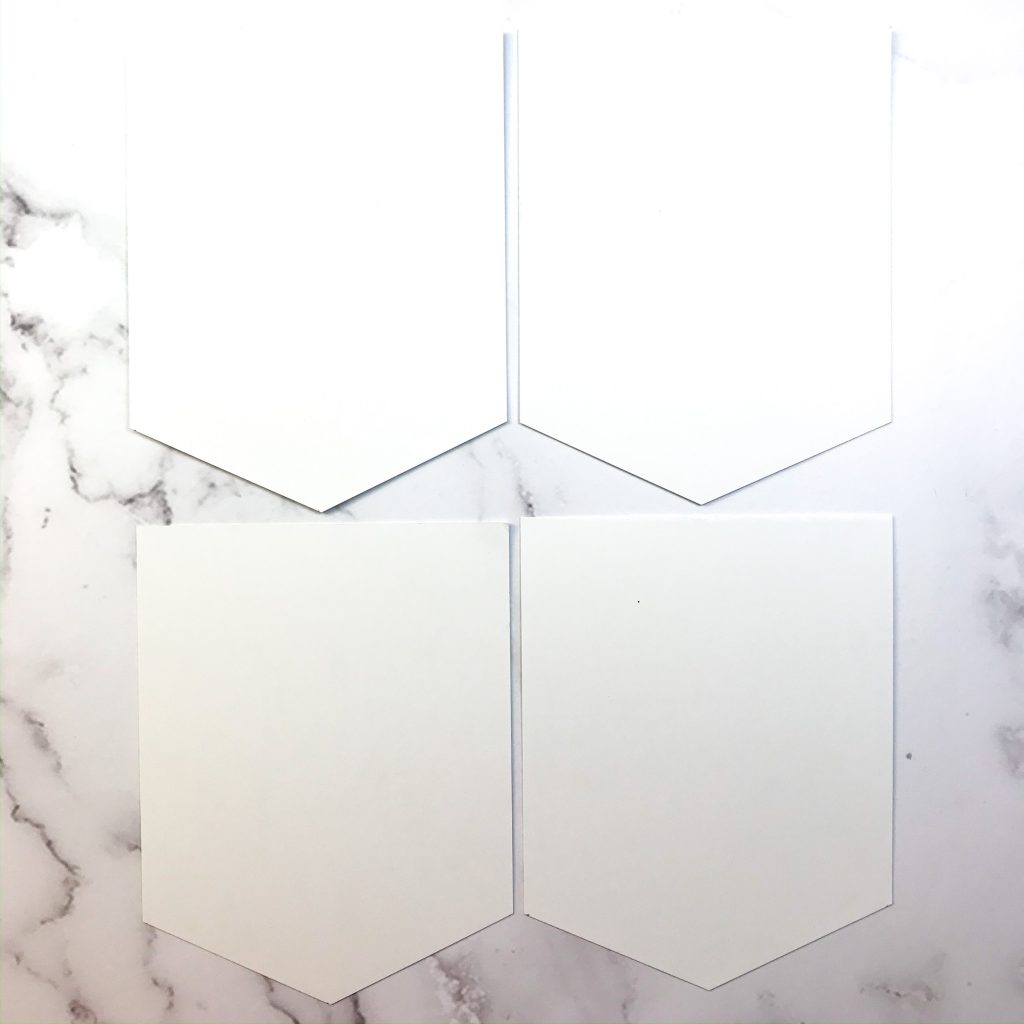
Now cut each piece of cardstock so that they come to a point at the bottom when they hang.
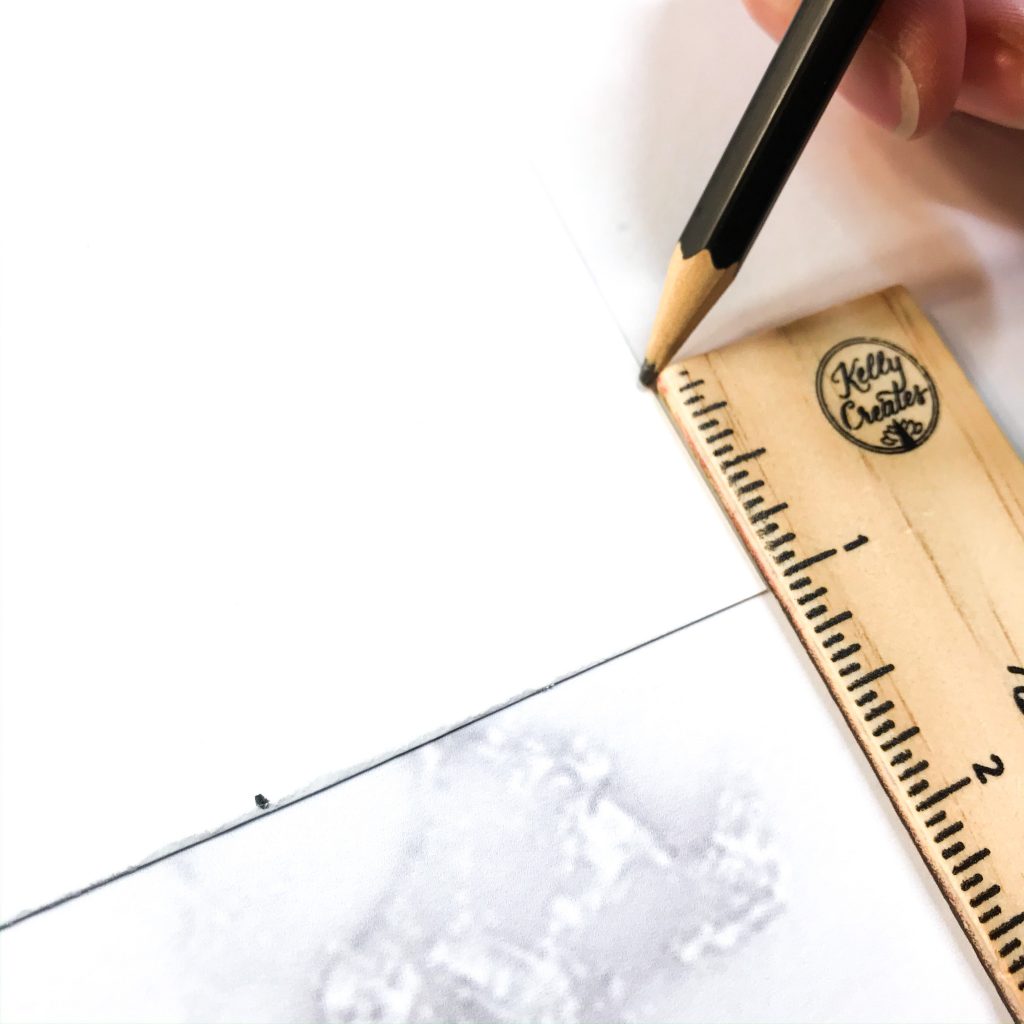
Place a small mark in the middle of the bottom edge and 1” up from the bottom on each side. Then cut from each 1” mark to the center mark on the bottom edge.
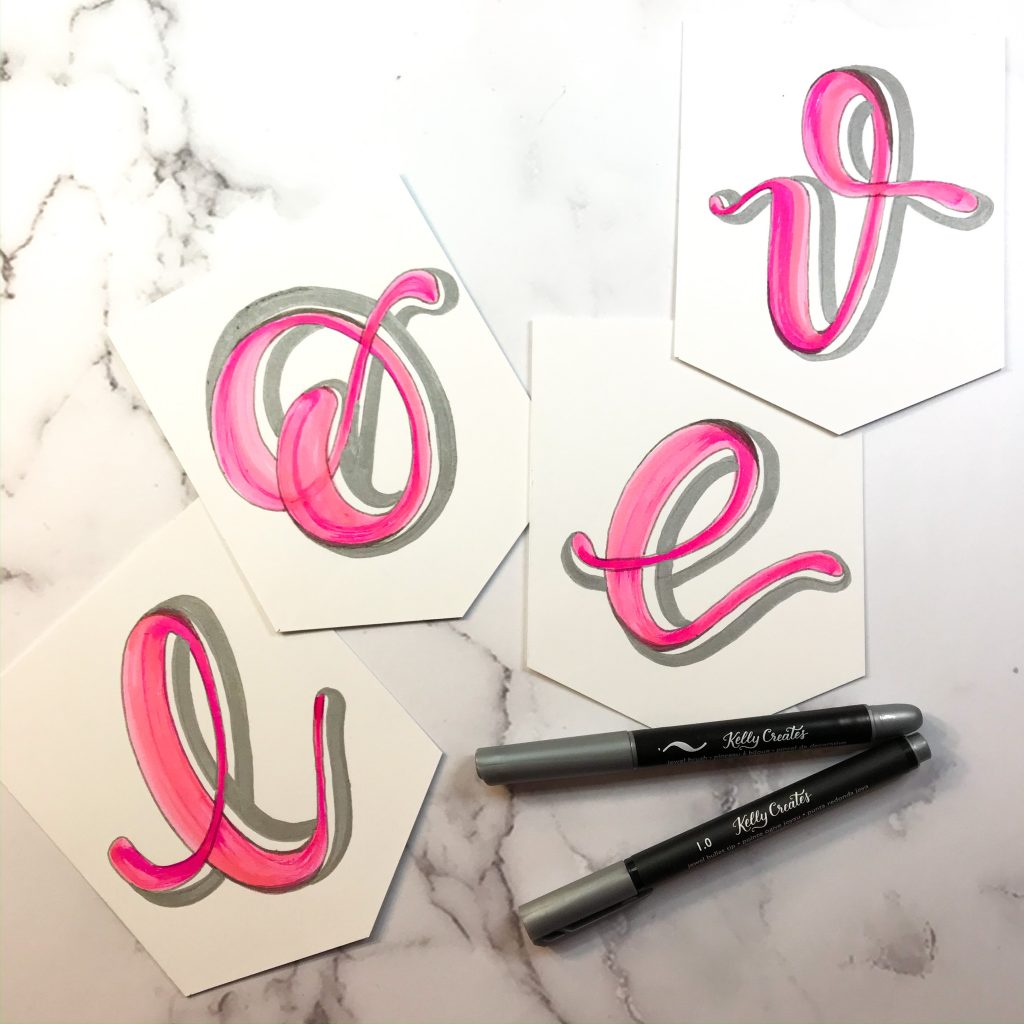
Now it is time to letter L, O, V and E on the banner pieces. There should be one letter per piece.
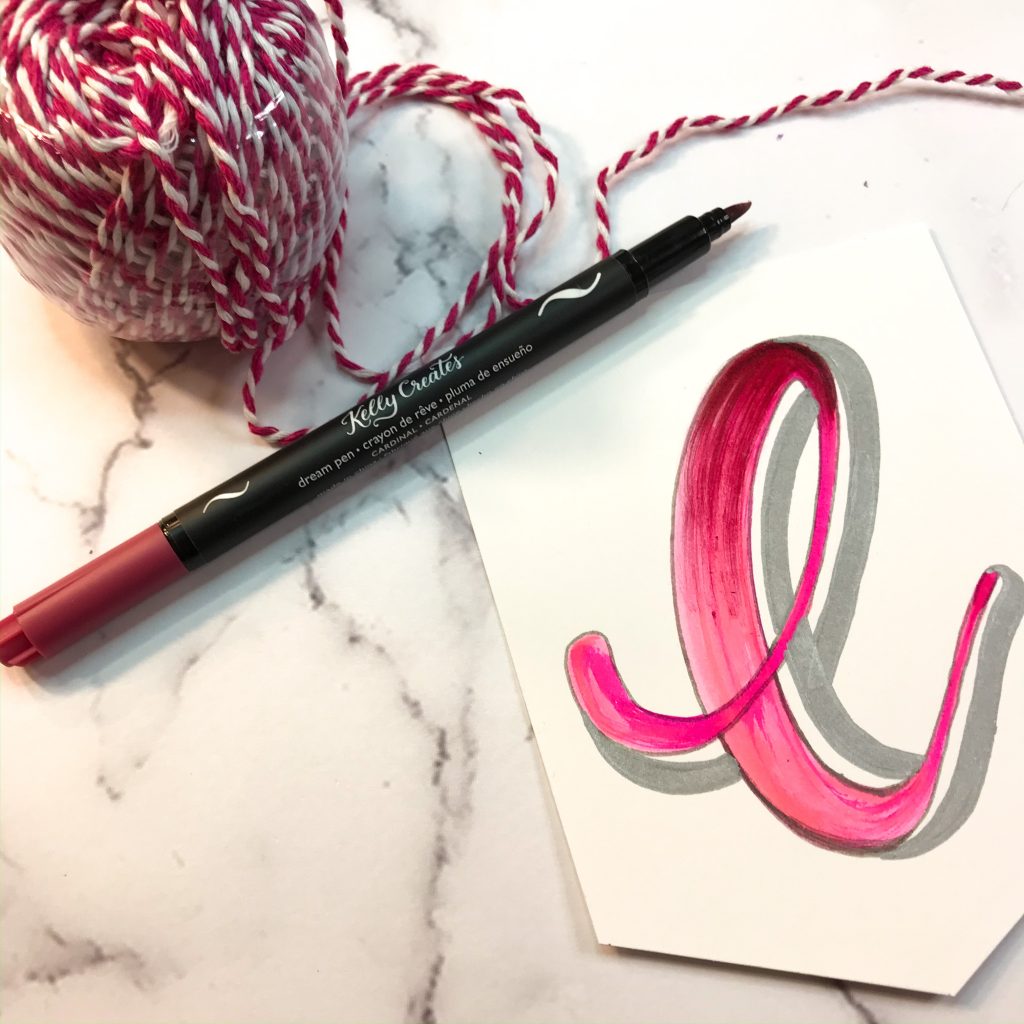
Take a moment to think about all the options you have at this point! You can use all capital letters. You can use all lowercase letters. You can mix styles. I chose to use all lowercase letters using a standard brush lettering style for this tutorial. It’s my favorite way to write love.
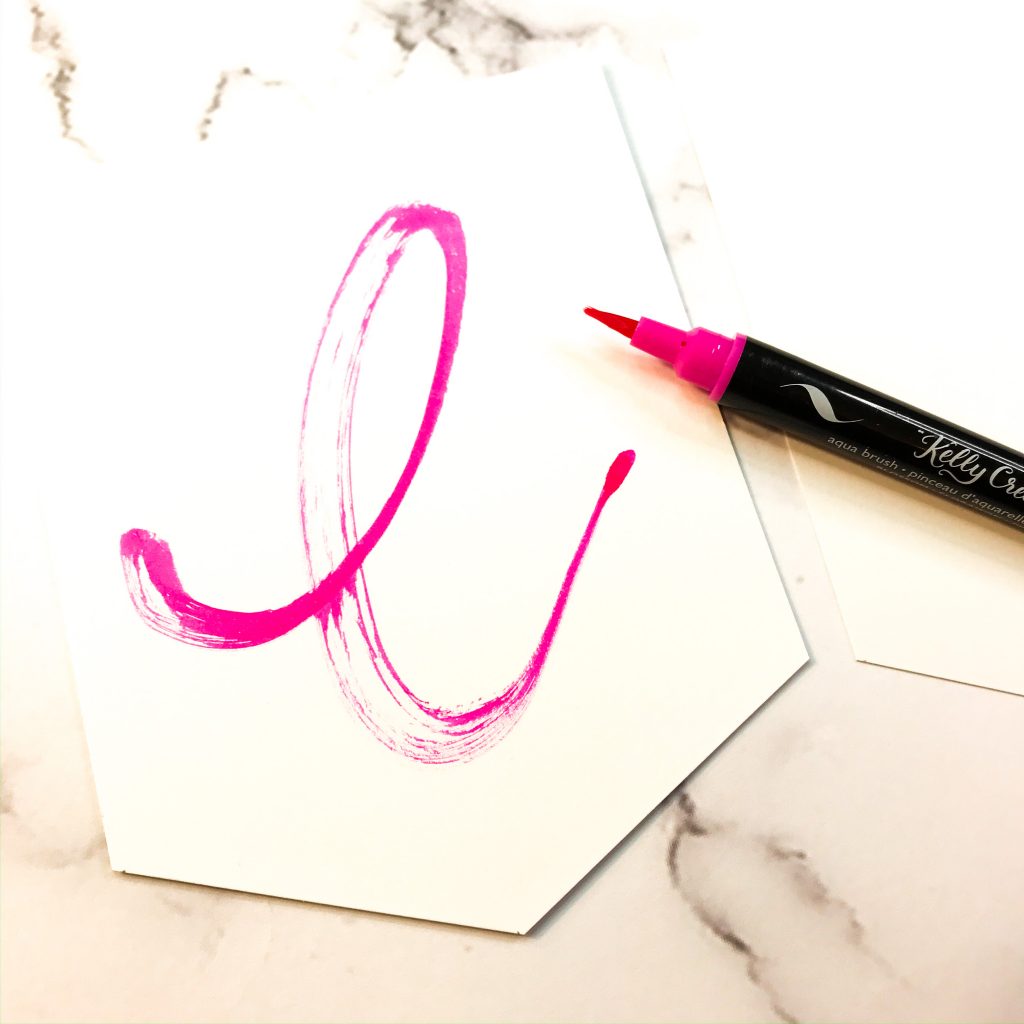
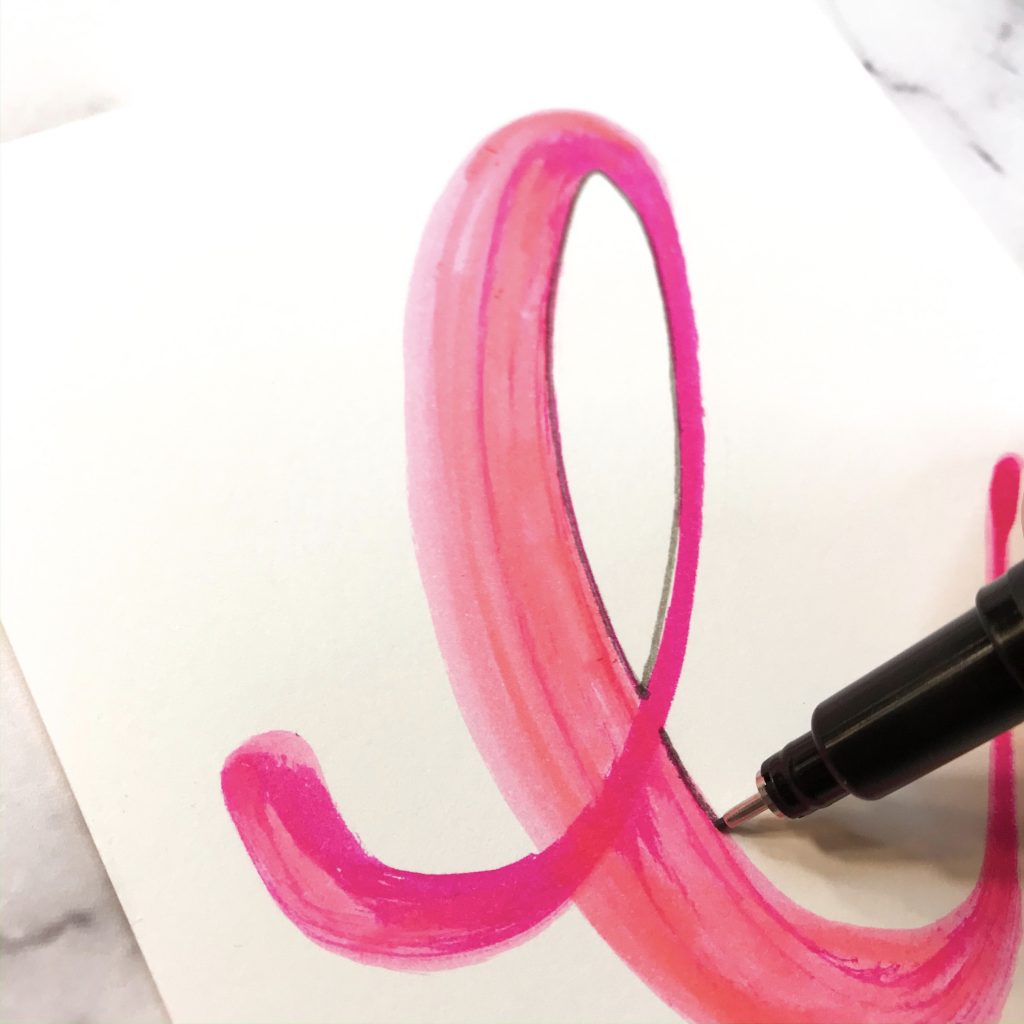
Use the Kelly Creates Aqua Brush in Blossom. Remember that the slower your strokes are when using the Kelly Creates Aqua Brushes, the more color will transfer to the paper. In this case, use quick strokes so that the Kelly Creates Aqua Brush creates streaks of color, not solid strokes.

Use the Kelly Creates Dream Pen in Petal to “fill in” the streaks of your letters. Different tones of pink will create a more dynamic colouring effect.
Outline all edges of your letters using a Kelly Creates Black Fineliner.
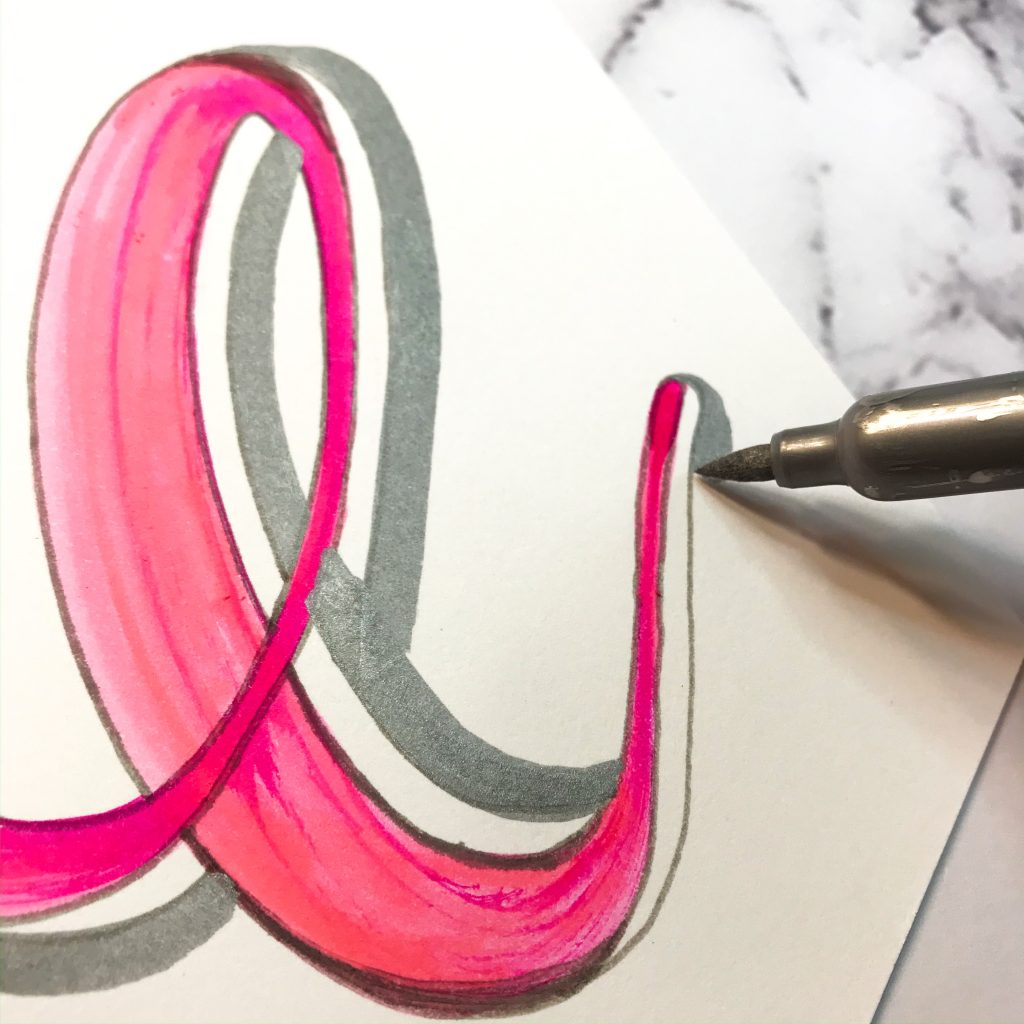
Then use the Kelly Creates Black Fineliner to create your guide for a drop shadow. The guide line should be a small distance from the edge of the letter, on the left side of each line. Use your Kelly Creates Jewel Brush Pen in Silver to create your drop shadow, tracing along the guide line. (You can skip the guide line step and go straight to the drop shadow if you prefer.)
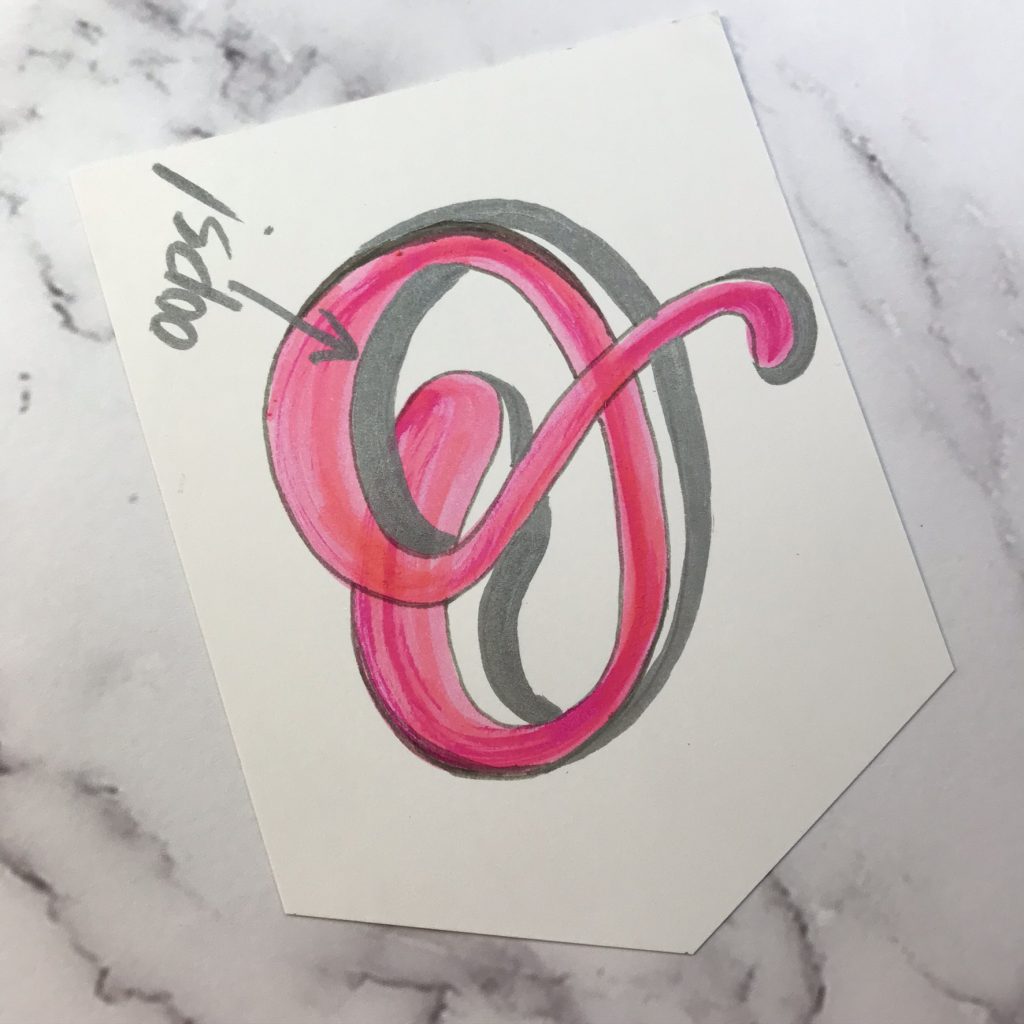
OOPS! I put the drop shadow in the wrong place. Good news! Since each letter is on a different card, I can discard the mistake, start over on the O card and continue as if nothing ever happened.
At this point, I laid the baker’s twine next to the lettered cards. I decided that using Kelly Creates Dream Pen in Cardinal would create a nice complement to the dark pink in the twine. I started at the peak of each letter and brushed color downward lightly.
TIP: I have a stash of well-loved pens that I don’t throw away because as they start running out of ink or becoming frayed, they are perfect for colouring, watercolor or creating a dry brush effect . That’s why I used an older pen for this.
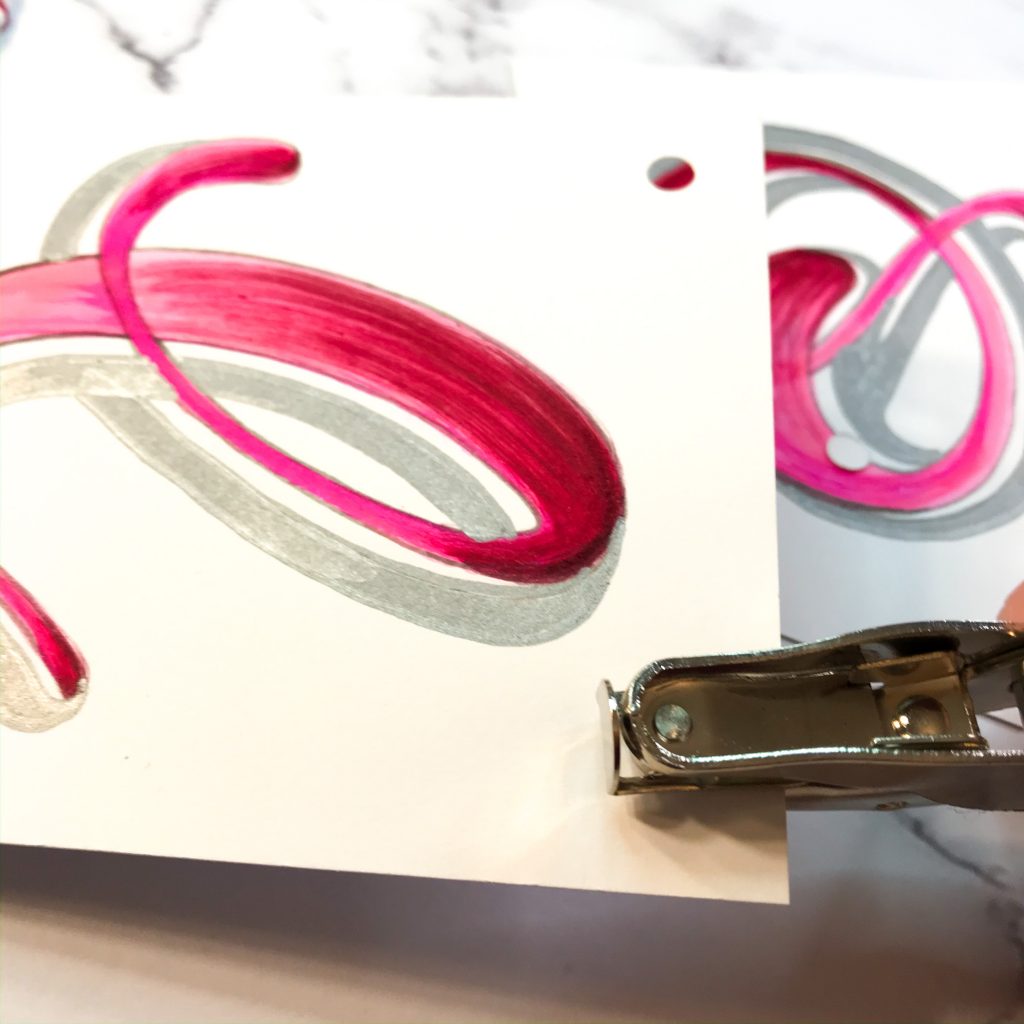
Use a hole punch to make holes in the top 2 corners of each banner piece.

Add some hearts to either end. Use 2 sheets from the Kelly Creates Galaxy Specialty Paper pad. You can either trace a heart template or free hand the cutting like I did if you want a more non-symmetrical heart. Use the hole punch to add holes to the top curves of each heart.
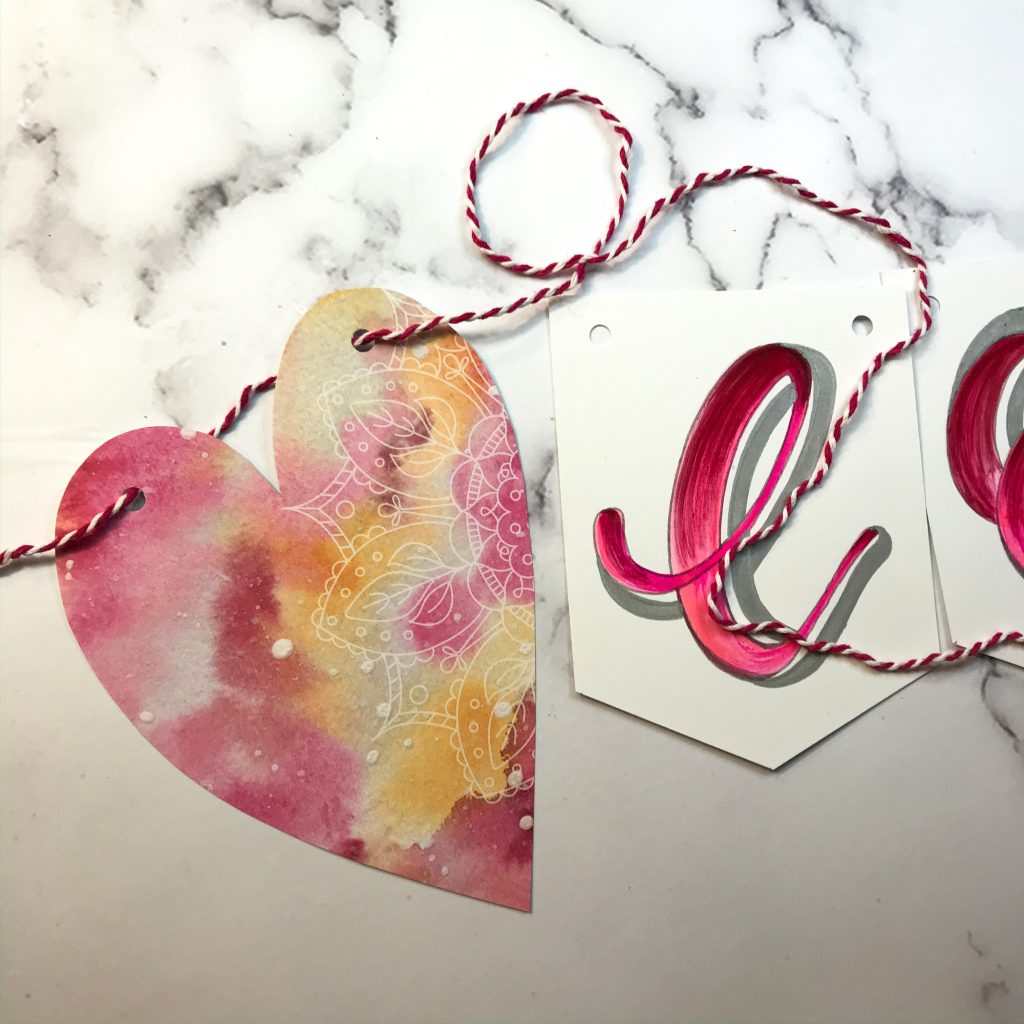
Thread the baker’s twine through the holes and make sure you have plenty of twine at the end to tie it in your desired location. Once the banner is hung, you can adjust spacing for the cards and hearts.
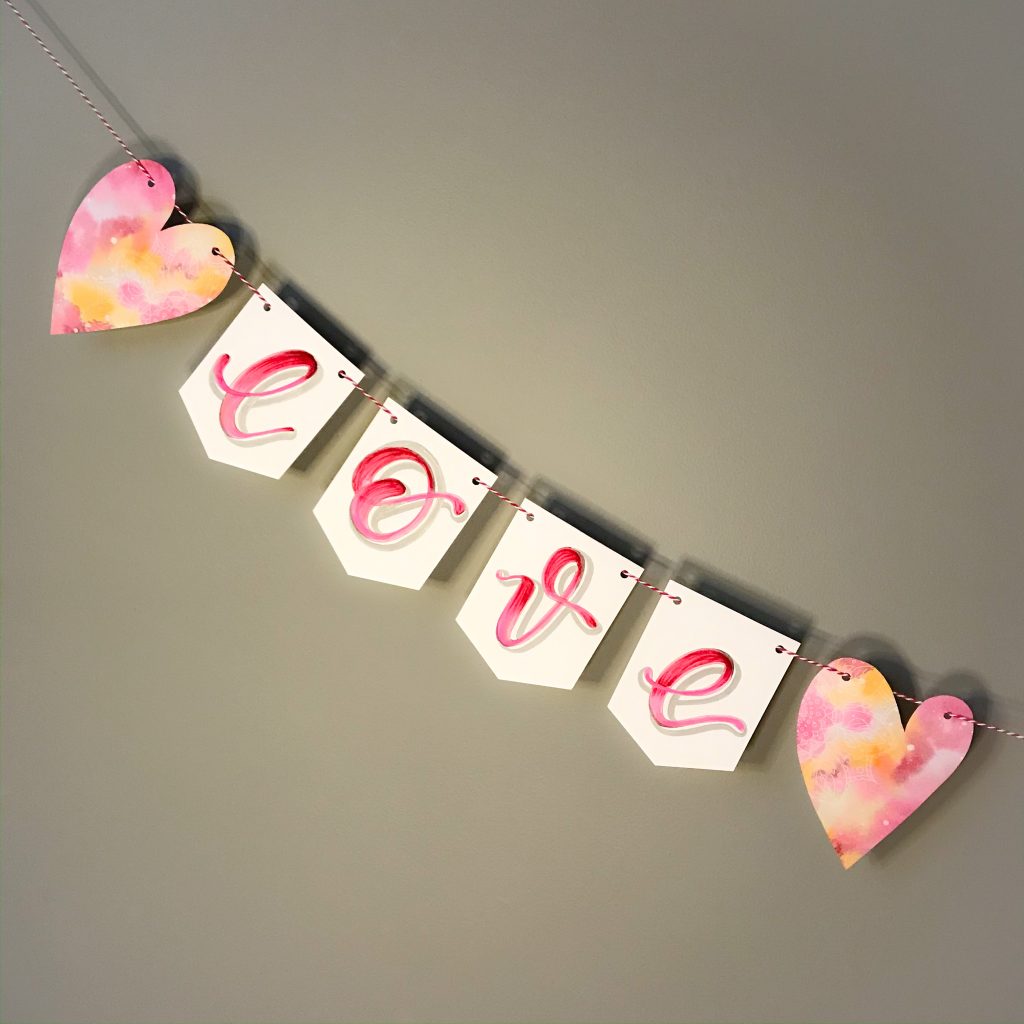
This tutorial could be used to create banners for so many different occasions. I hope you are inspired to create one for your home or next event!
************************************
For more crafty lettering inspiration, follow Erica on Instagram @ericalligraphy2
Shop the supplies Erica used by clicking the affiliate links below or visiting my online store http://www.KellyCreatesStore.com


PIN ME!
Linda Epstein
January 30, 2020 at 7:20 pm (6 years ago)A very cute idea. Thanks, Erica.