
Gemma (@lettersflowersandtea), our guest artist from England, is back with a fabulous tutorial on how to make your own hand lettered gift bag. I’m especially excited about those feathers on her bag, created with the Kelly Creates Moonlight Markers.

Kelly Creates Supplies: Grid paper pad, Deluxe Lettering kit (ruler, pencil, eraser, Dream Pen Midnight), Black Fineliners (1.0), Moonlight markers, Metallic Jewel Bullet tip pen ( in Silver), Project Paper Pad
Other materials: Plain brown paper gift bag, Transfer paper (optional), Scissors or craft knife, twine, thread or wool, bell

It’s that time of year again…Christmas is coming! I do love it – family, friends, relaxing, having fun…you can’t beat it. In this tutorial, I am going to show you how you can bring a little homemade charm to a plain Christmas gift bag by lettering a famous quote from the classic film ‘It’s a Wonderful Life’. There are quite a lot of steps to this tutorial, but I hope you’ll find that it will inspire you to try some of the techniques!
You can buy packs of plain paper gift bags quite cheaply. I have chosen a brown paper bag as I like the natural colours but you can of course go for white or coloured, whatever you fancy. First of all measure the space where your quote will go, leaving a gap around the edges of about an inch or so. I have left more at the top as we’ll be adding a tag later, and it will likely hang over this area.
 On Kelly Creates grid paper, draw out a rectangle the same measurements as you have just taken. This will give you the area in which you can place your lettering.
 Since practising lettering, I have discovered that designing quote layouts is not so easy! There are many do’s and don’ts to effective quote layout, and whilst I am no expert, I will be sharing a few basic techniques that I have found useful with you in this tutorial. We will be using two different types of lettering: a serif ‘typewriter’ style, and a brush lettered style with a mixture of lower and upper case letters.
 On your grid paper draw guideline boxes and shapes for each of the words. I have picked the important words I want to stand out by making them bigger and bolder and the link words e.g ‘a, an, gets’, a complementary smaller hand lettered style.
 Lightly letter in all the words with pencil, erasing and changing the placement until you are happy with it. Notice how the Y and T are connected? To allow for this you should aim to start the y higher up and join the desender loop to the top of the T. TIP: Remember to leave sufficient space between the letters at this stage because when you use the brush pen, the lines will become thicker.
 Happy with how it is looking? Now we are going to go over the larger letters with Kelly Creates Dream Pen in Midnight. Although we are mixing up lower and uppercase, the fundamental rules of thicker downstrokes and thinner upstrokes are still applied.
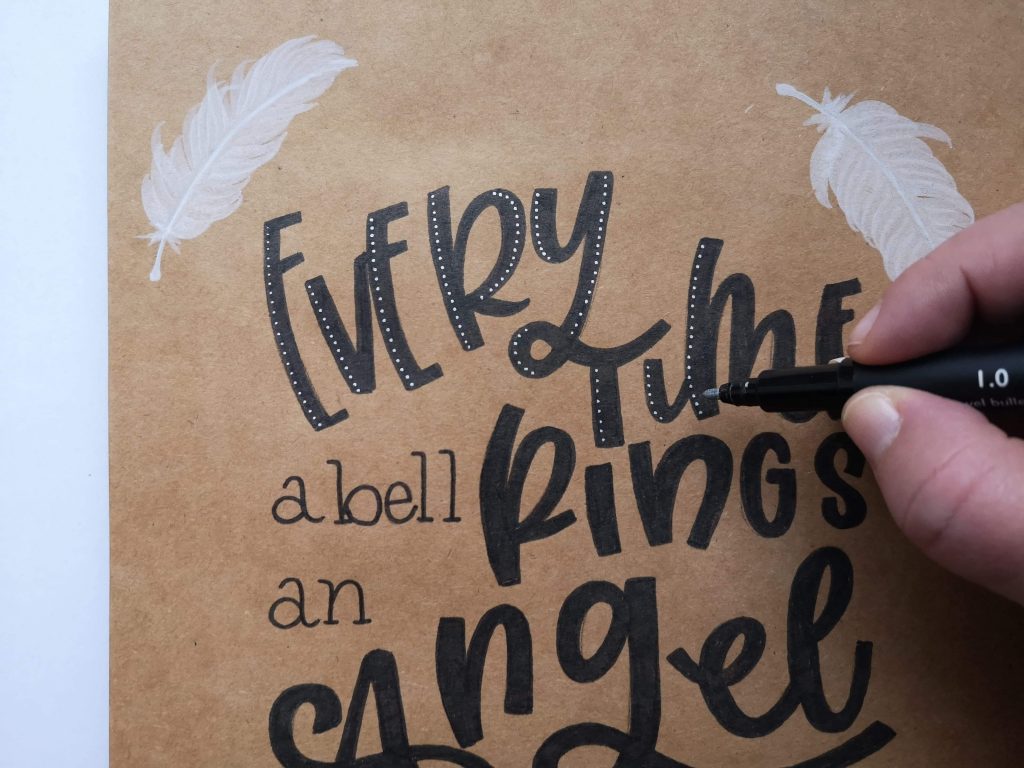
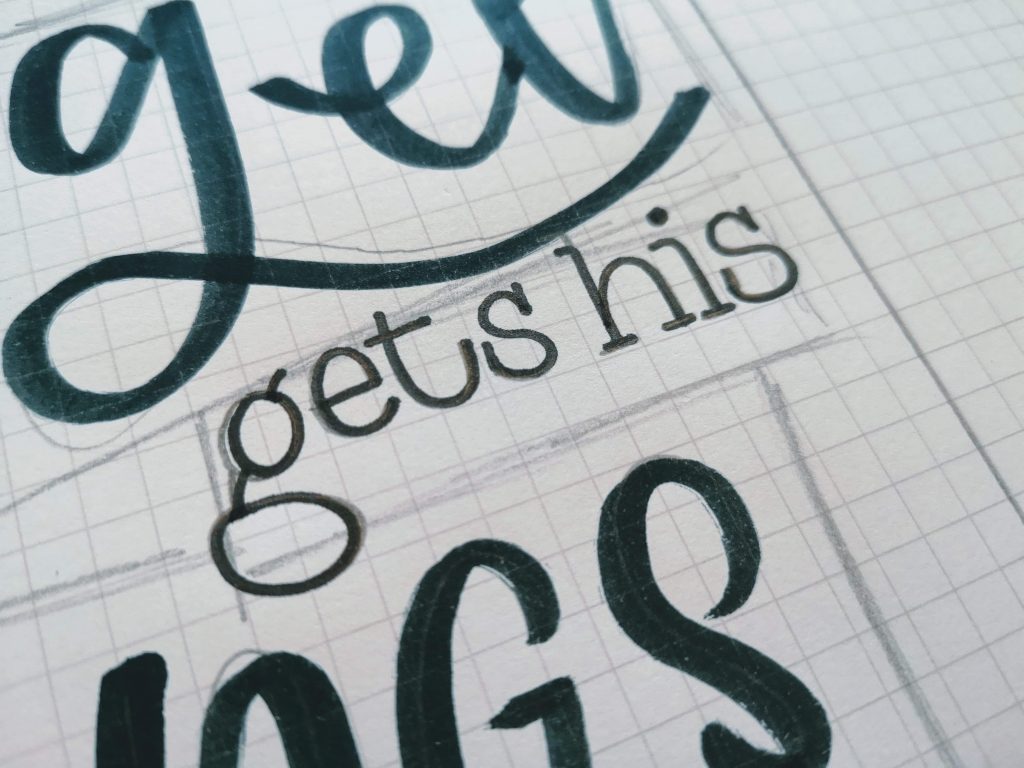 Next go over the serif letters with Kelly Creates Fineliner in size no. 1.0. When writing the typewriter style, notice how the letters are quite wide and there’s an added stroke at the top and bottom of the lines.
 Now you have your template which you can refer to again and again.
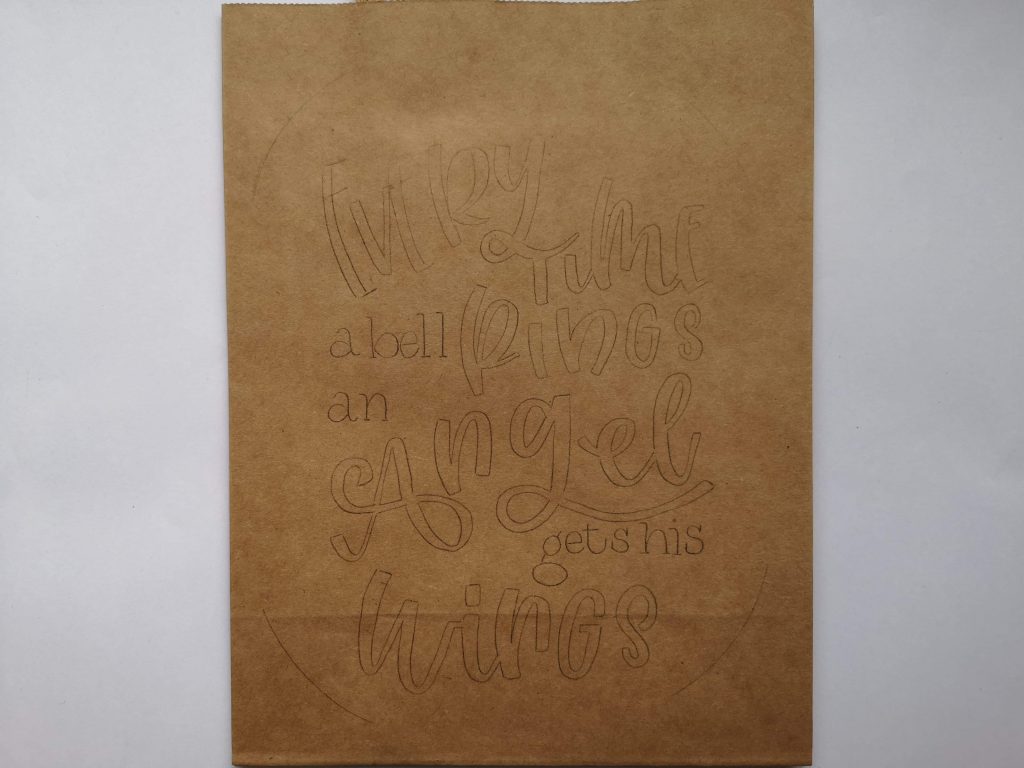
Depending on the size of your bag, the quality, the finish and how confident you feel, you can letter your quote directly onto your bag, or alternatively use a light box, trace your template or use transfer paper. Because I am happy with the layout, size and finish of my design, I just want to duplicate this onto my gift bag without the worry of getting it wrong, therefore I am using carbon transfer paper– which is also a really fun technique to try!
 Press down lightly on the outlines of your letters to transfer your design onto your bag. I used a stylus, but you could also just use a pencil. If you feel a line could be thicker / thinner now’s the time to do it! You could hold in place with a paper clip if you wish. TIP: Be wary of changes in the surface of your bag, especially where it gets thicker in the folded part at the bottom. Have a sneak peek to check that it is transferring okay.
 Near the corners of your quote, draw faint pencil lines where your feathers will go.
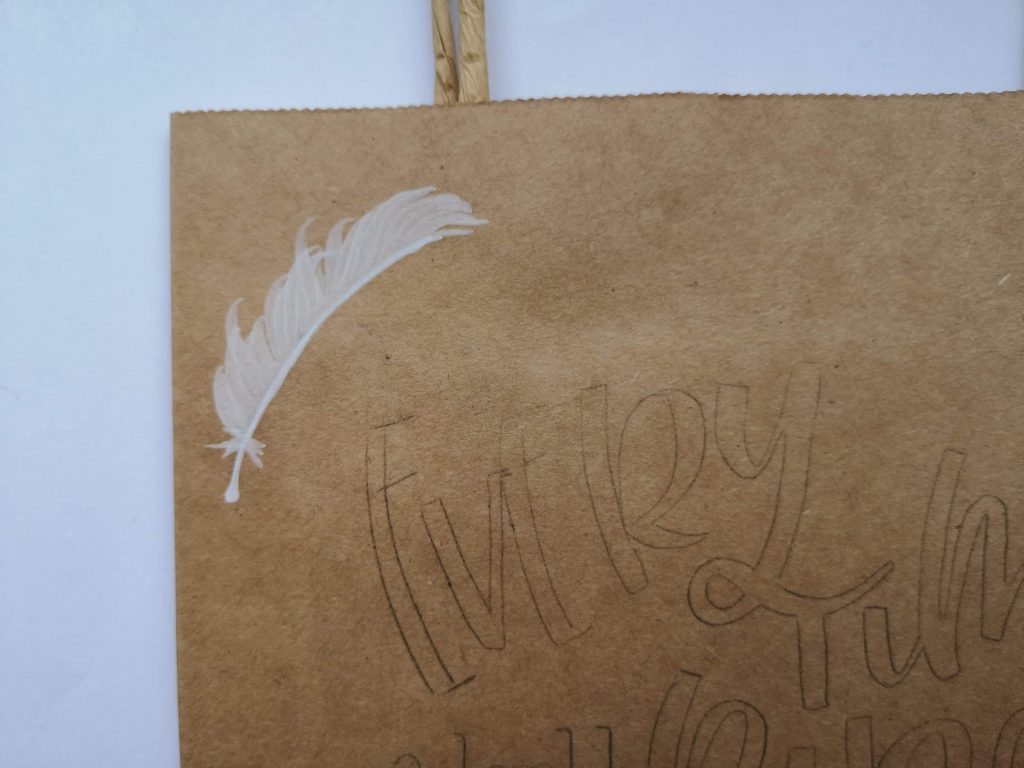
 I’m super excited about this next bit… whoever knew feathers were so easy to draw? Not me that’s for sure! They are now officially my new favourite thing to create and the Kelly Creates Moonlight Markers are just perfect for this! With your Moonlight Marker, go over the pencil line you previously made, adding a triangular shape at one end to create the quill. You may need to go over this a couple of times.
 Here’s a visual step by step tutorial for creating the rest of the feather.
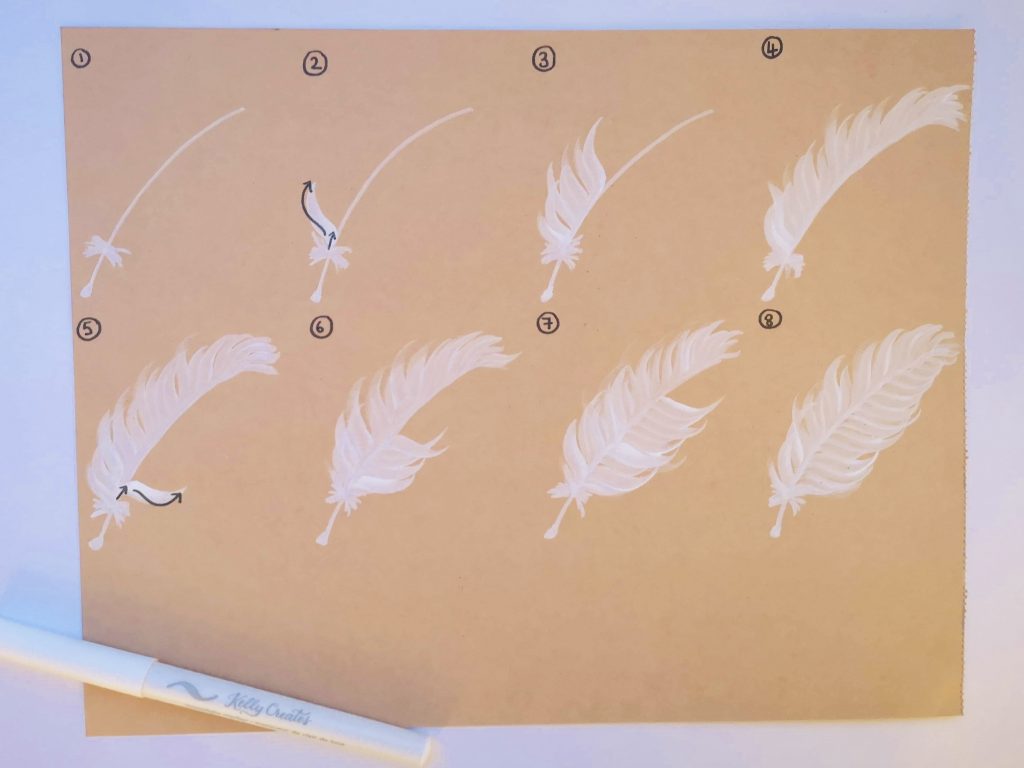 Add a few small lines of varying lengths either side of your main line, which will create the downy like barbs. For the feather vane, use the side of the Moonlight Marker brush tip like you would when lettering, make a swift move up and across like in the diagram. Repeat this as you move up the centre line. TIP: Each stroke does not need to be uniform; in fact it looks more natural if you change the size and direction slightly and curl round to the right at the top.
 Repeat this for the other side and follow the direction of the top of the feather. Doesn’t it look so pretty! TIP: practice a few times beforehand on a scrap piece of paper to find the style you like.
 Repeat this three more times to add a feather to each corner, framing the quote.
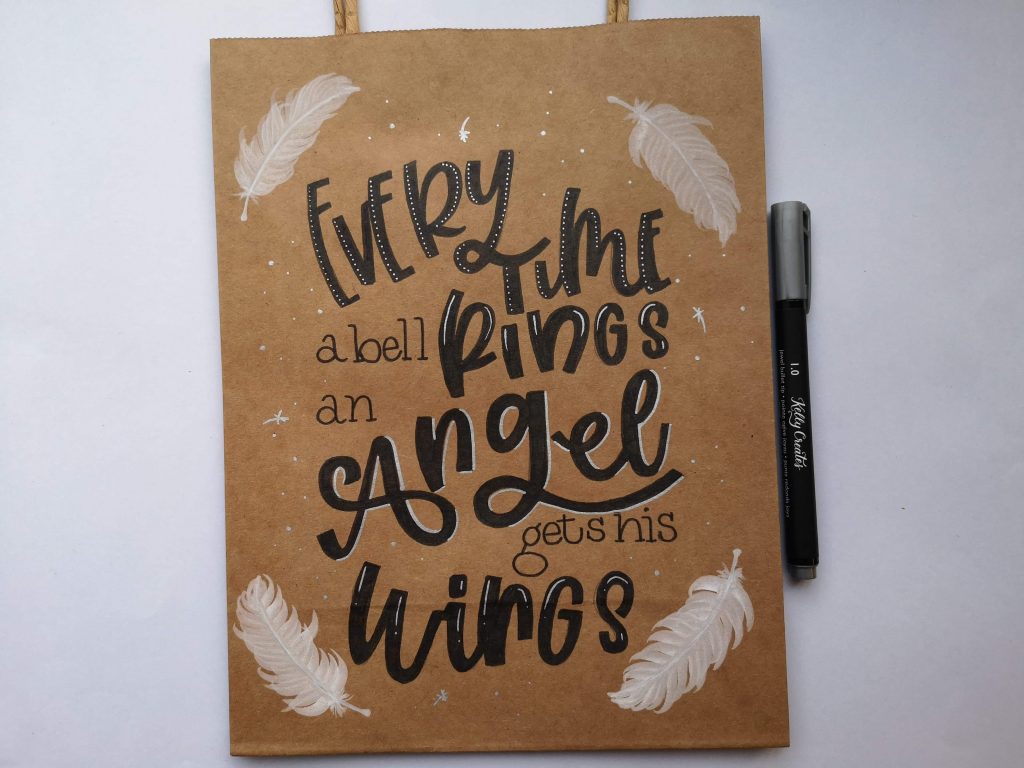
 Fill your large letters with colour and go over your smaller lettering. I have used Kelly Creates Black Fineliner no. 1.0 for both. TIP: You could use a brush script and a brush pen instead of colouring in with black.
 Now your gift bag is almost complete.
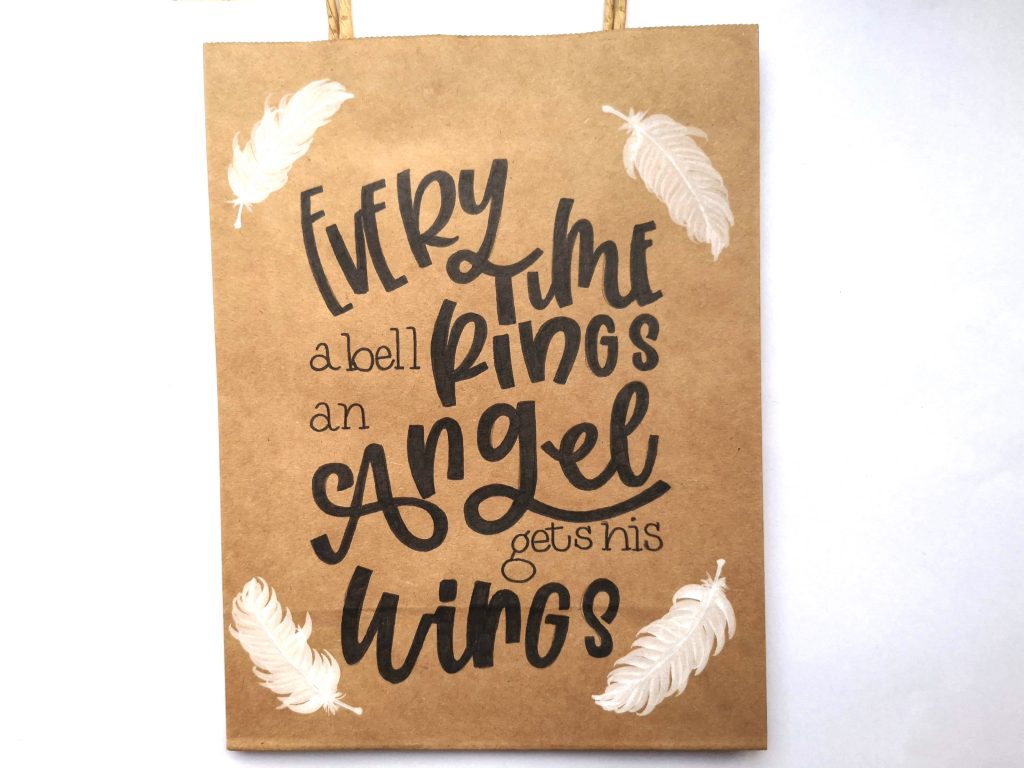
To add some Christmas sparkle I have drawn some silver highlights with Kelly Creates Metallic Jewel Silver Bullet Tip pen on the larger letters and added a silver shadow on the main word Angel.
 To finish off, I have added some simple small dots and stars around the outer areas of the bag, using the silver Kelly Creates Jewel Bullet tip pen again.
 Cut out a tag using the Kraft card stock from the Kelly Creates Project Pad and draw a feather on the same way as before. I drew the feather going in the same direction of the one on the bag so it blends in nicely. Keeping in with the theme of the quote, thread some twine through the tag, add a bell and attach to your bag. Add your greeting on the other side of the tag, and lastly add the lucky recipient’s gift!
If you would like to practice this quote with my original hand lettering design, click HERE to download a free printable template.

I hope you enjoy making this as much as I did. I’d love to see what you create, so please tag #kellycreates and me @lettersflowersandtea in any of your creations.
Thank you so much Gemma! I always knew hand made cards are a beautiful way to give a gift, and now these hand lettered bags make presents even more personal and creative.
For more inspiring lettering designs, follow Gemma on Instagram @lettersflowersandtea.
To shop the supplies Gemma used, click the links below or visit my online store KellyCreatesStore.com.


PIN ME!

Eleo
December 10, 2019 at 7:42 am (4 years ago)Que bello trabajo!!! Felicitaciones!!!!
Linda Epstein
December 10, 2019 at 6:19 pm (4 years ago)Gemma, this is a wonderful tutorial. Thank you so much.