
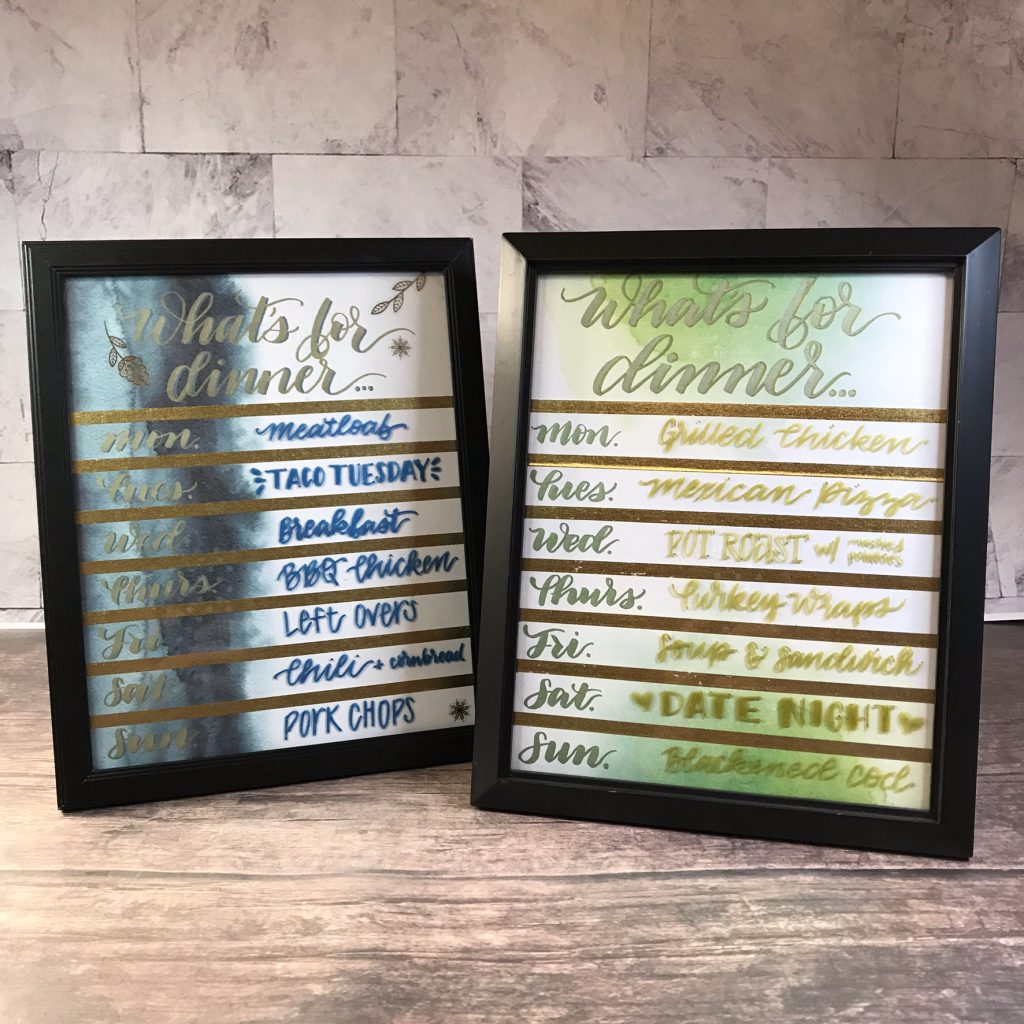
Today, Erica (@ericalligraphy2) has a brilliant way to meal plan and be creative at the same time! Get your household organized when the kids are back in school by creating this DIY ‘dry-erase’ menu board.
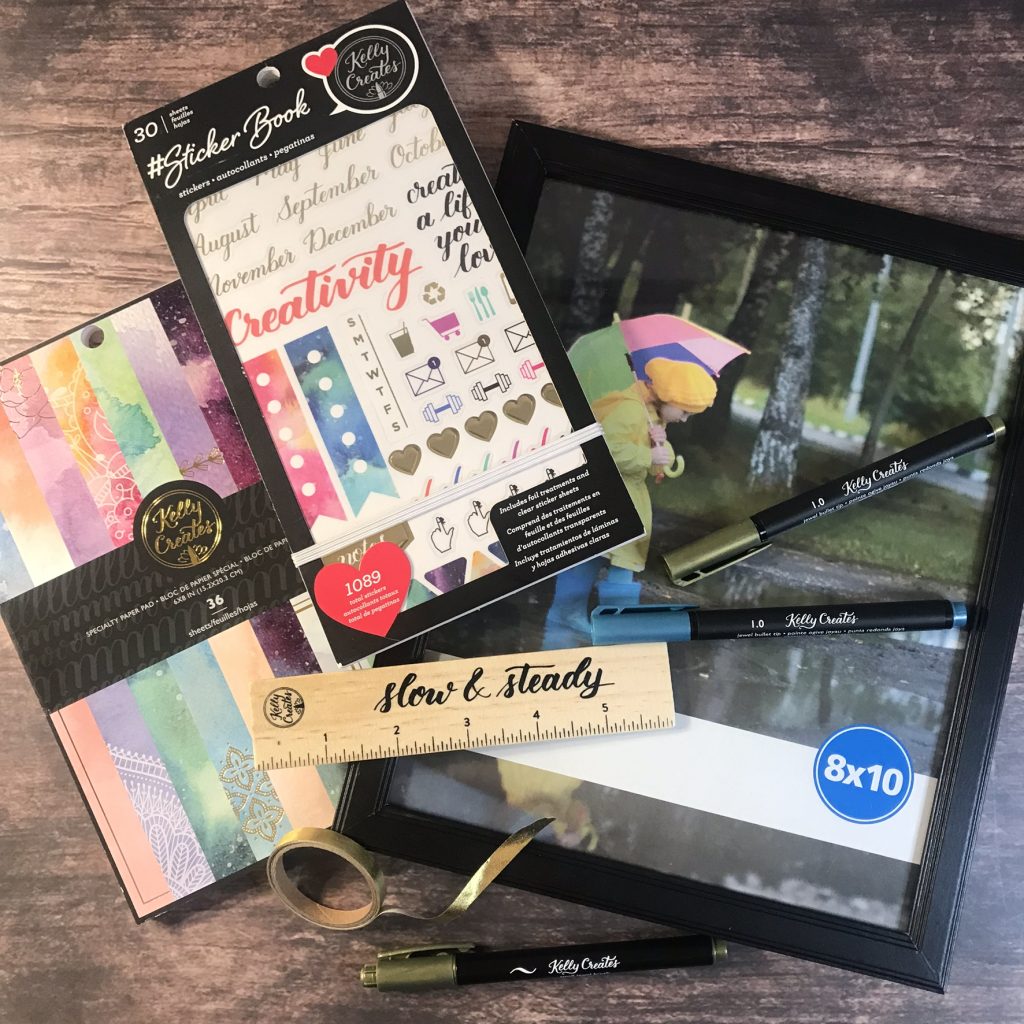
Kelly Creates Supplies: Metallic Bullet Tip Pens, Small Jewel Brush Pens, Specialty Galaxy Paper Pad, Washi Tape, Sticker Book, Deluxe Lettering Kit (pencil, ruler, eraser)
Other Supplies: 8×10 picture frame, tape
It’s the time of the year that can bring joy (mostly for parents) and chaos to any household: Back To School.
I’m definitely one of those moms that uses lists and various methods of organization to bring any semblance of order to my household. Organization makes me giddy. And sane-ish.
One thing I like to plan out is our dinners for the week. It helps with grocery shopping, to curb some after work/school craziness and knowing if I need to do any prep the night before. PLUS my husband will sometimes get a head start on everything when he gets home if he knows what we are having. (I know…I’m super lucky!)
I normally write my weekly meal list on a sheet of paper, but I thought it would be amazing to make a dry erase board for it. This project does double duty: meal planning AND lettering practice!
You will need 2 sheets of Kelly Creates Galaxy Paper in the same design. Select an 8×10 picture frame that coordinates with the Kelly Creates Galaxy Paper design you chose and your kitchen. Maybe you have already have a frame just laying around!

You need 2 sheets of paper so you can cover the entire 8×10 glass; Kelly Creates Galaxy Paper measures at 6″x8″. Lay the paper face down as you would a picture, paying attention to where the design on the paper will be once you flip it over. Place the “bottom” sheet in the frame first. Once you place the second sheet at the top, tape them together.

Take the paper out of the frame and turn it face up. I chose to place the design to the left, and that’s where I will write the days of the week. And see that seam? No worries…it will be disguised.
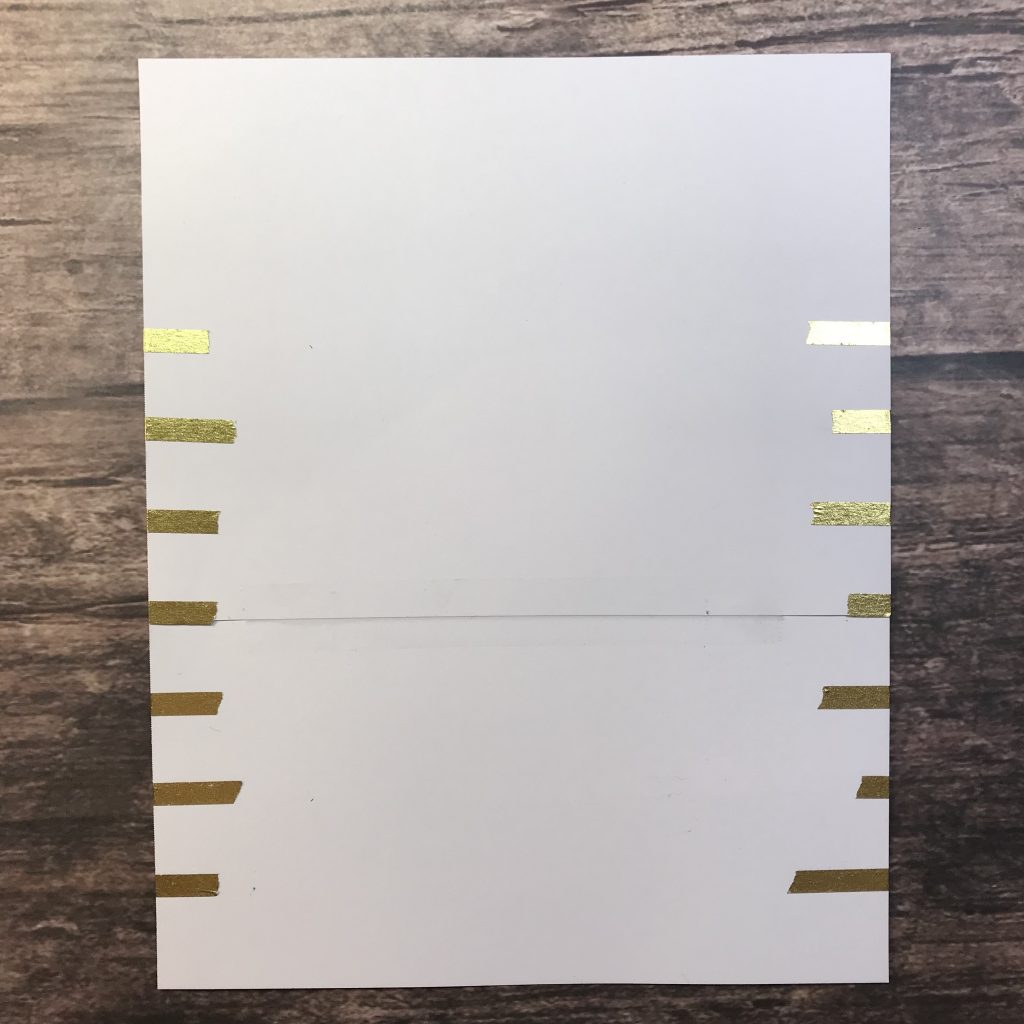
 Starting at the bottom, place 7 marks along each long side of the paper at 1-inch increments.
 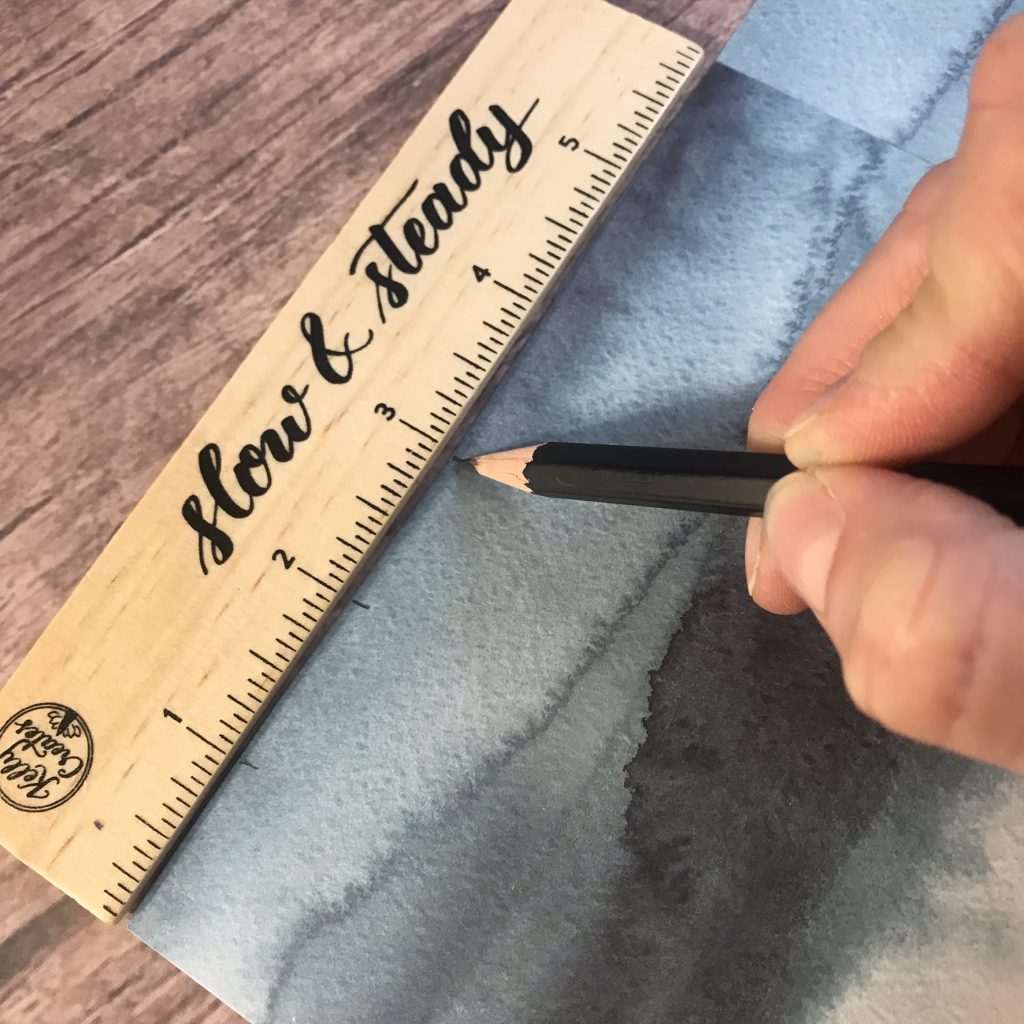 Choose a coordinating Kelly Creates Washi Tape design. I love the way the gold looks with this Kelly Creates Galaxy paper design. Use the 1-inch marks you made as a guide for placing straight lines of Kelly Creates Washi Tape. Place the Kelly Creates Washi Tape so that the bottom edge of the tape rests on the marks.
 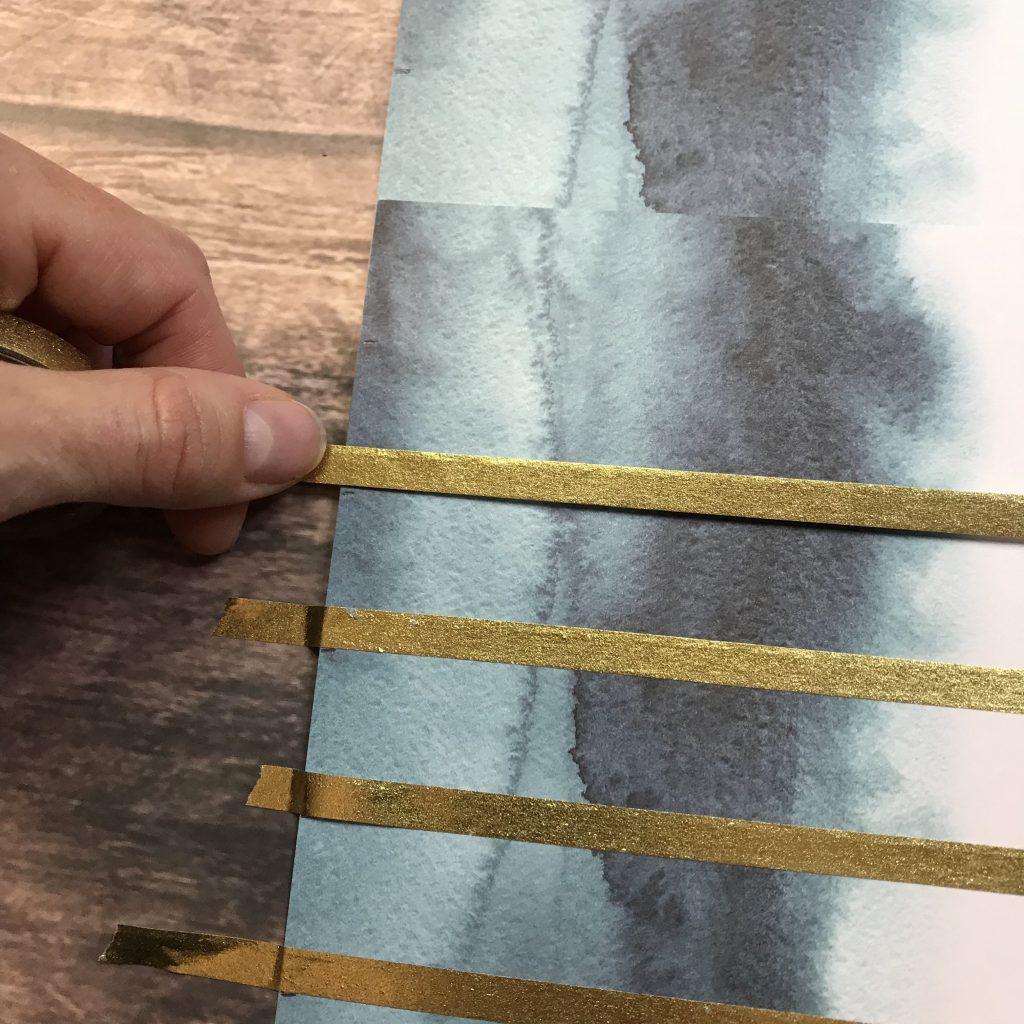 Once you have 7 straight lines of Washi Tape, you can cut the excess off or just flip the paper over and fold the tap over onto the back like I did.
 Now it’s time to letter the days of the week. I started my list with Monday, but you can start with Sunday if that is your preference. I chose the Kelly Creates Small Jewel Brush Pen in Gold so that the lettering shows up against the blue. Plus, it matches the Kelly Creates Washi Tape.

TIP: Be sure that you leave a small margin to the left and at the bottom to accommodate the overlap of the frame!

If you don’t know how to hand letter the days of the week, try practicing with the Kelly Creates “Making Connections- Calendar” workbook for large or small brush pens. This workbook has the days of the weeks, the months of the year, seasons, etc in trace and learn worksheets.
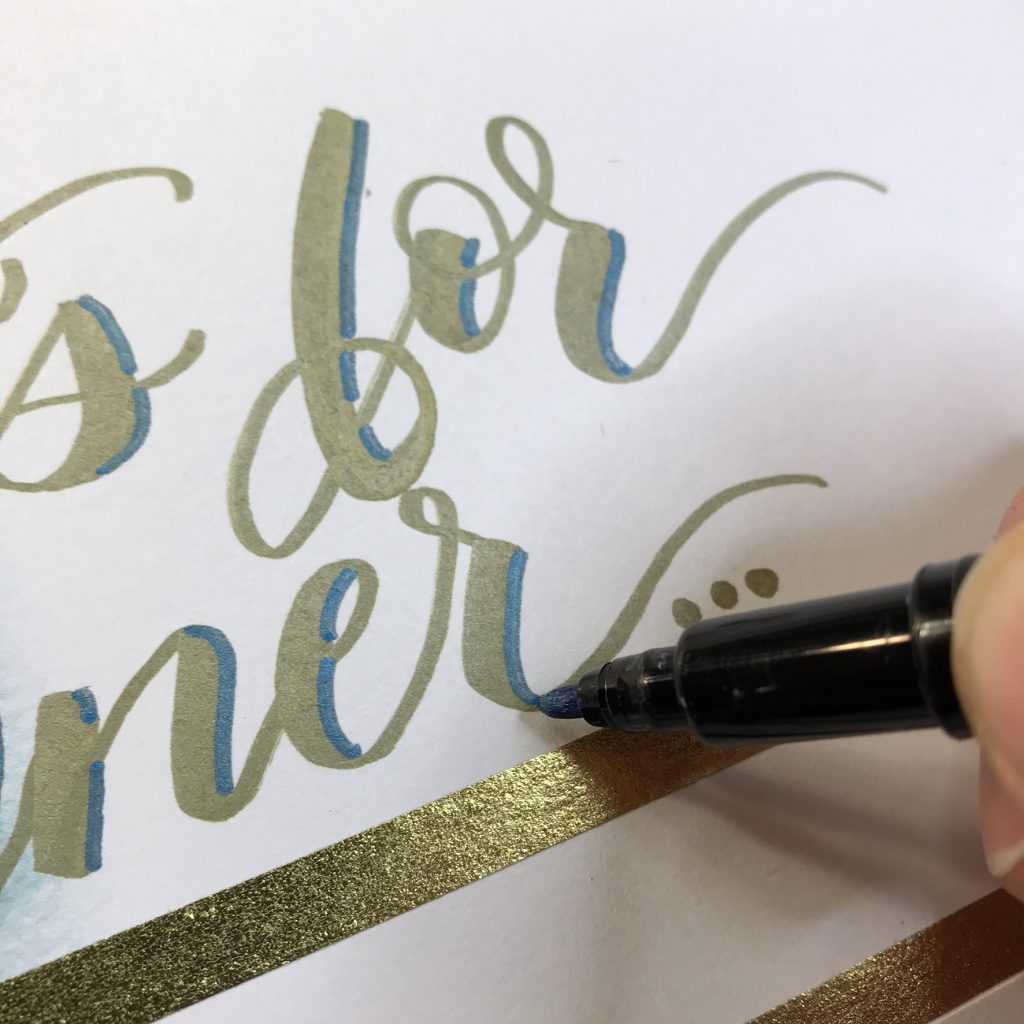
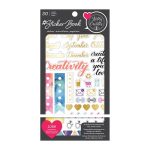
I used the Kelly Creates Metallic Jewel Bullet Tip Pen in “Sapphire” to create shadows. 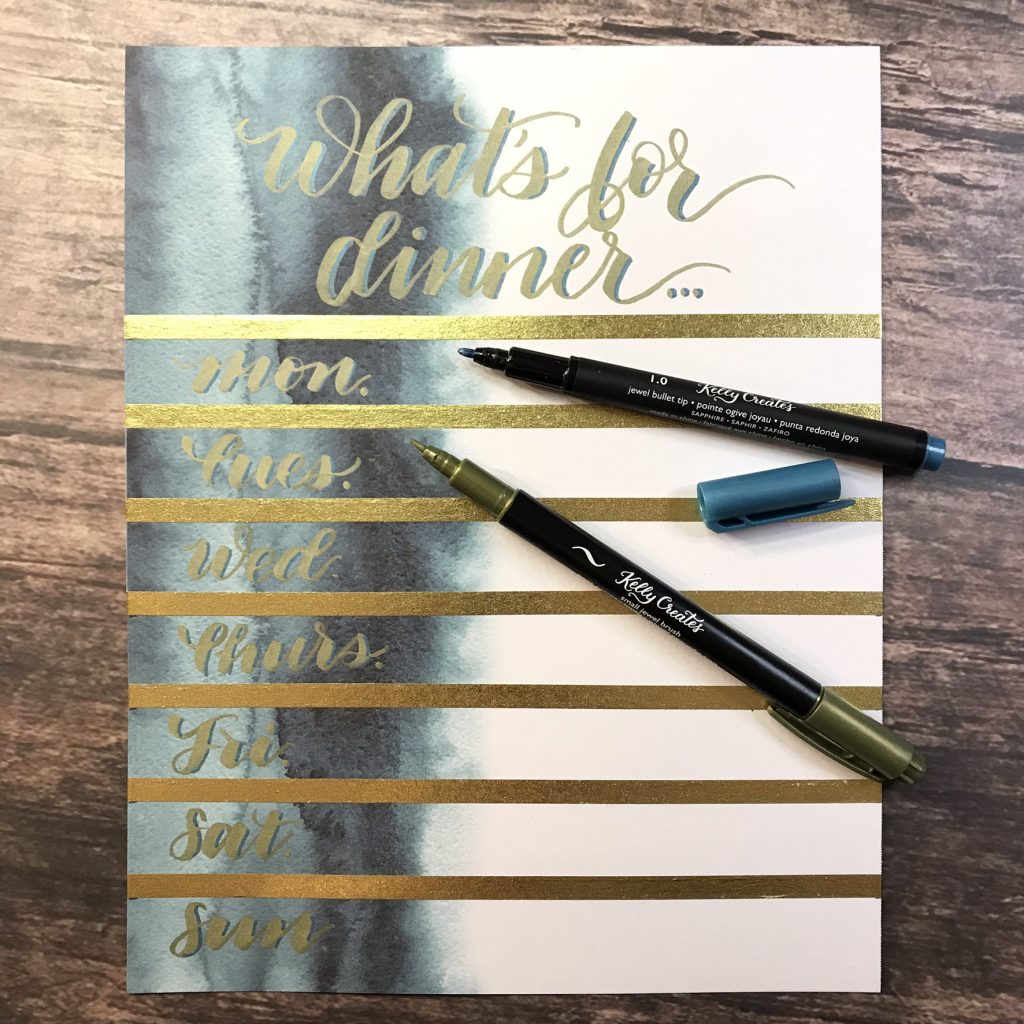 Not comfortable with lettering yet? You can use stamps from the Kelly Creates stamp collection or you can use the days of the week stickers from the Kelly Creates Sticker Book!

Next, add a “What’s for dinner…” header in the large space at the top once again using the Kelly Creates Small Jewel Brush Pen in Gold and Kelly Creates Jewel Bullet Tip Pen in Sapphire.

For a little extra design, I added gold foil clear stickers from the Kelly Creates Sticker Book.
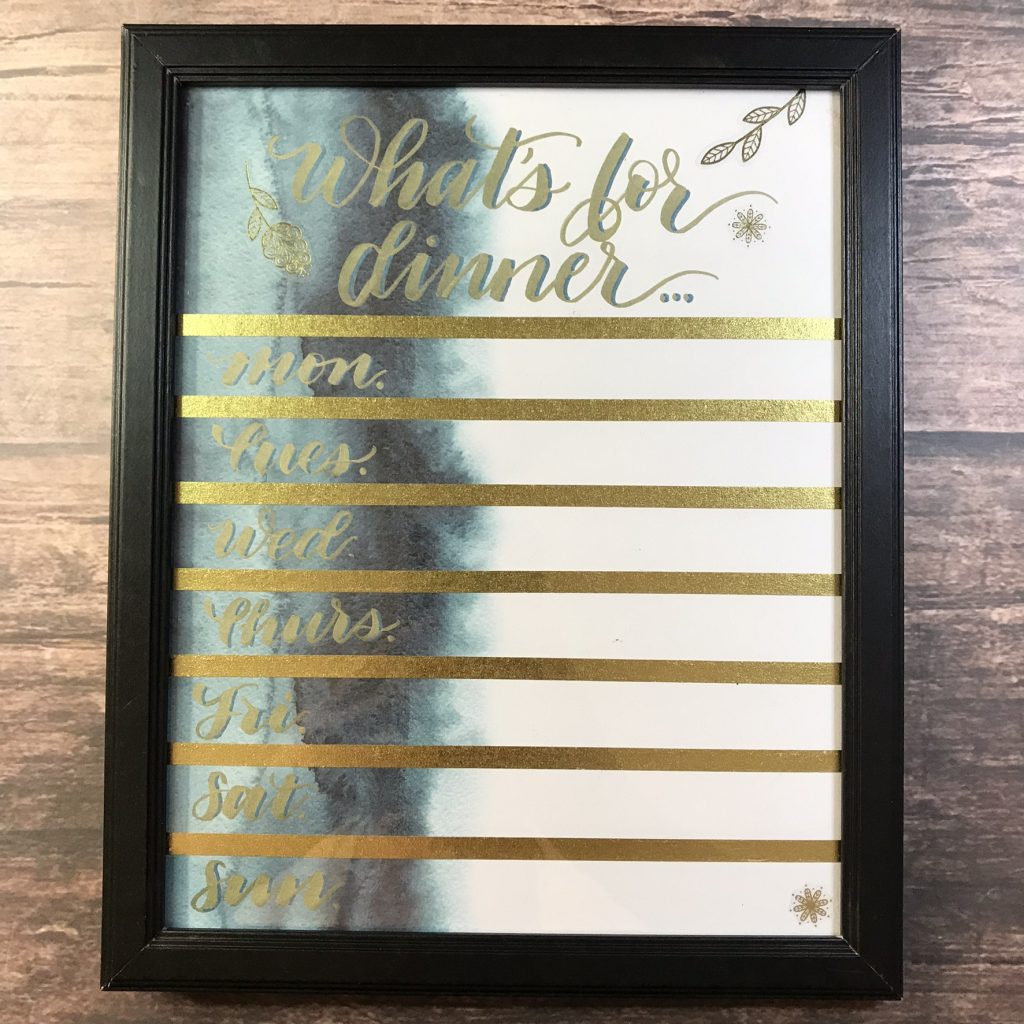
Once you are satisfied with your lettering and sticker placement, place your menu planner in the frame and put the back of the frame on.  Add your menu next to each day. I didn’t use a dry erase marker here…it’s the Kelly Creates Jewel Bullet Tip Pen in Sapphire again! Once dry, you can erase it using a wet cloth and a little pressure.

This project is beautiful and functional. It would make a great gift too. I get really excited when I see you all try the tutorials, so I can’t wait to see what frame-paper-Washi Tape combinations you come up with!
Erica always has such cool ideas about DIY….and this is a hand lettering project that is ‘green’ too, saving paper but helping us stay organized in a creative way.
For more lettering inspiration, follow Erica on Instagram @ericalligraphy2
Shop the supplies Erica used by clicking the affiliate shopping links below:


PIN ME!

Linda Epstein
September 27, 2019 at 4:22 pm (7 years ago)This is absolutely gorgeous, Erica.