
Today we have a special guest on my blog with a fantastic holiday lettering tutorial! Welcome Chasity Sivanick (@chiciscre8tive) who is an expert paper crafter and lover of all the pretty home decor things.

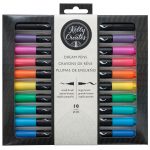
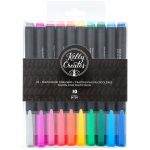
SUPPLIES from Kelly Creates: Dream Pens: Coral and Jungle, Multicolor Fineliners: Fire and Turquoise, Moonlight Markers: White Brush Tip, Multicolor Small Brush Pens: Grey; Black Fineliners, Deluxe Lettering Kit: pencil, ruler, eraser
OTHER SUPPLIES: We R Memory Keepers Laser Square, White and Kraft Envelopes, Handmade Holiday Cards
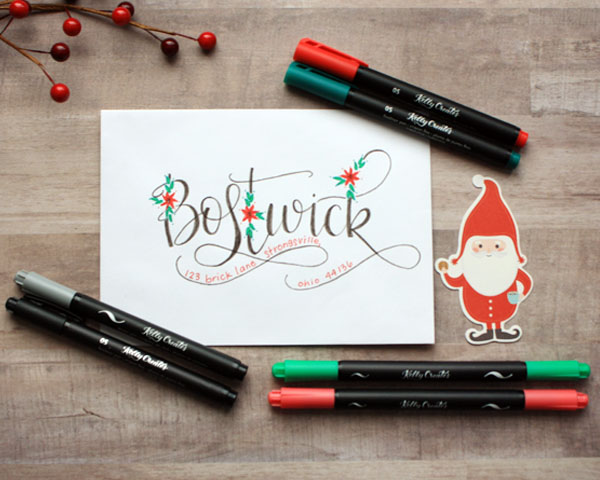
I just love creating fun, personalized envelopes to hold my Christmas cards! I want the recipient to be excited to open the card, just from seeing the envelope. Creating these poinsettia accents with brush pens is a super easy way to add a little holiday pizzazz to your hand lettered envelopes.
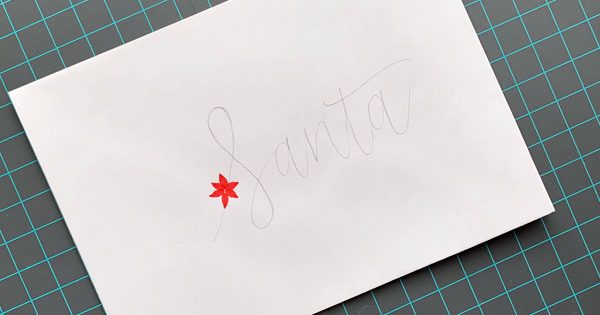
First, I pencil in the recipient’s last name. I use a laser square to make sure that I am writing in a straight line on the envelope. You can also use a ruler and a pencil from the Kelly Creates Deluxe Lettering kit.

Decide where you would like to place the floral accents on your letters. Next, grab the Coral and Jungle Dream Pens. Start with the Coral to create the poinsettia. The large brush tip side works best. Use the brush tip to gently push down at and angle, similar to the angle for brush lettering, holding the tip almost parallel to the paper. This will create the “petal” or tear drop shape. Lift straight up and down. Repeat as you rotate the envelope to create the poinsettia. Create as many petals as desired. Repeat these steps if you are adding the poinsettias to other letters.

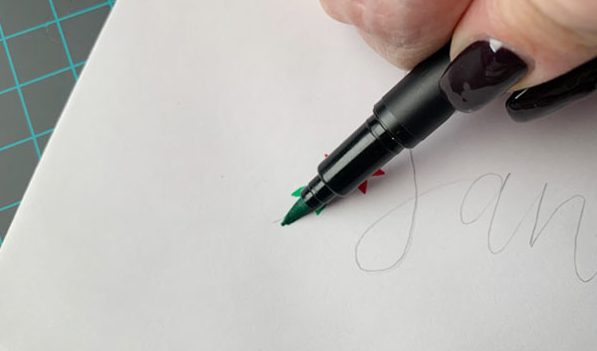
 Next step is to add the “leaves”. This is the same technique that is used to make the petals except using the Jungle green Dream Pen. I like to add them in sets of 3.

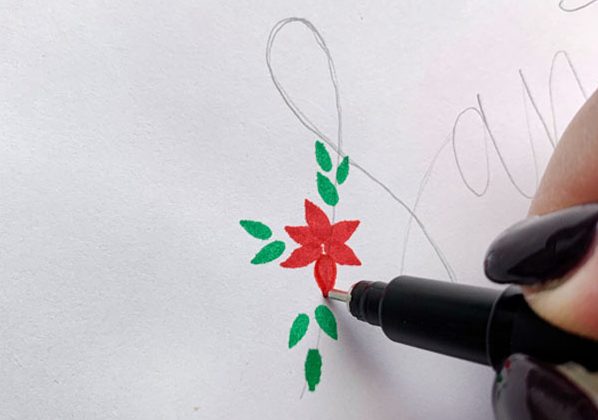
Now that your poinsettias are starting to take form, use the Multicolor Fineliners Fire and Turquoise to outline the petals and leaves. I added a dot with the Fineliners near the tip of the petals and the leaves to add another element.

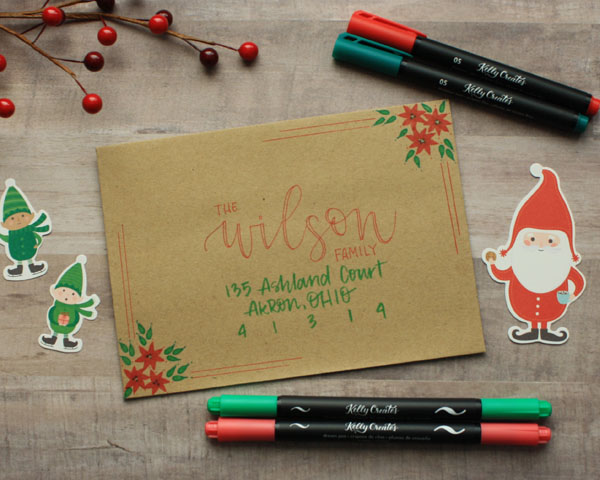
Repeat these steps for all of the letters that have the poinsettias. Next step is to finish with the desired color and lettering style. All of my envelopes are done with a faux calligraphy style. You can use brush lettering as well if you prefer. Here is how I created the faux calligraphy style with the poinsettias using a Kelly Creates Black Fineliner. Then I erased my pencil lines.

Fill in the lines or leave the negative space or fill in with color. Add your address and you’re done!

You can get creative by trying this technique on Kraft envelopes and use Kelly Creates Moonlight Brush Pens.

I also added some shadows on the Santa envelope with the Kelly Creates Grey Small Tip Brush Pen! The possibilities are endless for creating memorable envelopes.
Here are a few variations for you to try!
Well, I sure hope I receive one of these beauties in the mail (wink wink)! Thank you Chasity for sharing your creative holiday ideas with us!
For more inspiration and crafty ideas, visit Chasity on Instagram @chiciscre8tive
Click on the affiliate SHOPPING links below to find the supplies Chasity used:


Darcy
December 6, 2018 at 9:15 am (5 years ago)What a talented hand-letterer!!!
Michele K. Henderson
December 8, 2018 at 5:54 am (5 years ago)These are really beautiful!