Chasity will have you hopping to grab your Kelly Creates art supplies to make these wonderful Easter cards!

Kelly Creates Supplies: Dream Pens Set 1 and Set 2, Deluxe Lettering Kit, Moonlight Marker, Fine tip small black brush pen, pencil, eraser (from Deluxe Lettering kit), Blending pen/kit.
Other Supplies: White card stock, baker’s twine, vellum paper, patterned paper, adhesive, paper trimmer, foam adhesive
Hey Lettering Friends! Easter is just around the corner, and today I am going to share a quick tutorial with you to make your own Easter cards! I sure do love making cards, and cards for holidays is no eggception! (See what I did there!)
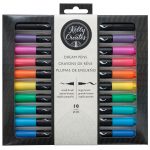
One of the most versatile products in Kelly’s line is her beautiful Dream Pens. I am going to feature these pens in today’s projects. Grab your pens, a few supplies and some vellum, and let’s make some cards!

I started with a piece of vellum. I knew I wanted to blend these colors and blending on vellum is easy to accomplish.

I chose colors that would work for Easter. There are so many beautiful colors that would work for this project with 20 different Dream Pens on hand.

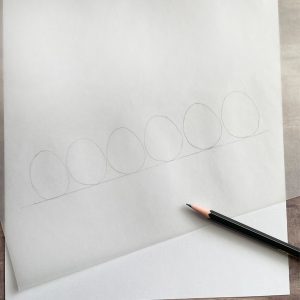
Start by sketching some eggs in a straight line with a pencil. I always pull out my Kelly Creates Deluxe lettering kit and start with pencil on my projects to get the placement correct before I commit to using the pen. Make sure you use a light hand with the pencil so that it can be erased later. I had in mind that I wanted to make a ‘Slimline’ card, so I went a little larger with the eggs than I normally would on a card. These eggs are about ¾” (2 cm) high. The slimline size is a long, narrow rectangular shape and very popular among card designers.
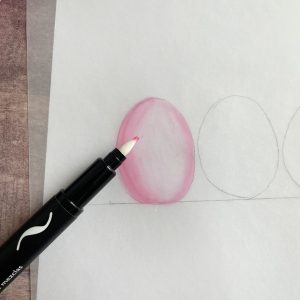
Decide what order you want your egg colors . Of course I went with the rainbow order, but you can get creative! Starting with the first color of Dream Pens, outline the egg and then color a thicker band along the left edge of the egg. I put a white piece of card stock behind my piece of vellum, so I could see the colors more clearly once the vellum is on the card. If you’re working on a dark surface, try this to really see how the colors will look.

The next step is to blend the color towards the center of the egg, to create an illusion of a dimensional curved egg. I used Kelly’s Blending Pen, which comes in a set of 2, along with a silicone blending palette.

A blending pen contains a special clear ink that will allow you to blend pen ink colors together on paper (Note: vellum and watercolor paper are best for blending water-based markers).

Keep blending the color from the outside to the inside of the egg until you get your desired look. If you need to add more color with the Dream pen, feel free to do so and continue blending until you reach the color you like.
Repeat this process for each color and egg. You will find with the darker colors you do not need as much ink, and lighter colors may need a second application.

Look how fun these are coming together! I colored the left side of my eggs with more ink to create the shadow side, but this could be done on either side!

Now that you’re finished colouring with Dream Pens, go ahead and erase any of the pencil lines. I love this retractable eraser from the Kelly Creates Deluxe Lettering kit. Be sure to wait until the color is completely dry to avoid smudging.

Then use the Kelly Creates small brush tip black pen (from the Deluxe Lettering Kit) and write the letters for the word “Easter,” one letter in each egg.

I went back and made my down strokes thicker and traced over the letters a few times to really make them darker. (Sometimes black ink can appear lighter on vellum)
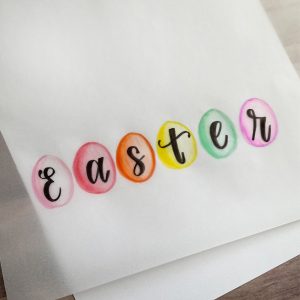
I used a script lettering style, but a serif or sans serif style would be great too! Some fun block letters would also look super cute! Next, using the same small brush tip black pen, write the word “HAPPY” above the eggs.

Now it’s time to assemble the card. I cut white cardstock into the slimline size and wrapped the vellum around the card, front and back, then trimmed it to the same size as the card. Be sure to center your eggs on the card. Adhere the vellum to the cardstock. Keep in mind to use very little adhesive because vellum is translucent, and you might see where the adhesive is placed, depending on the weight of the paper.

To complete the design, I drew grass at the bottom of each egg with the Kelly Creates Jungle and Evergreen Dream pens. This helps to “ground” the design so that the eggs don’t appear to be just floating on the card. I used 2 shades of green for dimension. The card is pretty much complete and just needs a little embellishment to finish it!

I want to show another variation of the same idea. I started with the vellum again, but this time I drew the eggs tilted at different angles, so they were a little bit more playful. All that means is the direction of the eggs shifted and were not completely straight. I did still draw a pencil line to keep my eggs even.

I repeated the same process with blending the eggs using the Dream pen and Blender pen. I did change the word to “hoppy” so there are fewer eggs. This card will be a traditional size; 5” x 7” so the eggs are about ½” tall.

I added a few highlights to the eggs with my Moonlight Marker. With the same small brush tip black pen, I wrote the word ‘Easter’ under the eggs.

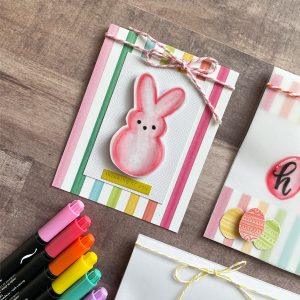
You can get as creative as you want, and try the same technique with different shapes! There are many shapes that would work for Easter. I also tried a Peep bunny shape!

Follow the similar blending steps to color in the Peep bunny shape.

Add the eyes and nose with the small brush tip black pen. I fussy cut the peep out of the vellum and added white cardstock to the back!

Here are the cards all finished. As you know, I like to add what I call ‘yum yums’ to my cards for some added decoration! I cut out tiny eggs from some patterned paper I had. I layered them and used some foam dots for dimension, and then tied some baker’s twine in a bow along the top folds.

For the slimline card, I wanted to keep this pretty simple, so I only added some baker’s twine to the top.

I think the Peep bunny card is my favorite! It’s super cute and small and I just added a sticker element to it, along with the baker’s twine.
I hope you take some time to give these cards a try! If you do, please be sure to share what you create with us on social media using the hashtag #kellycreates ! Thanks so much for stopping by today, and Happy Easter!
***********************************************
For more lettering and crafting inspiration, follow Chasity on Instagram @chiciscre8ive !
Shop the Kelly Creates supplies Chasity used in these projects by visiting the Kelly Creates online store or Kelly’s NEW Amazon Storefront HERE or click the images below.