Chasity will help you celebrate 2023 by showing you how to paint really cute 3D balloons using Kelly Creates Watercolor Inks!

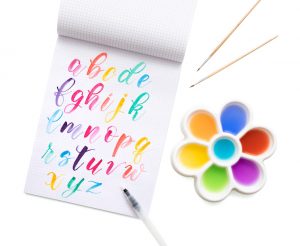
Kelly Creates Supplies: Watercolor Inks Set 1 (Rose and Black), Watercolor paper pad, Blossom Dream pen (set 1), Deluxe Lettering Kit – Medium Black Brush Pen, Pencil, Eraser, Watercolor Lettering Brushes, Daisy Palette.
Hey Lettering Friends! Happy New Year! I hope that everyone had a very, merry holiday season. It always comes and goes so quickly. I can’t believe it’s January and that 2023 is upon us. Do you make new year’s resolutions? Are you resolving to practice new lettering techniques? I know I am! Which brings me to this tutorial!
My tutorial today is one that I am excited to share with you. I wanted to do this tutorial because these metallic ‘mylar’ balloons have intimidated me for a very long time. I decided that it was time to just give them my best shot and be happy with how they turned out. This is your permission to create and love the results no matter what. It’s about the journey after all. I promise this tutorial is simple and easy to do.

Pull out a piece of Kelly’s watercolor paper, plus your pencil and eraser from the Deluxe Lettering Kit. Start sketching the numbers or letters in a balloon shape. This would work for the alphabet too! Think of bubble type letters. (You can also first sketch on Kelly Creates Grid paper to work on your design and use it as a template).
If you are struggling with the shape, I suggest using the internet to look up the actual balloons. I found this very helpful in not only showing the shape of the balloon, but also where the light and shadows hit on the balloon!
When you get the shape that you are happy with, also draw an outline around the balloon shapes, about a ¼” away from the outer edge. This will later become the seam of the balloon.
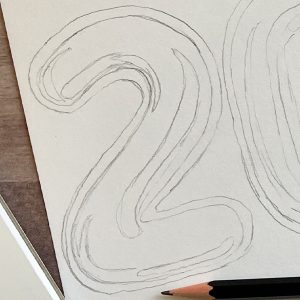
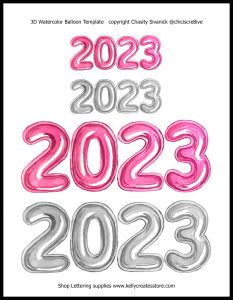
Would you like a template to help you sketch the balloons? Click HERE to download and print the PDF or click the image below.
Once that is done, on the inside if the balloon, with a pencil lightly draw the light and dark shadows. This is helpful when you are painting to know where to make it darker and where to leave the paper white to mimic where the light is hitting. Again, looking at a picture of actual balloons will help immensely with this step.

Now we are going to add some color! Pick any color you desire from Kelly’s watercolor line; the steps are the same with any color. Using one color makes it easier to create the balloons and is less intimidating. I chose Rose from Set 1! Once you’ve chosen your watercolor ink, add a few drops to the Kelly Creates daisy palette. Next add a few drops of water. This will desaturate or lighten the color. I use this as the base color for all of the numbers.
Paint this color on all the surfaces of the balloon except where the light is hitting. That area should stay white. Don’t worry about the pencil lines, they can be erased later once everything is dry. I used the Kelly Creates #4 lettering brush for this to cover the area as evenly as I could.

The next step is to focus on the dark areas of the balloon, where there are creases and bends. For this step, I used the Rose watercolor ink and did not dilute it with water. I loaded the #1 brush with the color straight from the bottle. Kelly’s watercolor inks are very pigmented and beautiful. I also painted around the outline of the balloon to create some depth between the balloon and the seam. Remember that shadows will be in the creases and bends of the letters or numbers.
Add a little color, then step away and go back and paint until you are happy with the shadows. I added a 3rd layer that was not as strong color to some areas to help create some additional depth and shadows to the balloon. Again, referencing images of balloons comes in handy here!
Step back and look at how your balloon is shaping up! Add some more layers for dimension until you are happy with how it looks. Layering is key to creating dimension with watercolor.
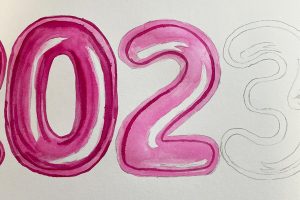
Next, I outlined the seam layer of the balloon on the outer most edge. I felt this helped lift the balloon off the page a bit.
You will repeat these steps until each number or letter is complete. You can always go back and add more layers as you finish each balloon, but keep in mind the goal is they look consistent.
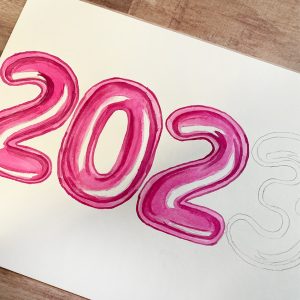
Remember to keep the white areas for the “light” on the balloons. This is a very important step to help with the balloon looking realistic.
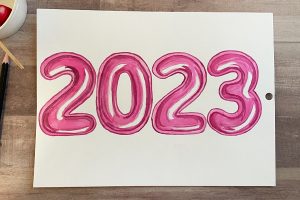
Here is what all the numbers look like almost done. I really like the way they are turning out. Now, find a Kelly Creates Dream pen that is a close match to the watercolor you used. I used the Blossom Dream Pen to draw short lines around the seam of the balloon. I didn’t’ draw them all the way around, just in a few key places. Be sure to draw them where the curves are. This is where you would see these on the real balloons.

The last step if desired is to add the word ‘welcome’ above the balloon numbers. I used the Kelly Creates Black medium brush pen (from the Deluxe Lettering Kit) because I am going to frame this as a piece of home decor. You can also use this design in your planners, and journals or even make a card.
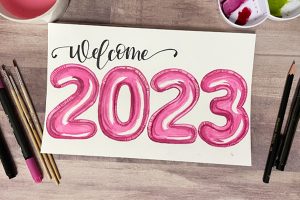
You can trim the paper if needed and your New Year balloons are ready for framing! I hope that you enjoyed this tutorial and try to paint your own balloons. Thanks so much for stopping by, and I hope each and every one of you have an amazing year and take some time to focus on creating!
****************************************************
Get inspired by more of Chasity’s lettering and crafty projects by following her on Instagram @chiciscre8ive
To shop the supplies Chasity used, click HERE to access Kelly’s online store or find Kelly Creates products on Amazon.


Ava Gavloski
January 19, 2023 at 7:24 am (1 year ago)Thanks for giving the detail deets on how to get the look. Appreciated.
Claudia Finnegan
January 19, 2023 at 3:41 pm (1 year ago)Thanks! Looks like a fun project!
Toni D
January 20, 2023 at 12:50 am (1 year ago)I look forward to trying this out.Thankyou for sharing.
Shamile McBroom
January 20, 2023 at 2:51 am (1 year ago)These balloons look so realistic! Great job Chasity and thank you so much for the detailed tutorial!