
Chasity is here to brighten your day with a fabulous watercolour tutorial!
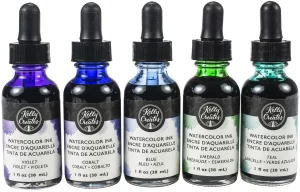
Kelly Creates Supplies: Daisy Palette, Lettering Brushes, Watercolor paper, Watercolor Inks Set 1 and Set 2, Multicolor Small Brush pen “Bark”
Other Supplies: Paper Trimmer, scissors, adhesive, scrapbook paper (DCWV), White cardstock
Hey Lettering Friends! It’s November, and there is certainly a chill in the air. Here in the States, we celebrate Thanksgiving in November, and it’s the perfect time to count blessings. It’s been a very busy year for my family, and we certainly have so many blessings to count. As you know, I love creating and lettering, but I will always be a scrapbooker at heart. It’s where my creative journey began. When I get to merge the two loves, that is where the magic happens. My creativity is one of my greatest blessings.
Today I want to share a fun tutorial with you on making DIY watercolor embellishments for those perfect fall moments. I will show you how I created different fall leaves to use on a layout, the perfect handmade embellishment. If you don’t scrapbook, you could use this technique to make leaves for cards, art journals, planners, etc.
We will make a few variations of leaves in this tutorial. I started with Kelly’s watercolor paper. Using the Orange Watercolor Ink and the #2 Lettering brush, I started painting small orange leaves. I didn’t draw these first, I painted these freehand, because I wanted them to each be a little different.

I started with a stem and painted little ovals to each side to create the leaf. Remember, they don’t have to be the same, and just have fun with them! Kelly’s watercolor inks are very pigmented, so I diluted the ink with very little water in my daisy palette to keep the color very vibrant.
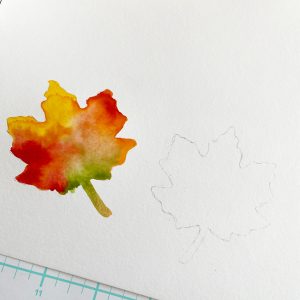
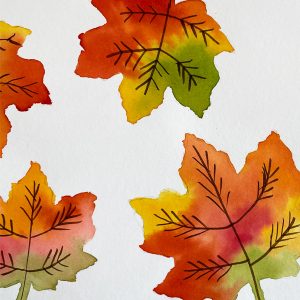
Set that paper aside to dry: we will go back and add the “veins” once these are dry. I then started on a new piece of watercolor paper and sketched some traditional maple leaves with pencil in a few different sizes.. If you are not comfortable sketching them, grab some real leaves from outside if you can and trace them!
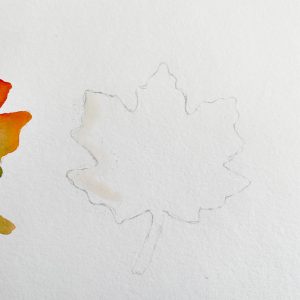
I sketched very lightly and went back with an eraser and lightened the pencil line so that it would not be noticeable once I added the watercolor. To paint these leaves, we will use a ‘wet on wet’ technique by first painting clean water only in the leaf shape. This will allow the colors to bleed into each other. The water allows the inks to move easily on the paper.
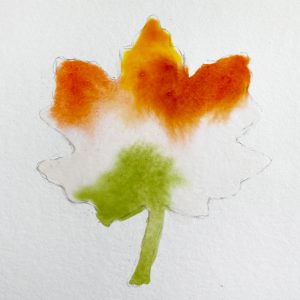
Then load your brush with watercolor inks. I used the #4 brush and Poppy, Emerald, Orange, and Deep Yellow watercolors for these leaves. I touched the brush to the water and the inks blended beautifully. (NOTE: Clean your brush between ink colors).
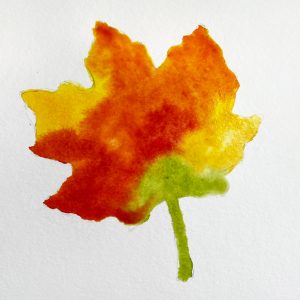
Add more color as needed to create more vibrant colors and to fill in the entire leaf. Fall boasts the most amazing colors, and these leaves should reflect those hues.
Continue filling in the leaves, alternating where the colors go as no two leaves change colors alike. I created five leaves total.
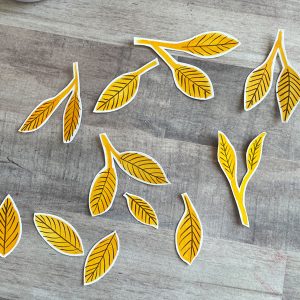
Set this aside to dry, and we will move on to another variation. I grabbed a new piece of watercolor paper. I mixed the Deep Yellow and a drop of Orange together in my palette with some water for the next leaves.
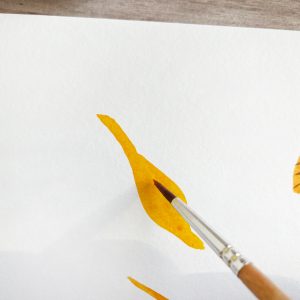
This leaf is created with a simple brush stroke and pressure. Start with a light pressure to create the stem, then press down to create the leaf, then lift the pressure to create the tip of the leaf. It’s the same concept as the pressure used in brush lettering. Practice a few times until you get the hang of it. You can also create the outline and just fill in the leaf if that is easier!

I painted some single leaves, and some double leaves with this color for variety. I made a few different sizes as well. Let those dry.
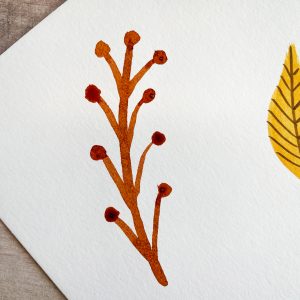
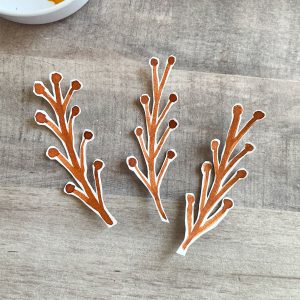
For the final leaf style, I mixed Poppy and Cobalt Watercolor Inks together to create a brown. These final stems don’t have leaves at all! Using the #2 brush, paint stems and add circles to the ends. I only made three of these and I am going to use them as filler. I painted these on the same sheet as the previous leaves because I had some extra space. Set aside to dry.
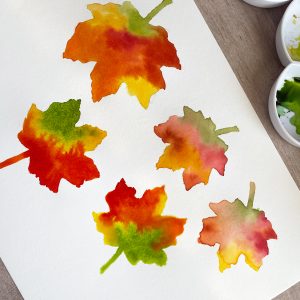
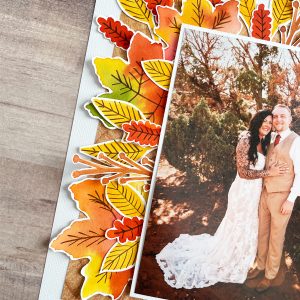
Once all the leaves are dry, use the Small Brush Pen Bark to add the “veins” to each leaf. Then grab your scissors and cut out all the leaves.

I left a little white edges as I cut around all the leaves. See how the brown adds detail and interest to the leaves?
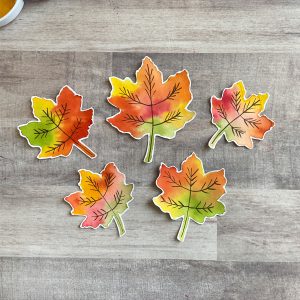
Here are the maple leaves with the veins added. I like how the brown ties all the leaves together.
I know they don’t look like much right now, but it’s time to assemble them together to create the perfect embellishments for a layout or card!
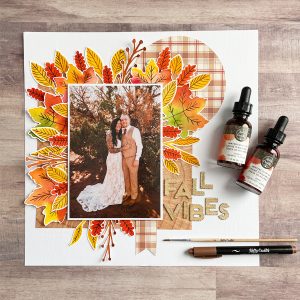
Using some patterned paper and cardstock, I started to build my layout. I used a 12”x12” piece of white cardstock as my base so that my watercolour leaves would really pop. I added some patterned paper from DCWV. I cut a 8”x8” square from the woodgrain paper and a 4”x4” circle from the plaid paper and layered them on the white cardstock. I knew I was going to use a 5” x 7” photo on my payout, so I cut a piece of white cardstock 5.5” x 7.5” for a photo mat.
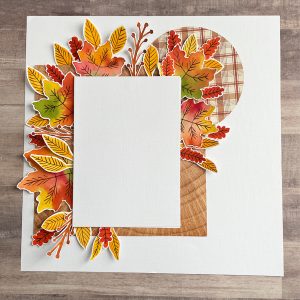
I started to arrange the flowers under the mat. I did not glue anything down yet because I wanted to get the arrangement first, before I committed to where everything went. Start with the larger leaves first, then layer the others on top.
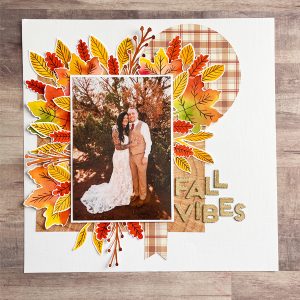
I kept layering the leaves until I was happy with the look. Once your arrangement is final, glue down the leaves, then adhere the photo and mat to the layout. Our daughter was married in August, and I wanted to scrapbook this stunning photo of her and her groom.
I love how the layout turned out, and I love that I made these beautiful leafy embellishments!
These watercolor leaves would also be great for handmade cards or home décor projects! And they are so fun to make! You can also paint a bunch, cut them out and store them in an labelled envelope to keep for future projects.
Thanks for joining me today for this tutorial. I hope that you try these DIY Leaf Embellishments and take a moment to count all your blessings.
*****************************************************
For more crafty inspiration and lettering ideas, follow Chasity on Instagram @chiciscre8ive
Shop the supplies Chasity used by clicking the images below or visiting Kelly’s new online store HERE.


Ava Gavloski
November 27, 2022 at 9:03 am (1 year ago)Great how to get the look tutorial. Well done.
LINDA EPSTEIN
November 28, 2022 at 1:57 pm (1 year ago)Love this idea, Chasity. The leaves turned out so pretty and look great behind the photo. Congratulations on your daughter’s wedding. She’s beautiful!