
We can always count on Chasity for a festive holiday lettering tutorial! Today she is sharing a wonderful technique on how to add greenery to your hand lettered envelopes and tags.

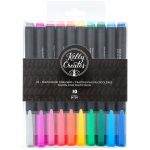
Kelly Creates Supplies: Grid paper pad, Deluxe Lettering Kit, Dream Pens, Multicolor Bullet Tip pens, Multicolor Fineliner pens, Moonlight Marker, Multicolor Small Brush pens
OTHER SUPPLIES: Kraft Paper, Paper Trimmer, White Cardstock, Adhesive, Holiday Pattern Paper (I used “Busy Sidewalks” from American Crafts), Baker’s Twine
Hello my lettering friends! Are you ready for the holidays? I know here in Utah, we sure are. There are Christmas lights popping up everywhere! It’s been the quickest, longest year ever!
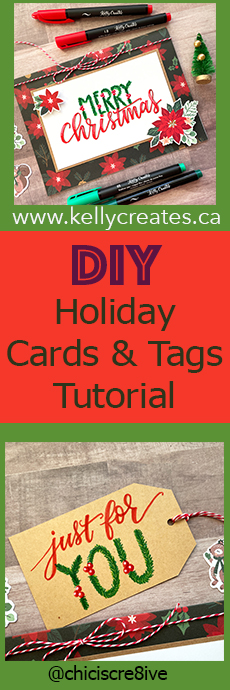
Today, I want to share a ‘Holly-day’ lettering tutorial that you can use for making cards, tags, addressing envelopes, or use in any of your holiday crafting. It’s super simple and so much fun!
I started by using Kelly’s grid practice paper pad. This is my favorite paper to practice on and figure out my technique. I love it because I tend to write uphill naturally, and the grid lines help keep my straight! Start by sketching tall, skinny letters.

I chose a tall skinny letter style so I could add the berries and still have plenty of room for the greenery. To make the berries, I used the Kelly Creates Multicolor ‘Hibiscus’ small brush pen and drew 3 small berries on each letter.

To add some shading and dimension, I then used the Cardinal Dream pen to add shading to the bottom of each berry. I went back and used the Hibiscus Small Brush pen to blend the two colors together.


Now that we have added some shading, let’s create some highlights with the magical Moonlight Marker! Just a few small dots in each berry, and it will look like the light is hitting the berries!

Now, let’s start layering ink for the greenery. I will show you what I did to create the greenery, but please play around with different pens and see what you come up with.
Starting with Meadow Multicolor Fineliner Pen, draw evergreen needles – short lines feathering out from the pencil letter lines. I drew the greenery to move away from the berries.

I will now go in with other shades of Kelly Creates green pens to add dimension to the greenery. I use different tips and colors to add depth. I also varied the length of the short lines slightly to make it look a little more realistic.

Here is the order I used after Meadow Fineliner, but feel free to try different color variations. Next I used Palm 1.0, then Turquoise 05, next Small Brush Emerald and finally Dream Pen Evergreen. I love the variety of ink colours in Kelly Creates pens!


Once you have the technique down, try a few more letters to get the hang of it.

The curves in letters are fun – just be sure that both sides of the greenery go in the same direction as the curve so it looks more natural.
I also wanted to try this same technique on cursive letters, so see if it would work. I really loved the results, but I wish I would have added some berries throughout!

I love the texture and dimension, and this would look amazing as a last name on an envelope!

OK, time to put your practice to the test and create a finished piece. I wanted to make a greeting card, so I started with the word ‘Merry.’ I used the same technique as I practiced, and of course started with pencil because, you know, uphill writing.

I then decided to brush letter the word ‘Christmas’ below and used the Kelly Creates Hibiscus small brush pen to bring it all together. I did find it easier to layer the evergreen colours with taller letters than shorter ones, so I am glad it’s a tall lettering style!

Here is the finished card. I added a shadow to the word “Christmas” with the Dream Pen Stone, and added some highlights with the Moonlight Marker to each letter.
I used the Crate Paper Busy Sidewalks Paper collection for my card base and die cuts, and matted the sentiment with kraft paper. I also added red and white baker’s twine to finish the card.

This technique would be so great for handmade gift tags as well, as seen here. You could try a name, or keep it simple like this tag.

I hope you give this lettering style a try! I think you will find it’s really fun to design. Thanks so much for stopping by today and checking it out. I hope you share with us what you create on social media by tagging #kellycreates.
For more lettering and crafty ideas, visit Chasity on Instagram @chiciscre8ive
*****************************************************
Shop the supplies Chasity used by visiting Kelly’s online store http://www.KellyCreatesStore.com or clicking the product images below. You can also find a store that sells Kelly Creates where you live by using our Store Locator HERE.


PIN ME!
Claudia
December 8, 2021 at 7:43 am (4 years ago)Thanks for this suggestion. Merry Christmas to you! 🎄
Shamile McB
December 8, 2021 at 8:05 pm (4 years ago)Tried this tonight and it turned out so cute!!!!
Thanks for the detailed tutorial Chasity!!