This lettering tutorial from Chasity could be my ALL-TIME favourite! I mean, WOW! I never thought I would figure out a way to create marquee letters that look this good. Thanks to Chasity, we will now be able to design letters that light up the page. And those popcorn letters are TOO CUTE! Now it’s time to plan a movie night!
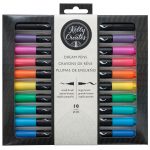
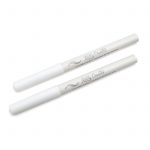
Kelly Creates Supplies: Deluxe Lettering Kit, Dream pens Set 1 and Set 2, Moonlight Markers, Multicolor Bullet Tip Pens, Black Fineliners, Grid Practice Pad, Multicolor Fineliners, Blending Pen, Multicolor Small Brush Pens Set 1 and Set 2
Other Supplies: Paper Trimmer, Patterned Paper (Pebbles Big Top), Adhesive, White Card stock, red card stock
Hey Lettering friends! I hope everyone is enjoying their summer months, relaxing and spending time outdoors.
July always reminds me of celebrations. And to celebrate the warmer summer months, I have a fun lettering tutorial today called Movie Night! Whether you are doing an actual Movie night, or another celebration like birthday, showers etc., this whimsical lettering is the perfect way to add to your celebration.
I got the inspiration for this tutorial after I saw a post by Lovable Letters on Instagram. I just had to try out the popcorn lettering style and share it with you, and show you how to recreate it with Kelly Creates amazing products. The marquee letters complement the movie themed celebration perfectly, so we will learn how to design those too.
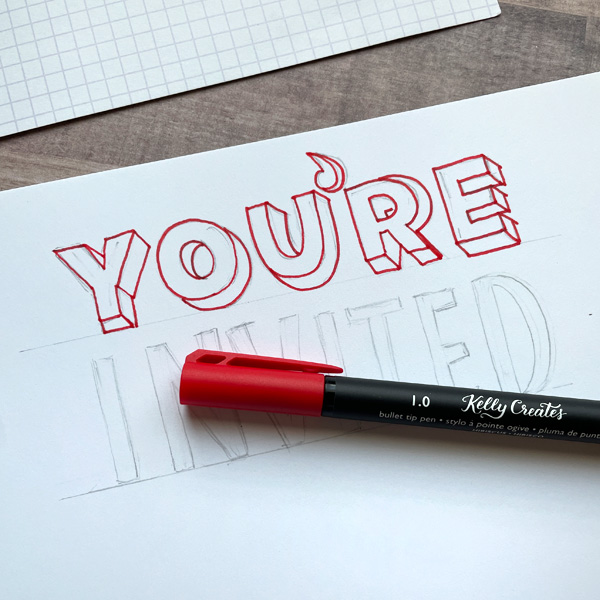
Grab your pens, and let’s give this a go! I started with Kelly Creates grid practice pad and sketched the letters, which helped me plan and visualize the final design. I used the pencil, ruler and eraser from the Deluxe Lettering Kit to sketch my ideas.

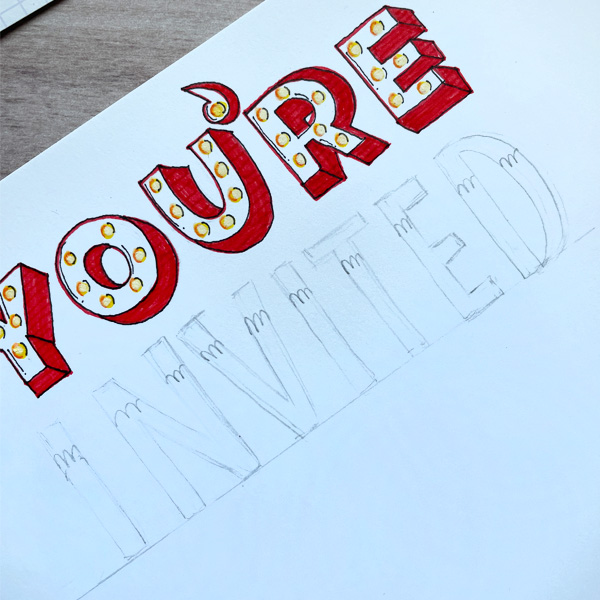
I wanted the marquee letters to be square and smaller and the popcorn lettering to be tall and skinny, like a small bag of popcorn from the movies or carnival. Use the ruler and pencil lines to make sure you get evenly sized letters. I drew the words “movie night” to practice and then changed the wording to “You’re Invited” for the final project.

Next, outline the word “movie” with the Kelly Creates ‘Fire’ Fineliner (or Hibiscus Bullet Tip Pen) Fill in the shadows of the block letters with the red. I also drew horizontal lines in the shadows to add some dimension and interest. Then using either the Kelly Creates Dream Pen or Multicolor Small Brush pen in ‘Sunshine’, draw small circles inside the letters to create the “bulbs” of the marquee letters.
 Next, with the Sunset Dream pen create a small half moon on the top of each of the yellow circles to create a shadow and add dimension. I then used the Kelly Creates Blender pen to blend out the orange into the yellow. Take the Kelly Creates Moonlight marker and add a white highlight the the middle of each circle after you have finished blending. Be careful not to blend too much, as it will tear the paper. A little goes a long way!
 Next, take the .005 Kelly Creates Black Fineliner, and add some small shadow lines to the letters and around the bulbs. Now is a good time to step back and make sure the desire look has been achieved. I also erased the pencil lines at this time.
 It’s time to try out the popcorn lettering. Using the Kelly Creates ‘Hibiscus” Multicolor Small Brush Pen, draw vertical stripes down ¾” of each letter. I tried to draw 3 stripes per letter section. Then using the .005 black fineliner again, I outlined each of the striped “bags” and drew scallop edges at the tops of each. Then with the same black fineliner, I drew the popcorn coming out of the top of each letter. I drew the popcorn in a variety of positions to give it a realistic appearance. After outlining the popcorn, I alternately colored them in with the Sunshine and Sunset (yellow and orange) Kelly Creates Bullet tip pens, leaving parts white, just like real popcorn!

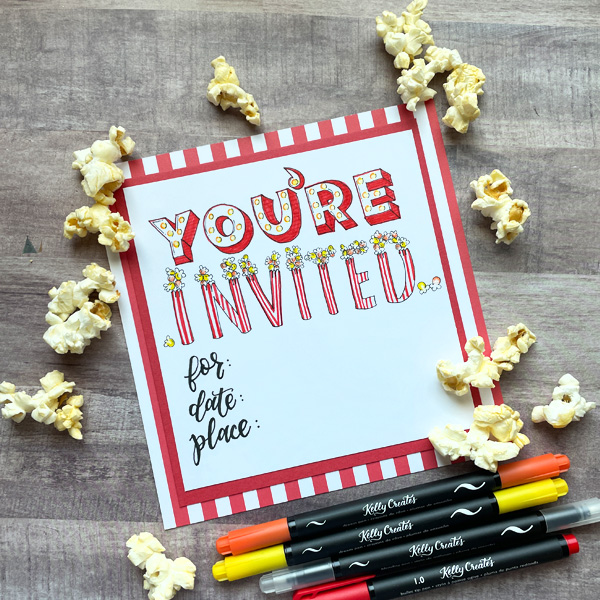
I really liked how this design came together and the overall composition. I also drew a filmstrip with the Kelly Creates Black Fineliner Pen 1.0. I moved on to the nice white cardstock. I started by sketching my design with pencil again, this time with the words “you’re invited.” I wanted to create a really fun invitation that could be used for a variety of summertime celebrations!
Repeat the same steps as above to create the marquee letters. Go back and lightly erase your pencil lines as you work and as you are happy with the results.

Go ahead and move on to those Marquee light ‘bulbs” with the yellow and orange Kelly Creates pens and white Moonlight marker, working on creating dimension with shadows and light and blending.

Now start to fill in those shadows with the red!

Don’t forget that apostrophe! Next, go back with your red fineliner or bullet tip pen and draw in horizontal lines on top of the red shadows.
Once that is done, add your Black Fineliner .005 pen lines for shadow line accents, and then move on to the popcorn lettering. You have already done this once, so you got this! With your pencil, draw the scallop top of the bag on each letter about ¾ of the way up the letter. Leave the top of the letter for the popcorn!
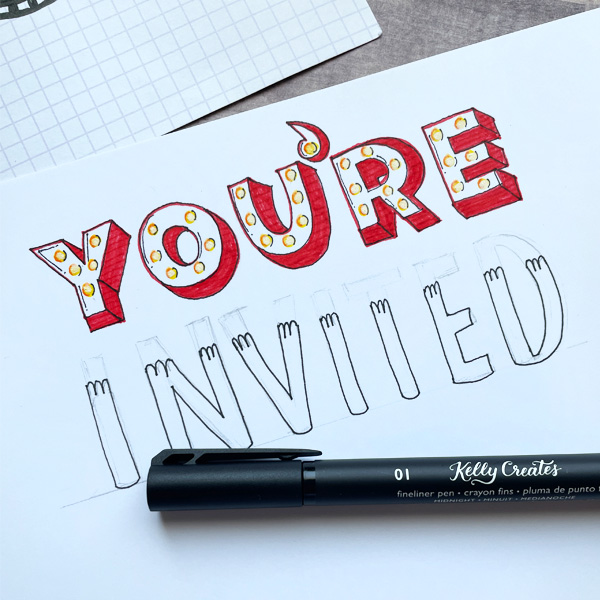
Next, outline the bags with the 01 Black Fineliner pen. Draw the popcorn on the top part of the letters. You can start with a pencil, or just draw directly with the Black Fineliner 005. Once you are happy with the look of the letters, erase the pencil lines. One of my favorite features of the Kelly Creates Black Fineliner pen set is that they do not bleed or smudge. These pens are quick drying and waterproof.

Then with the red Hibiscus Multicolor Small Brush Pen, draw the stripes on the “bags” of each letter. Colour the popcorn with the Sunset and Sunshine Dream Pens, and use the Kelly Creates Blender pen to blend the colors together.
I used some red cardstock and red striped patterned paper to mat the invitation, and wrote the party details ‘for date place’ using Kelly’s Fine Black Brush pen from the Deluxe Lettering Kit. (Note: I decided to leave out the filmstrip drawing but it would make a cute border on the bottom).
Again, this lettering would be perfect for a child’s name, a birthday card, a summer celebration and so much more. Thanks for stopping by today. Please share what you create with us by tagging #kellycreates online… we love to see your work!
***************************************
For more inspirational crafty lettering ideas, follow Chasity on Instagram @chiciscre8ive
Shop the supplies Chasity used by visiting my online store at http://www.KellyCreatesStore.com or click on the images below.