
Gemma @lettersflowersandtea is back! Our specialist on florals and lettering, she has a beautiful tutorial showing how to draw a basket weave pattern on your letters and monograms. Drawing these squares and lines in a pattern is so relaxing!

Kelly Creates Supplies: Grid paper, Black fineliners, Multicolour bullet tip pens , Project pad, Eraser, Pencil, Ruler from Deluxe Lettering Kit, Aqua Brush Pens
Other materials: Light box, Washi tape or clip (optional)

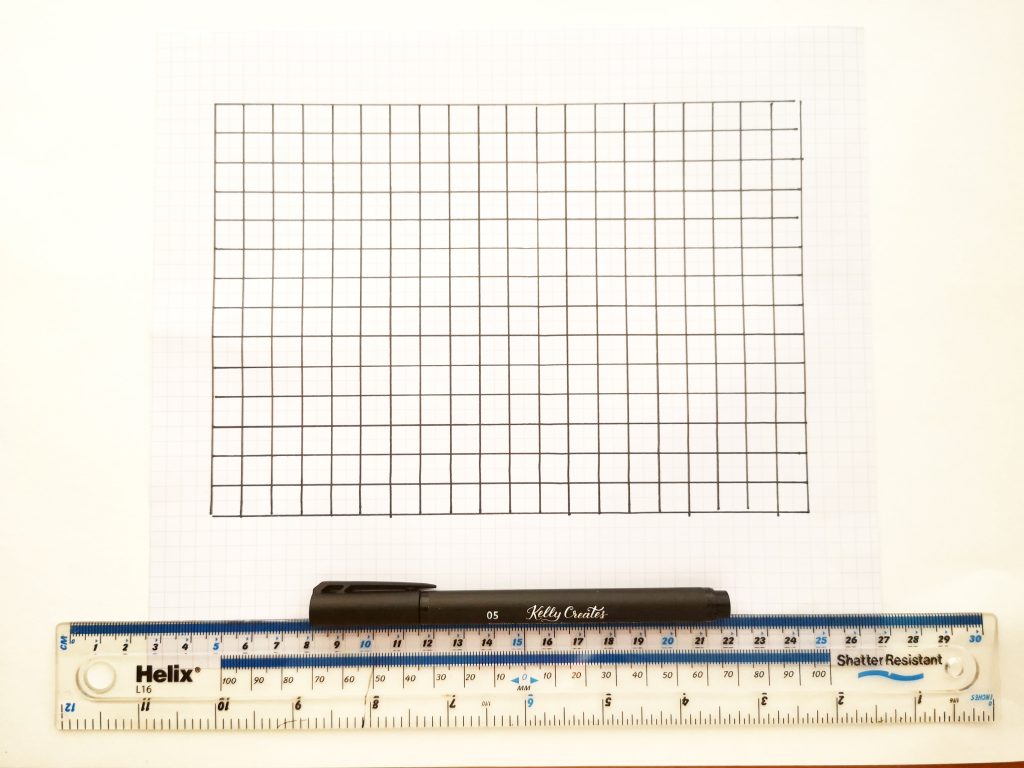
Take a piece of Kelly Creates Grid paper and with the Kelly Creates Black Fineliner 05 and a ruler draw out a large grid of 2×2 squares. Set this to one side for now.
On a piece of white silky smooth card stock from the Kelly Creates Project Pad, draw a large chunky outline of your letter. The paper and letter need to be quite big so that you have plenty of room to add the basket weave pattern.
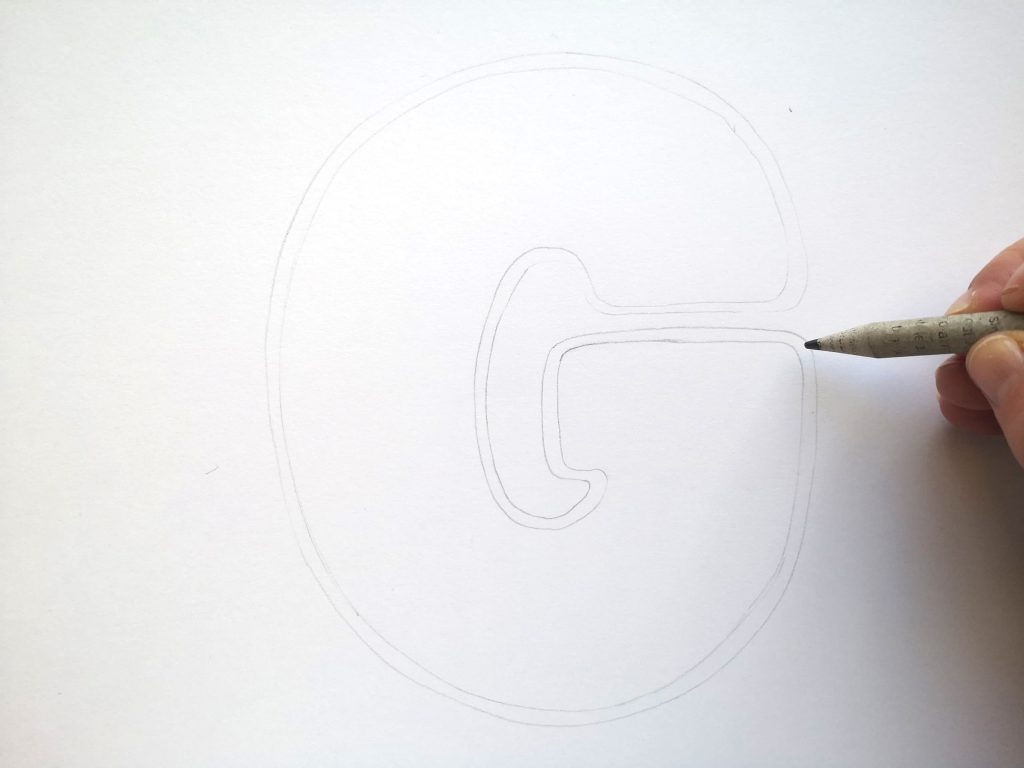
Draw a narrow border around your letter.
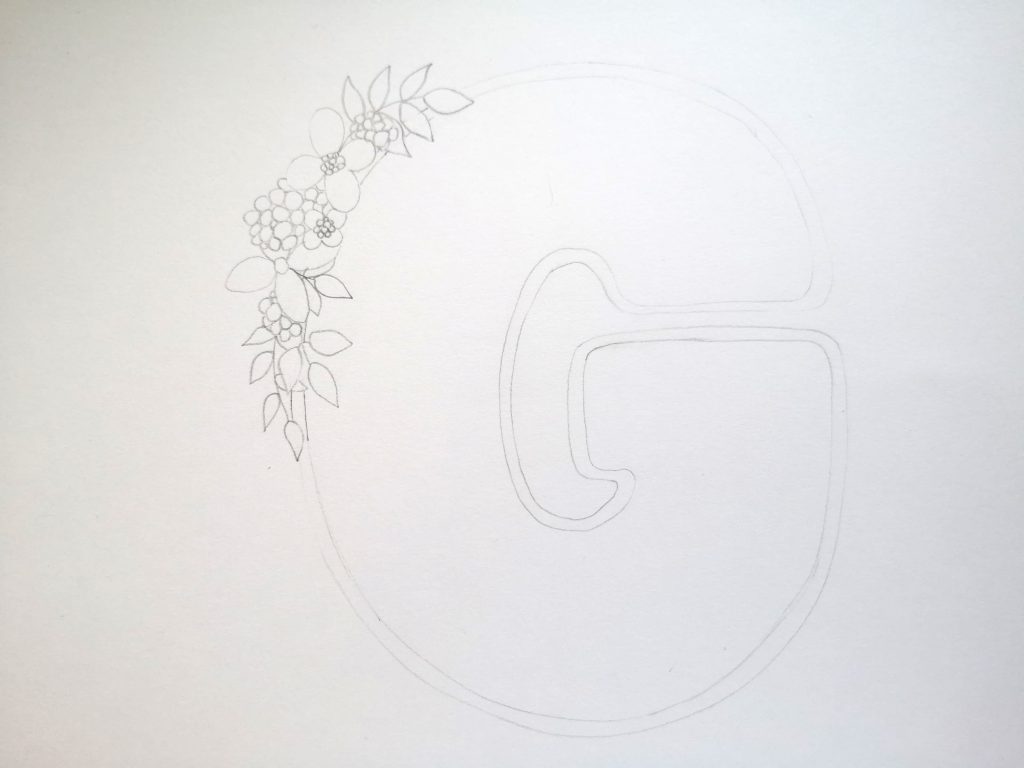
If you want to add flowers, now is a good time to sketch these, especially if any detail is going to overlap the letter design. This will make it clearer to see where you need to colour later on.
Pencil some small diagonal lines which will look like ribbon going round the basket edge. 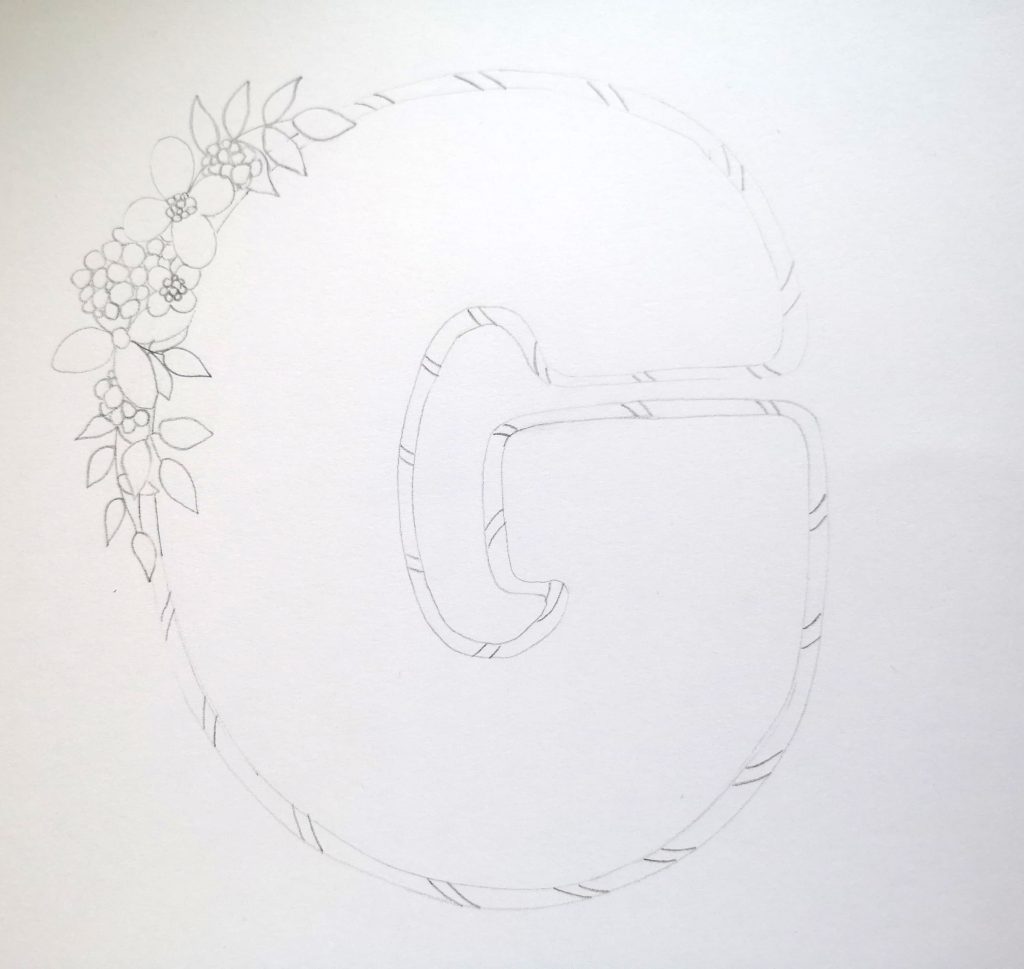
Now for the tricky bit! This can take some time to grasp but is a really great effect once you get the hang of it. We are going to create the basket weave effect. Take the grid you created earlier and place under your paper. Make sure that there is part of the grid under every bit of your letter shape. If you have one, place your work on a light box. Tip: small bits of washi tape or a clip can hold the papers in place.
Before attempting this on your final piece, I suggest practising this pattern on some scrap paper first. Here are the steps to create a basket weave effect. (I am showing it on a separate piece of paper)

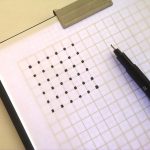
Using your grid as a guide, find a ‘cross’ (the point where 2 lines intersect) and draw a small even square and fill with black Fineliner. Repeat this until you fill the desired space inside your entire letter.
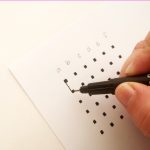
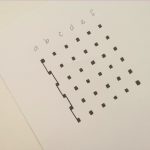
Think of each vertical line of squares as columns. For the purpose of this exercise I have referred to them as columns a – f.
Starting with column a, draw a line connecting the first two squares on the left hand side. You can do this freehand, you don’t need a ruler.


Sticking with column a, draw a line on the right hand side connecting squares 2 and 3.
Continue connecting the squares alternately as you move vertically down the column.
Now do the opposite for column b. by starting on the right hand side connecting squares 1 and 2 and then alternately all the way down.
Repeat what you did for a. and b. for columns c. and d. and so on as you start each new set of columns.


Ok, now for the horizontal lines, this is where the weave pattern starts to magically appear before your eyes! Let’s go back to column a and b, we’re going to join the first two squares in a. and b. together by drawing a line UNDERNEATH.
The next line goes on TOP of the next two squares. Then repeat this by going bottom, top, bottom, top and so on… as you move down the columns.
We are going to join columns b. and c. starting at the TOP and then going bottom, top, bottom etc… as you move down the columns. Then repeat for each set of columns as you move along. Pretty cool!


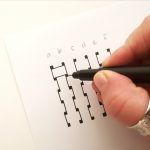
Now you’ve got the technique, we are going to replicate this pattern onto your letter. Where you are unable to draw a full black square, continue to draw part of it. Same for any lines, continue these until to you run out of room! Tip: If you find a gap, just remember that it will be the opposite to the line on the other side of the square.

Now you have all elements of your design. Go over your pencil marks with the Kelly Creates black fineliner. I chose a finer tip Fineliner pen for the basket weave pattern and flowers (01) and used 03 for the edging.
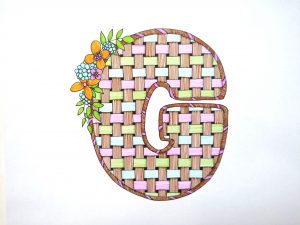
See all your vertical weaves? We are going to fill these with coloured vertical stripes. I have used Kelly Creates Multicolor Bullet tip pen ‘Nest’

You can choose any colours for your horizontal weaves. I found the Kelly Creates Multicolour Bullet tip pens in Wildflower, Palm and Breeze were just perfect for this ~ lovely Easter pastel colours! Don’t forget that these lines need to go horizontally.

Colour in the ‘ribbon’ and then using the Kelly Creates Nest Bullet tip pen again, fill your border with slightly curved lines.
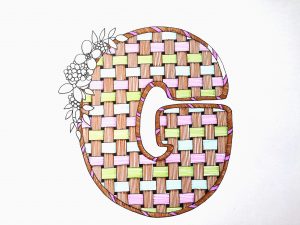
Lastly colour your flowers and leaves with any of the Kelly Creates Pens: Bullet pens, Dream pens or Aqua Brush pens in whatever colour you choose! I used the Yellow Aqua Brush for my flowers and the Bullet Tip pens for the foliage. Erase any pencil lines when dry.
I hope you have enjoyed following the steps for a basket weave monogram, and I’d love to see what you create. Tag me @lettersflowersandtea and #kellycreates in any of your work that has been inspired from this tutorial.
**************************
Follow Gemma on Instagram @lettersflowersandtea for beautiful and inspiring florals and lettering!
Shop the supplies Gemma used in this project by clicking the affiliate links below or visit http://www.KellyCreatesStore.com


PIN ME!
