
Erica is always designing creative word art, and today she is sharing a tutorial on how to make your words look like ocean waves!
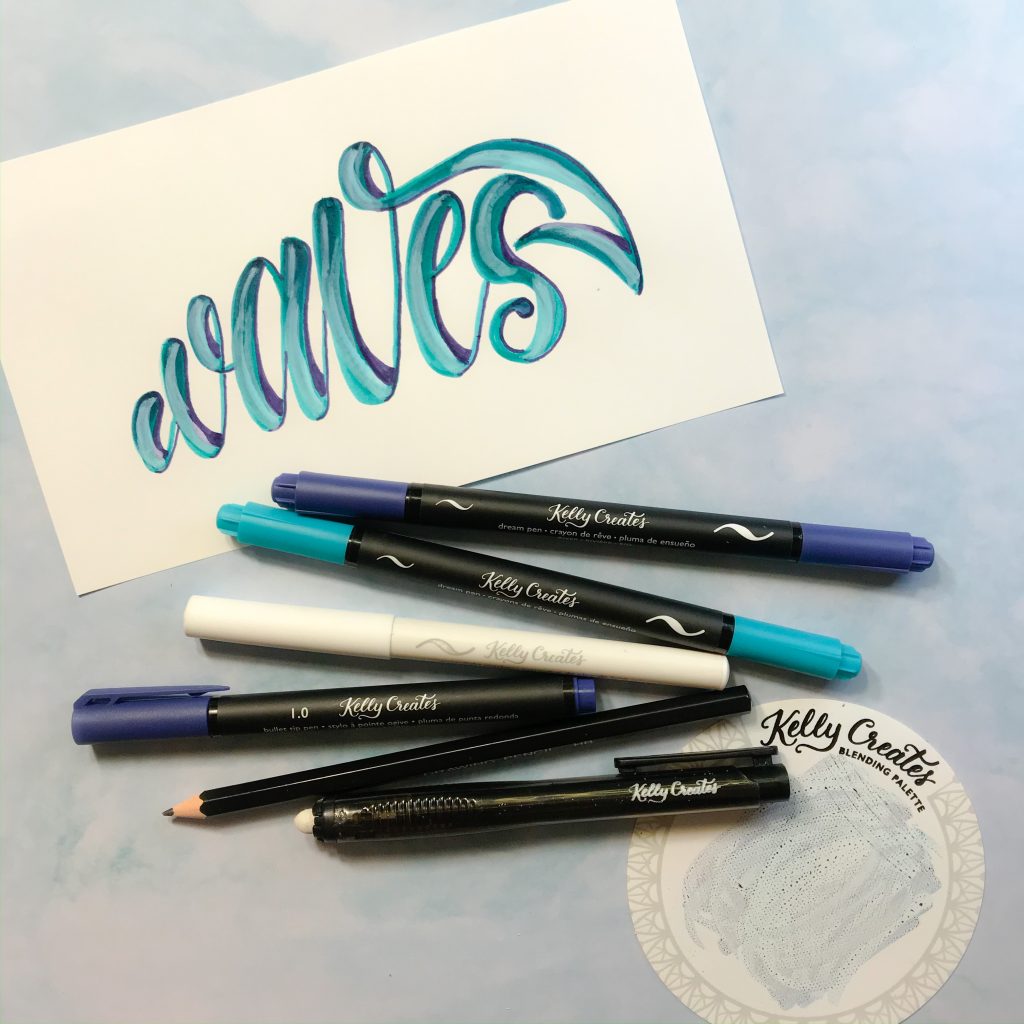
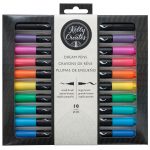
Kelly Creates Supplies: Dream Pens Set 1, Dream Pens Set 2, Moonlight Markers, Multicolor Bullet Tip Pens, Blending Kit (palette), pencil, eraser (Deluxe Lettering Kit), Project Pad (white card stock)
Optional Supplies: Light pad, Watercolor paper or Bristol paper
The handlettering process is sometimes more like drawing letters than writing. This is especially the case when adding details and artistic touches.
When I look at a word, especially a Love Letters word (our Facebook group daily lettering challenge), I consider a few things. How does the word make me feel? What do the style and colors “feel” like to me? What can I add to give it interest?
Today I’m going to show you how you can take a simple word and make it into an image. And that word is “waves.” Like most people, when I see the word ‘waves,’ I think of ocean waves…beach, movement, hues of blue and white foam.
Because I want to letter this word with movement, I’m going to letter the word in the shape of a wave.
Let’s begin by making a template. Take a piece of paper and draw a simple wave outline with your pencil. Don’t worry if you need to do some erasing and adjusting!

Once you are happy with your wave outline, you have a couple of options for the next step. You could begin by drawing the letters directly inside the wave shape with your pencil (and erasing later). My preference is to use my light pad by placing a blank piece of paper over top of the wave shape and adding the letters inside the wave shape.

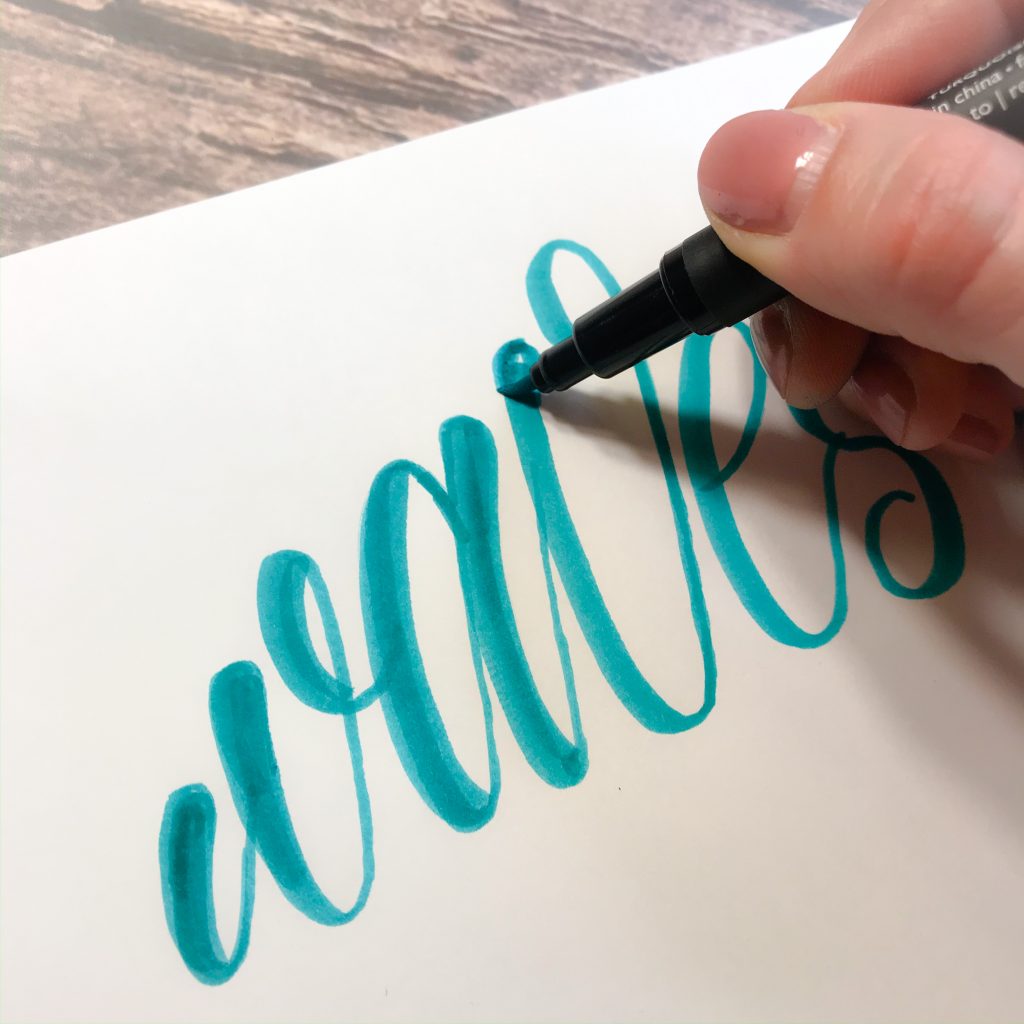
Follow the lines of your shape, filling the space with your letters. Here, I have used the tail of the V loop to create the tip of where the wave is curling around.
Now you have your template for your actual lettering!

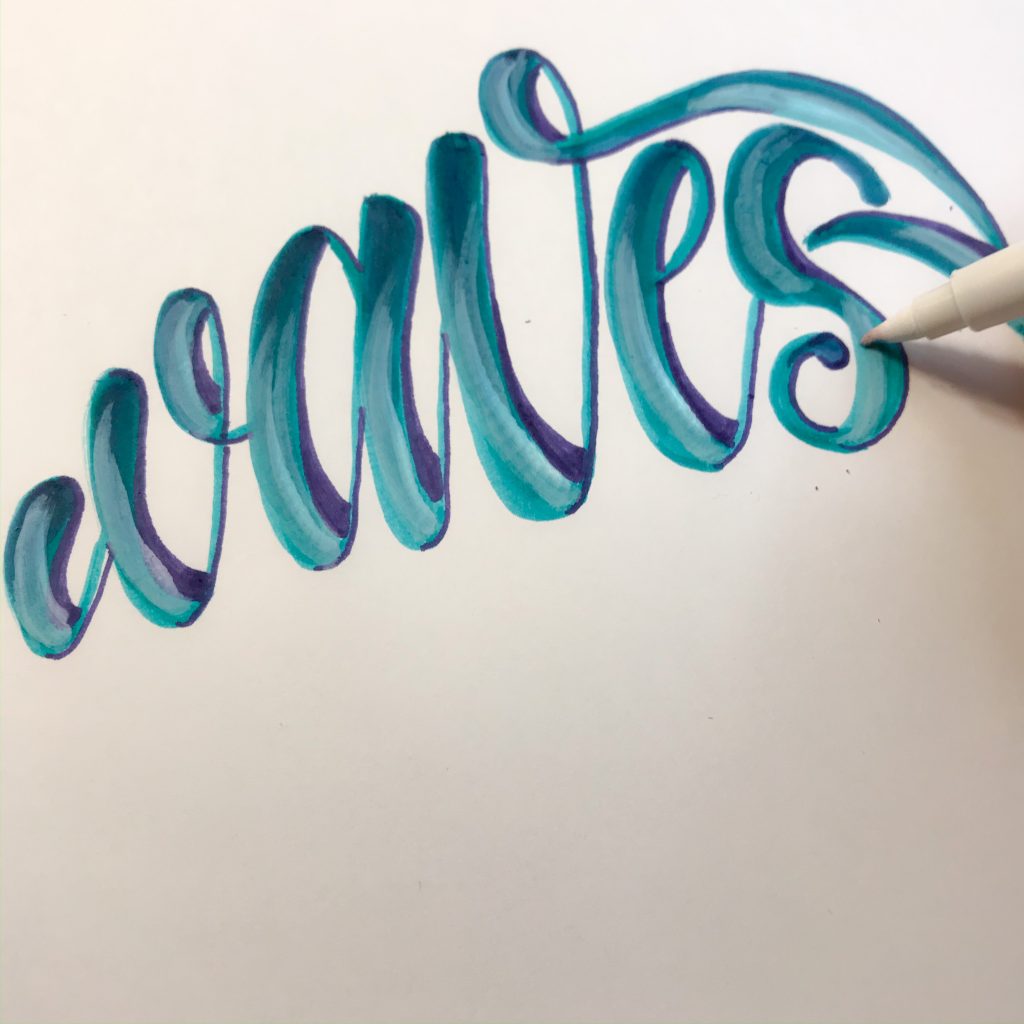
Using the light pad, trace the template with your Kelly Creates Dream Pen in Turquoise. Turquoise is the perfect base color for waves. You could also trace over your pencil lines and erase the pencil after you have your color added.
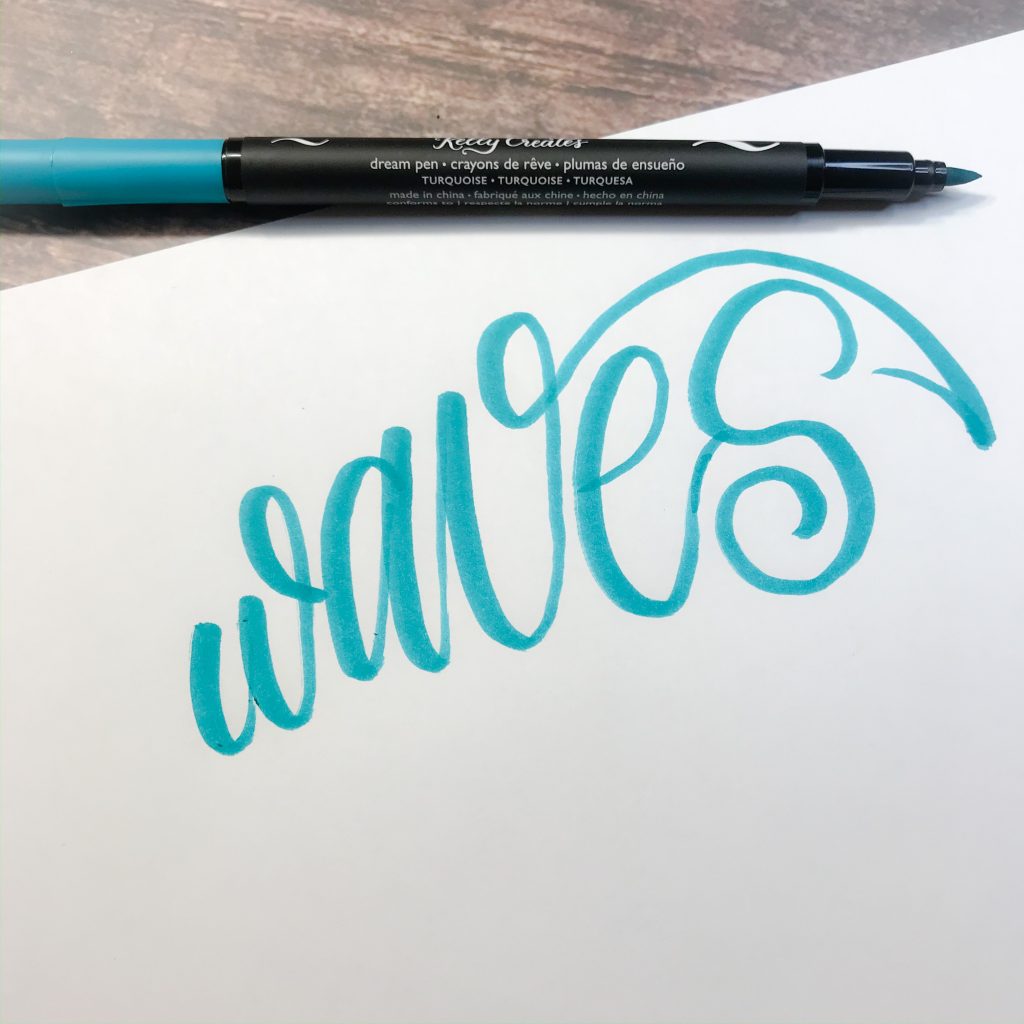
Use the same Kelly Creates Dream Pen in Turquoise to make your thick lines thicker and since water doesn’t have sharp lines, round off any sharp points in your letters.
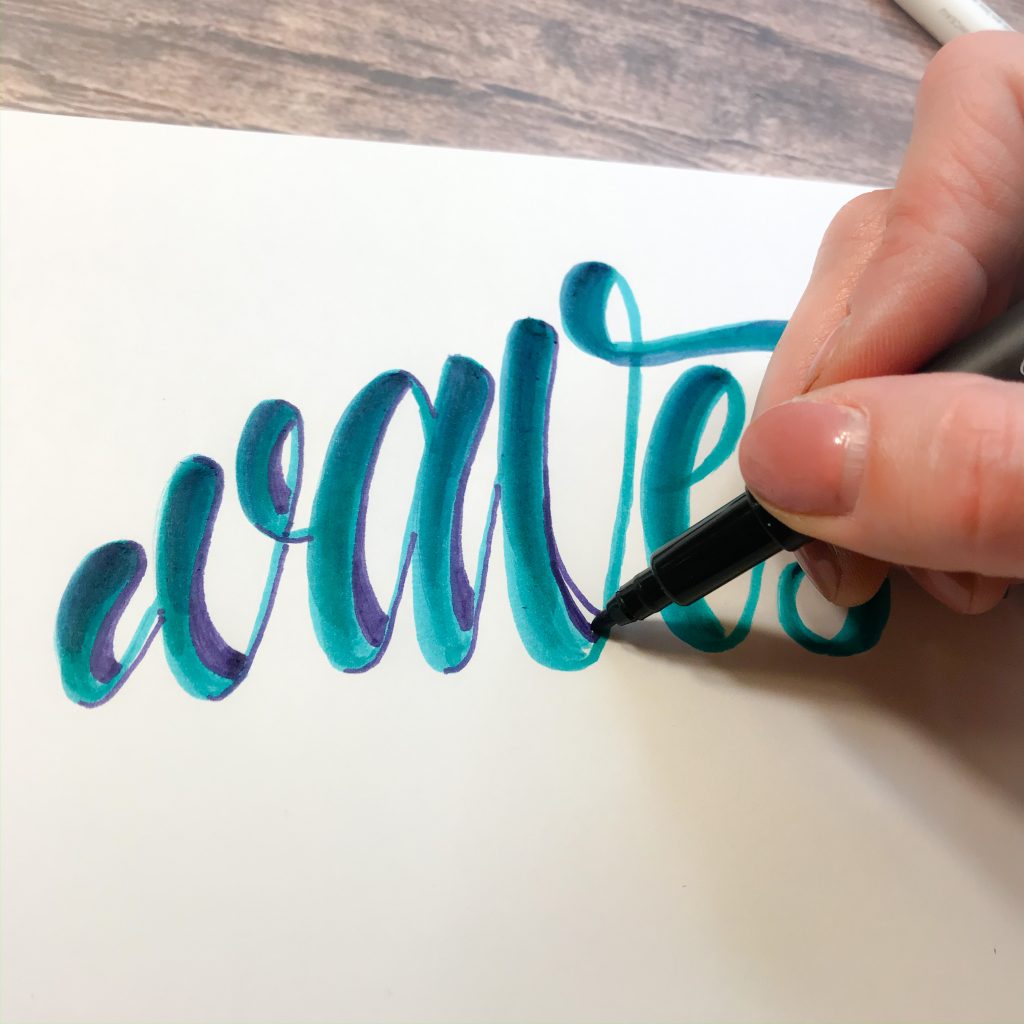
Let’s add some shading. Create a layer of ink on the Kelly Creates Blending Palette using the Kelly Creates Dream Pen in River.

Drag the Kelly Creates Dream Pen in Turquoise through the River ink on the Kelly Creates Blending Palette so that you have River ink on the tip of your Turquoise marker.

Add shading by starting at the peaks of each letter and lightly pull downward. Using the same Kelly Creates pen that you used for the base color as the blending marker helps keep the blending soft.
 To ‘clean’ or remove any leftover River ink from your Kelly Creates Dream Pen in Turquoise, make a few strokes on smooth paper until you no longer see the dark blue River ink and you only see Turquoise.
Create dimension by adding some shadows using the Kelly Creates Bullet Tip Pen in River. Make the shadow thicker along the right edges of the thicks, and a thinner shadow/line along the right edges of the thins.
Use the Kelly Creates Moonlight Marker to add white highlights because you can’t have rolling waves without white bubbles and foam!
You now have created “Word Art” : a word that has been transformed into an image! Here are a couple more examples of word art I have designed: “tears” and “football”.

You can letter inside any shape! What will you try? Share with me on Instagram or Kelly’s Facebook Studio page or our group!
[Feel free to leave a comment for Erica about her tutorial! We would love your feedback!]
******************************************
For more creative lettering inspiration, follow Erica on Instagram @ericalligraphy2
Shop the supplies Erica used by clicking these affiliate links below or visit http://www.KellyCreatesStore.com


PIN ME!

Brinda Coble
February 24, 2020 at 2:42 pm (6 years ago)This is amazing! I love it!
Linda
February 24, 2020 at 5:39 pm (6 years ago)Love this tutorial, Erica, especially the questions to consider before writing out your words. I love how you shared the process of “thinking this through”. Thanks for sharing it.
Diana
February 24, 2020 at 8:07 pm (6 years ago)Thank you for sharing this awesome technique. I never think outside the box of creativity. This really helps me see words a new fun way.