
Chasity (@chiciscre8tive) always brings her cute style to our blog with her awesome tutorials, and today she is sharing some Christmas hand lettering on envelopes!

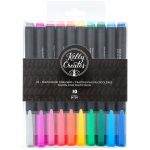
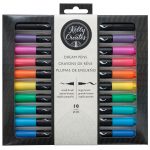
Kelly Creates Supplies: Deluxe Lettering Kit: Pencil, Eraser and Ruler; Dream pens Meadow Set 2; Moonlight Markers; Multicolor Small Brush Pens, Aqua Brushes, Grid Practice Pad, Multicolor Fineliners
OTHER SUPPLIES: Water and paintbrush, Envelopes
OK lettering lovies! Happy December!!! I can’t believe the holidays are upon us . As you know, I love to letter my envelopes for sending Christmas cards! I was so inspired by Kelly’s Christmas cards she made with us on Facebook, I have been making cards with all of my favorite paper lines. Now I need to dress up those envelopes! This year I am going to show you yet another way to letter those ‘lopes to make them extra special. The postman and the recipients will thank you!
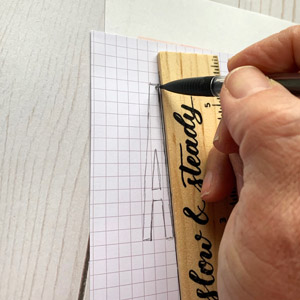
I started by sketching my Alphabet on the Kelly Creates Grid Paper pad. I knew I wanted to add some dimensional greenery and berries to each letter, so I used a tall block letter style. You can make them any size you would like based on the envelopes you are using. I love having the Kelly Creates Paper Pads handy to sketch out my ideas before I commit the design layout.

After you sketch the letters, you can go back with the ruler and pencil from the Kelly Creates Deluxe Lettering Kit and draw straight lines if you would like straighter lines and don’t want to free hand the letters.
 You can draw the whole alphabet or just the first letters you will use for the last names on your cards.
Once you have the base letters sketched out, add the greenery and berries. Draw the berries on the letter and lines that will become the greenery.

Now it’s time to grab those Kelly Creates green pens and create some branches. I used 2 Multicolor Fineliners, a Kelly Creates Small brush pen and a Dream pen to create the “evergreen branches”. The more colors you use, the more realistic and dimensional the greenery will look. 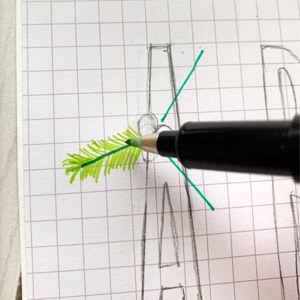 I started making short strokes on either side of the line I drew in pencil. I started with the Sage Multicolor Small Brush Pen. I then went back and layered the 2 Kelly Creates green Fineliners, Meadow and Turquoise. I varied the size and stroke for a natural look. I went over the center pencil line to make it darker with the Kelly Creates Dream Pen Evergreen.

Next I used the Fire Fineliner to draw the berries. To add some more dimension, I added a stroke of Cardinal dream pen to create a look of a shadow under the berries.

Then I used the Kelly Creates Moonlight Marker to add a highlight on the top of the berries.

Now that the greenery is done, I focused on the letters! There are so many variations of what can be done with the base letter. You can outline it, give it a shadow, color it in, fill in with a pattern, so many possibilities!
I tried a few different styles to see what I wanted to use on the envelopes, and ended up loving them all!

Here are the letters outlined, with a shadow, in different colors. I even tried a candy cane pattern for the letter D.

As you can see, you can vary where you put the greenery based on the letter!
 Now that you have the letters down, it’s time to move on to the envelopes. I started with the same steps and sketched out the letter on the envelope. I planned to only draw the first letter of the last name of the recipient, and brush letter the rest.
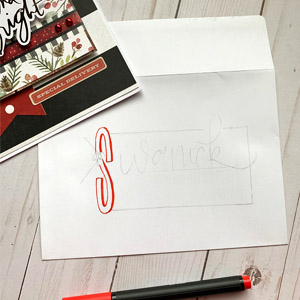
I added a fun border with the pencil and sketched out the rest of the name and address. Next I used the Fire Fineliner to draw the letter and border.
 I used the Emerald Multicolor Small Brush Pen to add the address.

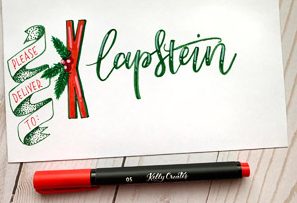
I had fun adding different elements to the envelopes for extra eye-catching decoration. You might recognize this next last name! I drew a cute banner to the side of where the last name will be.

I used the same Kelly Creates Fineliner to “shade” the banner with a stipple effect. It’s as easy as using the tip of the pen to create small dots. Add more dots where the shading should be darker. This is called ‘stipple.’ Create the letter with greenery and berries, then brush letter the rest of this amazing last name!

Next use the Fire Fineliner and add some simple lettering and write “Please Deliver To:” in the banner.
Another fun variation for envelopes is sketching all the upper case letters on the envelope. This special letter is going to the BIG GUY himself!

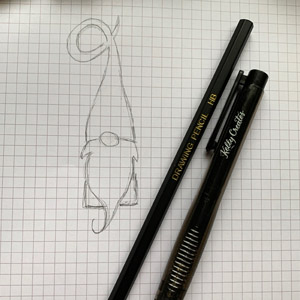
You can even draw an adorable Santa Gnome to add to the envelope. I always start with practicing the sketch on Kelly’s Grid Paper Pad before I commit to the design on the envelope. I simply colored in the design after it was outlined. For the nose, I used the yellow Kelly Creates Aqua Brush Pen, some water and a brush to fill it with flesh color.
And lastly… If you want to keep it simple, you can add the greenery and berries to brush lettering and even some washi tape to the envelopes.This technique is perfect for cards you give in person and don’t need to add the address.

I hope that you are inspired to sit down and try a few of these fun techniques on your holiday envelopes. I can’t wait to see what you try, or better yet…what you come up with! Please share what you create in our Facebook group “Kelly Creates Art & Calligraphy” or tag #kellycreates on Instagram!
Chasity really knows how to dress up an envelope for the holiday season…and now I want to make more cards AND envelopes!!
Follow Chasity on Instagram @chiciscre8tive for more creative, crafty ideas!
To shop for the supplies Chasity used, click on the products below or visit http://www.KellyCreatesStore.com


PIN ME!

Brinda Coble
December 13, 2019 at 4:51 pm (7 years ago)This is awesome! Thank you so much!
Linda Epstein
December 13, 2019 at 6:13 pm (7 years ago)This is a wonderful tutorial, Chasity. Thank you and Merry Christmas.
Gail borczyk
December 13, 2019 at 8:18 pm (7 years ago)What brush set do i find the red liner you used fir candy cane? I have both dream sets and theres no red! Small brush pw s dont have a red pen either!
Kelly
December 13, 2019 at 8:32 pm (7 years ago)Hi Gail! Chasity is using the Kelly Creates Multicolor Fineliners for this project, and this set has a bright red called “Fire.” Two other nice sets with a bright red is the Aqua Brush Pens, and the Multicolor Bullet Tip pens.