
Chasity (@chiciscre8tive) has been playing with the new Kelly Creates Foil Quill USB Design Drive and the results are stunning! The blending she has done with the Aqua Brush pens is so beautiful. Even if you don’t have a Foil Quill or Digital cutting machine, you can recreate this card with pens and colouring.

Kelly Creates Supplies : Project Paper Pack, Foil Quill USB, Blending kit, Aqua Brush Pens, Galaxy Washi Tape
OTHER SUPPLIES: Electronic Cutting Machine (Silhouette, Brother Scan N Cut, Cricut etc), WRMK Foil Quill, Adhesive Runner, Paper Trimmer, Score Board, Foam Adhesive Dots
I think I have found a match made in heaven! Hi everyone! Chasity here today, and I’m so excited to show you a product of Kelly’s in collaboration with We R Memory Keepers! Kelly and WRMK launched a USB PACKED FULL of Kelly’s stunning art and lettering to work with the Foil Quill Stylus. Quick note on the Foil Quill if you haven’t heard of it, this tool allows you to turn your digital cutting machine into a foil machine! So let that sink in for a moment… Kelly’s beautiful letteringin the foil color of your choice. SWOON!


Kelly’s USB is stuffed with over 200 images that include: Upper and Lowercase Alphabets, Borders and Patterns, Flowers and Leaves, Mandalas, Days of the Week and Months and lastly, Words (sentiments). It has everything you need to make luscious, shiny cards, layouts and home décor projects! To learn more about the Foil Quill, click HERE.

For this project, you will need an electronic digital cutting Machine. If you don’t own one, this Kelly Creates USB might just convince you that your life is not complete without one in your home. You will also need the We R Memory Keepers Foil Quill Stylus and Foils. The Files on Kelly’s USB are SVG’s and PNG’s, so this can be used with the most popular digital cutting machines.

I created this beautifully foiled card quickly and easily using just a few tools, and incorporated some pops of color with Kelly Creates Aqua Brush pens and Blending Kit!
For the sake of time, I won’t go into much detail about the Foil Quill and electronic die cutting machines because directions will depend on the machine you have, and the Foil Quill comes with great instructions and tips and tricks that will show exactly how to use this amazing tool. I suggest familiarizing yourself with both the machine and tool, then follow along to make this card and search YouTube for helpful Foil Quill tutorials.


First step is to plug the USB into your computer or digital machine, and select the images and/or sentiment you would like to use. For example, I have a Silhouette Cameo 3, and I chose to use these SVG’s to create this card:
- Flowers folder, Flower 2.svg, (this created the background pattern)
- Borders folder, Circular Border 3.svg (this is shape I added the sentiment to)
- Words Folder; Thank you , Thanks.svg. (Sentiment)
I really love how all the images are organized on the USB so I can quickly find exactly what I need!
 Once you have selected the svg files, bring them into the software program for your electric die cutting machine. I used the Flower 2.svg to create a pattern background for my card. I just repeated the image randomly.
The next step is to use the Foil Quill to foil the images on the card. I used the Standard Tip Foil Quill, and gold foil to create this card.


Just a quick note, plug your foil quill stylus into an external battery, not into your machine, and let it heat for 5 minutes. You are ready to foil! Remember to follow the instructions for your machine and the instructions for the foil quill.


Look at how beautiful the pattern is on Kelly’s black paper from her Project Pad! Here is the reveal right out of the machine! TIP: Just as a side note for anyone using the Silhouette, I had my settings in the software at: Material: Cardstock; Plain. Action: Sketch, Speed: 10 and Force: 18. This gave me a beautiful foil transfer of Kelly’s flower.
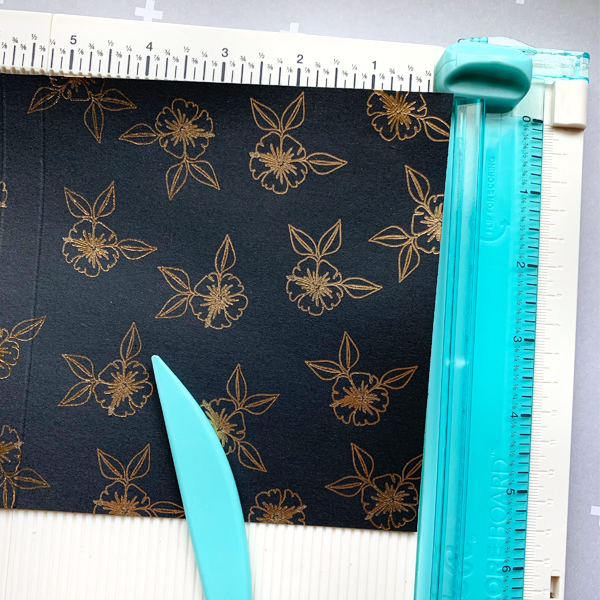
This creates the background for the card. Trim the black cardstock to 5” x 10 inches and score at the 5” line. Fold in half. You can also choose to layer this with the white cardstock that is included on the Project Paper Pack to make it thicker.

 Follow the same steps to create the foiled wreath with the “thanks” sentiment. I used the white cardstock from the Kelly Creates Project Paper Pack. It is possible to foil then cut on your machine. I opened both the Circle Border and ‘thanks” sentiment and combined them into 1 svg.

Repeat foiling process. If you don’t remove the mat once it is done foiling, you can send it back through and cut the outline. If this is too tricky, you can always fussy cut around the foiled image as well.

Now that the foiling process is complete, you can put the Foil Quill and machine away! Pull out your Kelly Creates Aqua Brush Pen Set and Blending Kit, and let’s color!

I colored half of the leaves with the Jungle Aqua Brush pen and blended the other half with the blending kit to lighten up the green slightly.


Next, I used the Blossom Aqua Brush Pen to color in the edges and center of the flower.
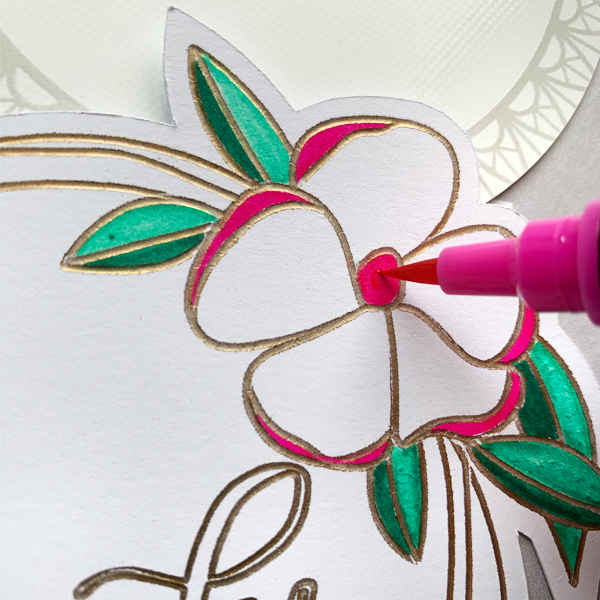
Then I used the beautiful yellow Sunshine Aqua Brush Pen to blend the flower petals from the center outwards, gradually getting lighter.


I used the same technique to color in the letters of my sentiment “thanks” and blended together. I really love the pops of color, and still adding some personal touches to the card.

The last step is to assemble the card. I accented the card with 2 of the Washi Tapes from Kelly’s Galaxy Washi Tape set because I am addicted to all washi and washi makes everything better!

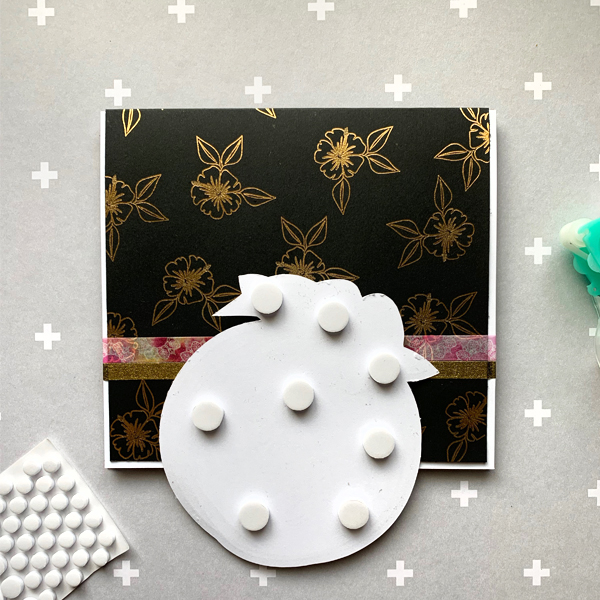
For the final step, I added some foam adhesive dots to the back of my die cut to add some dimension to the card.
That is the completed foiled card! Everything is better with foil! I really love that Kelly keeps giving me products that allow me to use her amazing lettering skills. I love that her USB also comes with her hand lettered alpha’s that really allow me to personalize my projects. I really hope that you enjoyed this tutorial and give it a try. It’s a little different from traditional lettering as a fun new twist on Kelly’s remarkable style!
Be sure to show us what you create. Share with Kelly on her Kelly Creates Studio Facebook page….we would love to see your Foil Quill projects!
Chasity always takes things to the next level! I would never have thought of coloring the Foil Quill designs with such stunning results.
For more lettering and crafty inspiration, follow Chasity on Instagram @chiciscre8tive.
To shop for the products in this project, click on the affiliate shopping links below or visit KellyCreatesStore.com:


PIN ME!

Bonnie
July 20, 2019 at 1:15 pm (5 years ago)Beautifully done Chasity ??
Chasity
July 23, 2019 at 1:08 pm (5 years ago)Thanks Bonnie!
Julie Bentley
July 26, 2019 at 11:26 pm (5 years ago)Hi I have just bought Kellys Foil Quill USB and am wondering if there is a list of the pictures on this USB that has its corresponding file names to them please.
Kelly
August 6, 2019 at 5:41 pm (5 years ago)Hi, I don’t think there are corresponding file names but you can email American Crafts acinfo@americancrafts.com and ask them or contact We R Memory Keepers.