Meagan Guild (@theillustratedplanner) is going to brighten your day with this beautiful butterfly mood tracker tutorial. This will be the prettiest spread in your journal or planner for sure!
It may still be snowing outside in your part of the world, but I’m definitely mentally ready for spring! While this layout might look complicated…it’s really not! I’ll be giving you step by step instructions to make it manageable. When you get to the end you’ll realize that it was quite easy!
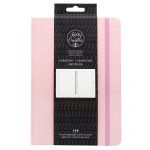
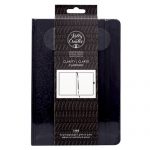
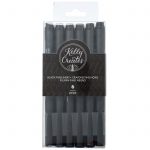
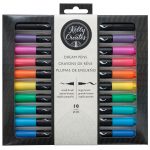
Kelly Creates Supplies: Black Fineliners, Creative Journal, Dream Pens Set 1 and Set 2, Deluxe Lettering Kit (Pencil and Ruler)
Step 1.
With a pencil, go about ⅓ of the way down the page and draw a circle across the two pages to make the head of the butterfly. The circle should be around 3 dots by 3 dots. For the butterfly’s main body (thorax), draw an oval that is about 10 dots in height. Last, draw the thin tail (abdomen) with a height of 4 dots.
Step 2.
Now the wings! The key here is no matter what size or shape you make the wings, try to keep the wings on each side the same the best you can.
Top Wings: I counted 5 dots up from the head and 18 dots over and drew a small guide line. Then I found the middle of the thorax and drew a line 10 dots long. To make the outside of the wings, draw a s shaped line to connect the top and middle. To make the inside of the wings, draw a diagonal line from the top of the wing to the top of the thorax.
![]() Bottom Wings: Count 4 dots down from the abdomen and 4 dots over to create the bottom curve of the wing. Draw a diagonal line from the abdomen to the bottom curve of the wing. Last draw a curve to connect the bottom to the middle wing line. And now the trickiest part is finished!
Bottom Wings: Count 4 dots down from the abdomen and 4 dots over to create the bottom curve of the wing. Draw a diagonal line from the abdomen to the bottom curve of the wing. Last draw a curve to connect the bottom to the middle wing line. And now the trickiest part is finished!
Outline the whole body and the wings with the Kelly Creates Fineliner Size 05 or bigger. Add antenna to finish the butterfly.
Step 4.
With pencil, divide the butterfly into 30-31 sections (according to the days in the month). Feel free to experiment with shapes and sizes, or try to mimic your favorite butterfly pattern! To keep my sections even, I drew one section on the left and then tried as much as I could to create the same size and shape on the right size. Once you’re happy with the design, trace each section with the Kelly Creates Fineliner 05 or larger. Last, erase all the pencil lines.
Step 5.
With a smaller size pen (I used the Kelly Creates Fineliner 01) write the date in each section.
Step 6.
Color in spaces that are not date sections. For this step, I used the Kelly Creates Dream Pen in Midnight.
Step 7.
Next step is to create your color key and choose the moods you want to focus on. You can assign one color per mood, or group similar ones. I chose blues and greens from the Kelly Creates Dream Pens Sets 1 and 2. Here’s some options for moods to track:
Happy-excited-motivated…….Average-fine-just ok……..Frustrated-grumpy-annoyed……..Anxious-stressed-nervous……..Tired-sick-sad
Step 8.
Each day fill in the space with the corresponding mood color. If you find your mood changes during the day, don’t feel committed to filling in a section with just one color! I wrote the title “March Moods” with a Kelly Creates Black Fineliner in a monoline script, and my mood tracker is done. (Of course, you can use this tracker for any month, not just March.)
Seeing this gorgeous tracker in your journal put me in the BEST mood! Who knew a mood tracker could be so pretty and functional at the same time?! Thanks Meagan!
For more planner tips and and journal inspiration, follow Meagan on Instagram @theillustratedplanner.
Shop the supplies Meagan used by clicking these affiliate shopping links below:


Joan
March 14, 2019 at 7:57 pm (5 years ago)Tout a l’air tellement facile, je vais le faire en fin de semaine. Merci !
Linda Epstein
March 15, 2019 at 3:12 pm (5 years ago)Great idea Meagan, and a project that lifts the mood while you’re make it.
Debbie Sessin
March 26, 2019 at 8:34 pm (5 years ago)Kelly so excited to try your USB for the WRMK quill pens. I just purchased, and was wondering if there is a print out of designs on the drive somewhere? My eyes are not good enough to see what is on there. It would help me so much with designing a card.
Thank YOU,
Debbie
Kelly
April 2, 2019 at 6:04 pm (5 years ago)Yes Debbie, if you go to the Foil Quill web page and search the Kelly Creates USB, then you will find the images and can enlarge and see them on your screen,