
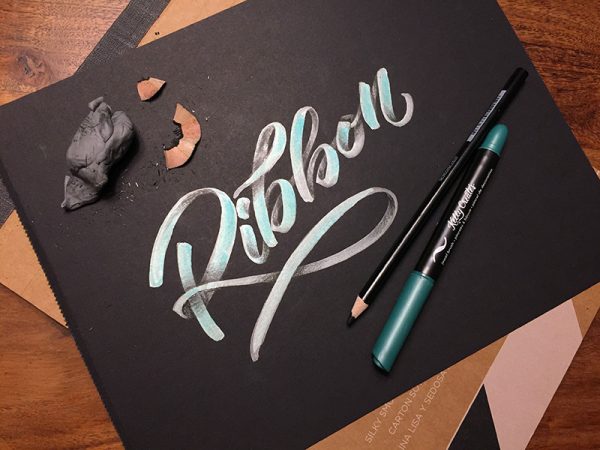
Today, Elizabeth Wise is sharing a tutorial about ribbon lettering using the Kelly Creates Jewel Brush pens.

Using smooth black paper from the KC Project Pad, write any word using a Kelly Creates Metallic Jewel Brush Pen. The more loops and flourishes you have, the better it will look in the end! Tip: I find doing this technique on black paper easier because you don’t need to worry about your shading being perfectly within the letters like you would if it was on white paper – the black paper hides imperfections.
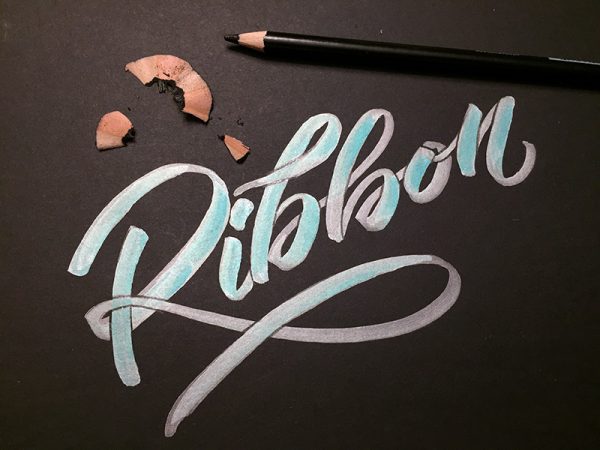

Using a black pencil crayon, identify with a guideline any places where two strokes are overlapping and decide which piece is going to be in front, and which will go behind. In most cases this will be the natural overlap that was created when you wrote the letters out. Tip: Try to alternate intersections that are close to each other to give a better effect of the ribbon wrapping around itself.


Shade the “behind” ribbon by starting with a harder pressure and moving outward to a lighter pressure with your pencil crayon. Make sure you’re paying attention to which piece you picked to be on top and ensure you aren’t adding any shading to that area unless there is a multi-layer of shading like with the post of the “R”.
Go back over your piece and identify any areas where the ribbon is curving. Draw a guideline that follows the same curve as the stroke. Tip: You can also follow the natural direction of your strokes to look for which way the curved shading should go.
Finally, use the same shading technique to the curved areas moving from a harder pressure to a lighter pressure to create the look of a ribbon curling. Using this simple technique you can turn a regular flat word into a dimensional piece of art!
Click on the following supplies to find them in Kelly’s online store: KellyCreatesStore.com
KELLY CREATES JEWEL BRUSH PENS KELLY CREATES PROJECT PAD


