
Chasity has a sparkly tutorial for you that shows how to add glitter & shine to your hand lettering. Her ‘faux’ chalkboard technique using Kelly Creates Metallic pens and Watercolor Inks looks amazing!

Kelly Creates Supplies: Metallic Jewel Small Brush Pens, Deluxe Lettering Kit (pencil, ruler, eraser), Watercolor Inks Set 3 (White & Iridescent), Lettering Watercolor Brushes, Palette with Pipettes.
Other Supplies: Glitter, Frame, Sequins, heavy weight Black card stock (or black watercolor paper)
Happy New Year Everyone! Hope that everyone is having a fantastic start to 2021. Today I am sharing a project with you to celebrate the New Year, but this technique can be used for any celebration! You can uses this on cards, layouts and home decor projects. So gather your Kelly Creates stash and let’s make a sparkly 2021 sign!
The first thing I do when starting any project is pull out the Kelly Creates Deluxe Lettering Kit. This is by far one of my favorite items in her line because everything is in the canvas storage roll and is so easy to take on the go, but also it includes a pencil, ruler and eraser. These are tools I use all the time…I need a straight edge because I can’t write straight EVER. I always draw with pencil first, so I can play around with my design and get it just the way I want (usually with a lot of erasing) before I commit to my design permanently.
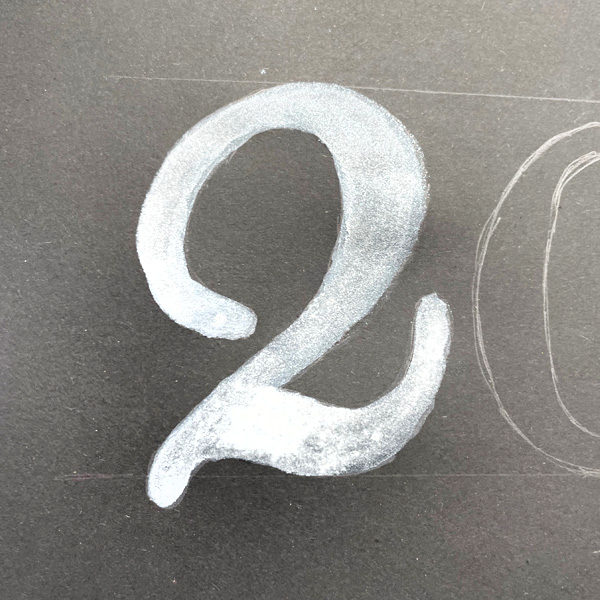
Starting with the black paper, pencil, eraser and ruler, sketch out the numbers 2021. (It’s helpful to practice drawing these numbers first on Kelly Creates Paper Pads). Keep working at it until you get it just the way you want. I used some large, wide numbers so I had plenty of room to fill them in.
NOTE: Use heavyweight black card stock so it doesn’t warp or wrinkle….or use black watercolor paper.

The next step is to use your Kelly Creates Watercolor Lettering brush and clean water to paint the inside of each number. This will help to blend the watercolors. (NOTE: Work on one number at a time). I mixed together the Kelly Creates White and Iridescent Watercolor Inks from Set 3. The Kelly Creates palette with pipettes is perfect for mixing these inks. I did this to make the numbers sparkle and POP on the black paper.

Keep re-wetting the inside of the number and painting with the watercolors. Add as many layers as you want to make the number more opaque. If you prefer it more transparent, use fewer layers, or use more iridescent watercolor ink to white ratio. This will create an Ombre effect.

Fill in the entire number. The Iridescent Ink combined with the White ink is SO pretty in real life! It’s hard to capture this in a photo.
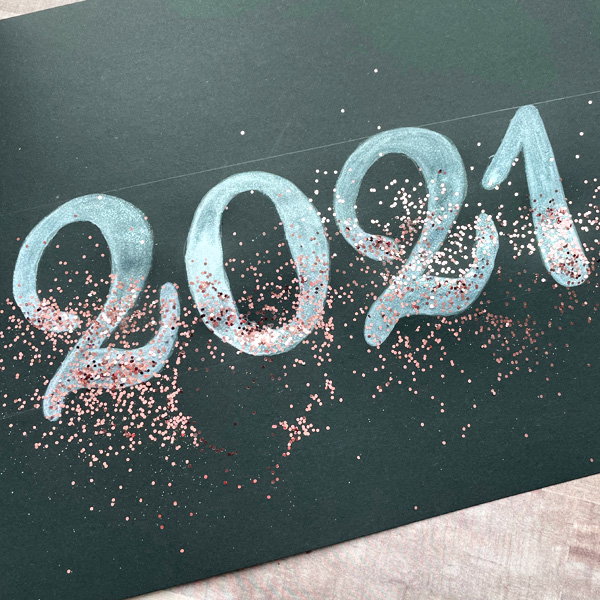
While the number is still wet, sprinkle the bottom half of the number with glitter. (I chose rose gold glitter). It is important that the paper is still pretty wet. As it dries, the glitter will stick to the area. Remember to work on one number at a time.

If you get glitter where you didn’t want it, use a clean, dry brush to remove it. I did this between each number to make sure I controlled where the glitter was placed.

Repeat this process for each of your numbers or letters. You can also go back and re-wet if needed, just be mindful of too much water and bleeding or paper tearing.
Once your numbers are dry, take the same dry, clean brush and brush away any lingering glitter.

I then used the clickable eraser from the Kelly Creates Deluxe Lettering Kit and erased any pencil lines that I could still see. This eraser is awesome for smaller areas and pencil lines. Light pressure on the black paper worked wonderfully.

Next I wanted to add a thin outline around each number. The Kelly Creates Metallic Jewel Pens on black do the trick to add some shimmer and shine to projects.

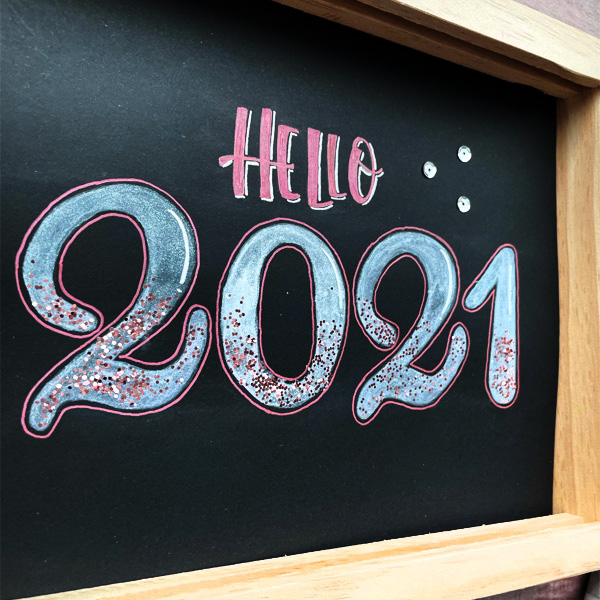
Carefully, I drew a thin line around each number, leaving some space between the number and the line I was drawing. I used the Ruby Bullet Tip Metallic Jewel Pen. Repeat this outline around each number’s edges. (NOTE: The Metallic Bullet Tip pens are discontinued but you can use the Kelly Creates Metallic Jewel Brush Pens to draw these outlines)

I wanted to add the word “Hello” to the project, because let’s face it, aren’t we all happy to see the new year after 2020!?! I sketched this out in pencil first above the 2021 in pencil.

Then I drew and filled in with the same Bullet Tip Ruby Metallic Jewel Pen so it would coordinate nicely.

Add a fun shadow to the work “Hello” with the Kelly Creates Silver Metallic Jewel Pen.

Now that the project is complete, decide what you would like to do with it. I put it in a simple wood frame to mimic a chalkboard, which I will display for the month of January, and will most likely add it to a scrapbook layout after. This would also look great in a planner or art journal. You can change out “Hello 2020” with the months of the year. “Hello January” would look super cute too! Be creative!
Thanks for stopping by today. I hope each and every one of you take time to be more creative in 2021. I think if there is anything we learned from last year, is we should all slow down a bit and do something for ourselves. Remember there are many forms of self-care, and sometimes that means taking time to create!
*********************************************
For more crafty lettering inspiration, follow Chasity on Instagram @chiciscre8ive
Shop the supplies Chasity used by visiting KellyCreatesStore.com or clicking the images below. To find a store near you that carries Kelly Creates art supplies, click HERE.


Shelley A Malone
January 28, 2021 at 2:15 pm (3 years ago)This is such a fun idea!
Chasity Sivanick
January 28, 2021 at 2:31 pm (3 years ago)Awe! Thank you!!!
Lisa
January 28, 2021 at 8:42 pm (3 years ago)It’s beautiful and that’s for your expertise, hope I get a minute to try it.?
Lisa
January 28, 2021 at 8:43 pm (3 years ago)Thanks for your expertise*