
Exciting news, friends! I have been invited to be Guest Designer for Canadian Scrapbooker magazine! This is a one year term, starting with the Winter issue, which will be released December 1. My photo and Bio is now posted on their Home webpage…so if you want to check it out, click HERE.
Quite a few of the projects I will have on my blog will also be featured in the magazine. I am thrilled and honoured to be a part of the fantastic team behind the magazine…they are a very talented group of scrapbookers!
Today I am sharing a layout I completed for the monthly staff challenge at Urban Scrapbook, the store where I teach and design….plus, I used Jill Sarginson‘s sketch from the November Sketchy challenge over at the Canadian Scrapbooker website.
Here is Jill’s awesome sketch….

…and here is my layout using the new My Mind’s Eye Lost & Found Christmas collection…
 |
|
| We Wish You A Merry Christmas |
The designer at Urban who creates these monthly staff challenges is Jan Hobbins…a truly gifted artist when it comes to scrapbooking and crafting. In our kit with these papers, she included the following which we were supposed to alter in some way: a chipboard lamp post, 2 wood snowflakes, another snowflake and holly cut from acetate, and gold metal paper.
Here is how I altered these elements…

I coloured the chipboard lamp post with Vintage Photo Distress Stain and Clear Rock Candy Crackle Distress paint. Then I added a light behind the top lamp part by tracing it onto gold cardstock.

I attached this gold cardstock piece behind the lamp with Glossy Accents. It dries quickly and is great for adhering chipboard, grunge board etc.

The lamp wasn’t shining brightly enough so I added some Gold Stickles right onto the gold cardstock.
(BTW, the lamp post, holly and snowflake were cut with a Tim Holtz Sizzix die)
The acetate holly you see on the lamp post is simply altered into a gold element using Gold Mixative Alcohol Ink. It dries immediately and gives beautiful coverage on non-porous elements like plastic and transparencies. I did the same with the clear acetate snowflake..
 |
| The snowflake on the left has the Gold Mixative on the back…hard to tell in this photo. |
The wood snowflakes from Maya road were altered with Clear Rock Candy Distress Crackle paint and then to highlight the “cracks”, I rubbed on some beautiful Accent Powder by Harmonie….
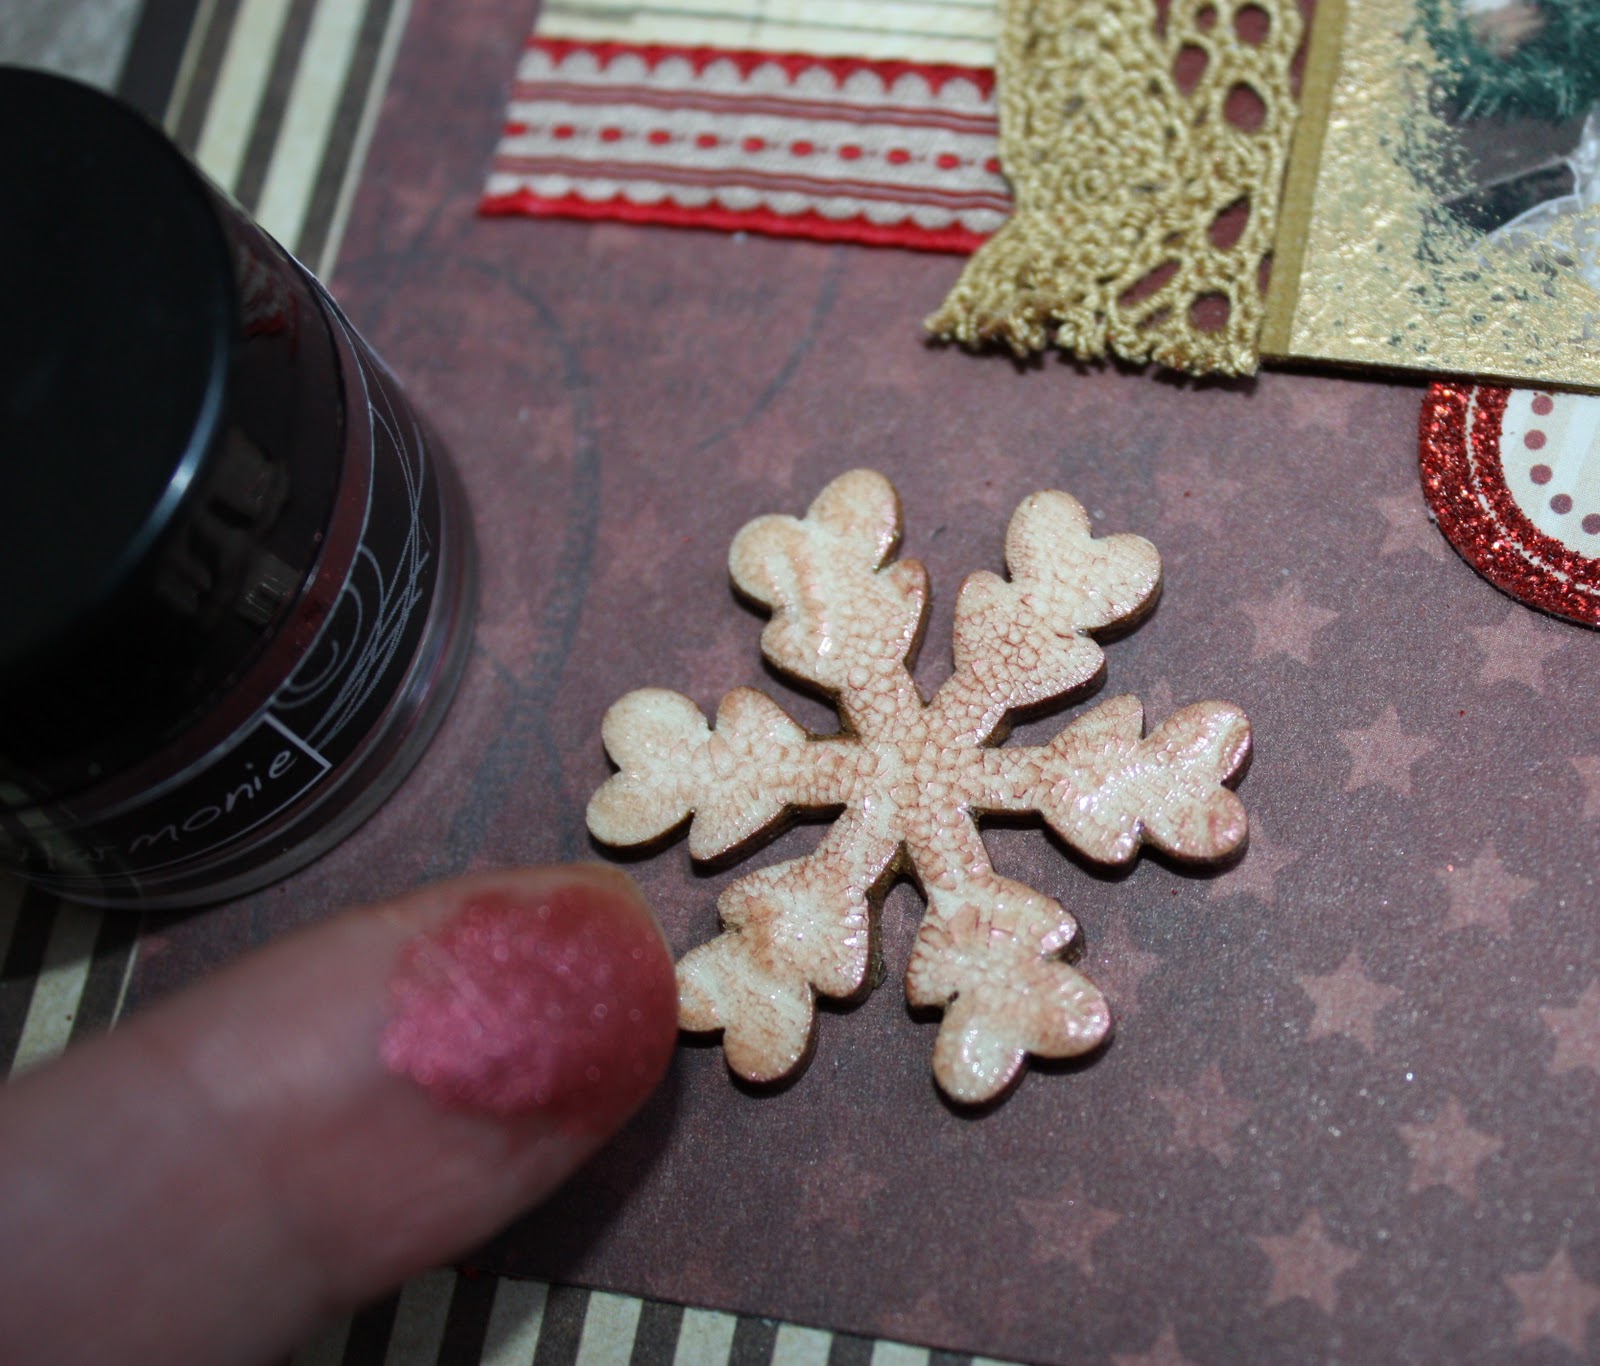 |
| The cracks just come to life with this Raspberry Accent Powder. |
I used another handy tool for the powder….my finger tip 🙂

To alter gold metal paper from Spellbinders, I used a die cut scalloped element from the MME Christmas collection and traced it to make a whole scalloped circle.

That purple doily in the photo is a steel die from Cheery Lynn…I used it to dry emboss the metal paper…
 |
I used the rubber handle of my Cutterbee scissors to rub the metal paper on the doily die and emboss it with the design. This wasn’t my official plan…I just didn’t clean up my workspace and the doily die was sitting there ….so the lightbulb went on over my head while I was looking at my metal paper! lol!
There probably is an official tool to emboss like this but I used what was sitting on my desk 🙂
 |
| And here’s the finished metal doily! |
For those of you who don’t use Photoshop or a program to alter photos, here is a handy trick to add an edge to a photograph….using paint. I added Gold Metallic paint to my Christmas tree pic…
 |
| Place your photo on a piece of scrap paper and use any paint dabber. |
 |
| Pounce or bounce your paint dabber along the edge of your photo to create a soft stippled effect. |
 |
| I didn’t let this dry on the scrap piece…I took it off so it didn’t stick to the paper. |
 |
| So easy…and it dries within minutes. |

Put it all together….and it’s a Very Merry Christmas!
The tree in the photo is very special to me, not because it is the first artificial tree we bought together when married, but it is now decorated with beautiful Swarovski crystal snowflake ornaments. One design is released every Christmas, and a few years ago I told my husband how my BFF had been collecting them since the year of her daughter’s birth. I wished I had done that. So for the past two Christmases, he had purchased all of the snowflake ornaments designed since the year of our son’s birth, 1995, and gave them all to me 🙂 I was moved beyond belief…he’s a wonderful man and I’m so lucky.
These Christmas projects have brought me much joy and helped me appreciate the spirit of the season…..
So it’s time for another GIVEAWAY!!!!
If you are a follower and comment on this post, your name will be entered into a draw to win a kit with all of these goodies that I used to create this page! If you live in Edmonton, these kits will be on sale soon at The Urban Scrapbook…so drop by! The winner will be announced next week 🙂
Miae
November 18, 2011 at 8:59 pm (14 years ago)Kelly CONGRATS!! That is awesome news about being asked to be a GDT by Canadian Scrapbooker..so happy for you:) And what a gorgeous LO you’ve created, lovin’ your tutorials…hmmm might have to give making tutorials a try! Cheers!
Kay
November 18, 2011 at 9:52 pm (14 years ago)Congrats & what a fabulous X-mas page! I can’t believe we’re already upon yet another X-mas…but that’s ok…this page inspired me to dust off all of my X-masy stash! Beautiful work & thanks for sharing some of your tips!
Trisha
November 19, 2011 at 3:11 am (14 years ago)Congratulations, Kelly, on your Guest Designer spot. They are so lucky to have you. What an amazingly beautiful layout. patnbobcuddy at gmail dot com
ferrellgraph-x
November 19, 2011 at 6:11 am (14 years ago)I rhink your page is fabulous! I’m so happy you showed us more details of of the lamp post, snowflake and doily. I would not have realized it was your alterations. Bravo!
Kindest regards,
Jennifer
Tasha
November 19, 2011 at 6:14 am (14 years ago)Great post! I love the lamp post it turned out so great!! I also like the spellbinders die. It looks like a must have for sure! Thanks for sharing.
misty
November 19, 2011 at 6:21 am (14 years ago)Incredible page! I absolutely love that lamp post…thanks for showing us the alterations!
Nancy Hanttula
November 19, 2011 at 7:22 am (14 years ago)Such exciting news!!! Super Congratulations!!!! and what an amazing layout….love the look of the dabbed paint along the photos edge…and your altered chipboard pieces are amazing!!!! just gorgeous!!!!
Char
November 19, 2011 at 7:29 am (14 years ago)Such great exciting news for you! Congrats! I’m looking forward to seeing the layouts you’ll be creating in the magazine! I really love this Christmas Lo you did! Fantastic!
barbara johnson
November 19, 2011 at 8:06 am (14 years ago)Beautiful layout and fantastic tutorial!! I love the embossing from the die idea!!! So many layers of interest in that design!! Love it!!! Thanks!!!!
Lee-Anne
November 19, 2011 at 8:15 am (14 years ago)Congratulations Kelly! It is well deserved! Your projects are always inspiring and amazing.
Lynne J
November 19, 2011 at 8:21 am (14 years ago)wow, Kelly-congrats on the designer spot; I think canadian scrapbooker is by far the best scrappping mag out there!Your Lo is fabulous!
Lisa Barrie
November 19, 2011 at 10:32 am (14 years ago)Congrats on the DT work! I love the way you did the lamppost, the stickles really makes it sing. I was especially glad to see you Christmas post because, hello it’s like less than a week from Thanksgiving and I haven’t even taken my Fall decorations out. I’m so not mentally ready, as you know I’ve been spending way too much time on the computer. So thanks for reminding me I’ve gotta get moving! Have a great day and thanks for visiting me on my blog, I’m always happy to get your visit! Hugs, Lisa
Tamara L (Wpg)
November 19, 2011 at 10:47 am (14 years ago)I just love the lamp post, such a simple way to make it look so shiny! and the edging around the photo, nice! Thank you for the great step by step explinations!
A SASSY SCRAPPER
November 19, 2011 at 12:38 pm (14 years ago)Wow, Kelly…..I am really glad that I stopped by here to look at this LO again…..you really used a lot of techniques that I somehow missed at SB.com….gee, whiz! You ROCK, girlfriend! HUGS to YOU!!!
scrapbookertink
November 19, 2011 at 3:47 pm (14 years ago)Congrats on DT post, love this xmas layout, so puts me in the mood, take care, Doreen x
Cindy Gay
November 19, 2011 at 7:44 pm (14 years ago)I particularly like the gold dabber frame and all the fine details.
Michelle
November 19, 2011 at 7:47 pm (14 years ago)Soooo gorgeous Kelly. LOVE all your secret tips that you used to create this wonderful LO…puts me in the Christmas mood! 🙂
Bozena Andersen
November 19, 2011 at 9:38 pm (14 years ago)Congratulations on the designer spot in CS! I love your LO’s and I am so happy that I found your blog on the CS website!
Micupoftea~
November 19, 2011 at 10:35 pm (14 years ago)Fun tips and techniques…love the painted edge on the photo~
Congrats again on your DT gig!
xoxox
Anonymous
November 20, 2011 at 5:11 am (14 years ago)I love the layout and thanks for all the info on how to do different things. I have learned alot from you!!! Congrats on your designer gig. I hope I win the next giveaway,
Sherri
November 20, 2011 at 8:11 am (14 years ago)Beautiful LO my friend. Congrats on the DT for CS. I’ll be watching for it.I love the story behind the tree and ornaments too.
Izzyb
November 20, 2011 at 3:50 pm (14 years ago)Kelly, congrats on the Design Team post with the magazine. Well deserved. You will do amazing work for them, no doubt. I love love love your Christmas page. You are the master of detail! Love all the layers and shine. Just gorgeous.
Gerry van Gent
November 20, 2011 at 5:58 pm (14 years ago)Congratulations, Kelly, on the GDT spot! This is great news!
Love your layout and thank you for sharing your tutorial!
Hugs ~Gerry~
Cris
November 21, 2011 at 6:01 pm (14 years ago)Congrats! Wow, Kelly, this is such a cool blog. Love your sense of humor and writing style. Had a blast around here!
BTW, great LO! Precious tips all over!
Hugs
~Cris
WhiteRacoon
November 22, 2011 at 2:50 am (14 years ago)It’s so cute! Love the layout and the details – so nice of you to show ecah and each item. Great idea with golden frame and paint! =)
Beebeebabs
November 23, 2011 at 6:34 am (14 years ago)Very nice job tfs!!!
Pendra
November 23, 2011 at 2:10 pm (14 years ago)Hi Kelly, congrats… I wonder what took someone so long to nab you!!! Your layout is beautiful and thanks for the little tutorial on it, I need all the help I can get! Your hubby sounds like a great guy… I got the other great guy… guess that makes us pretty great gals! Haven’t been around much lately but hope that changes soon! Have a great Thanksgiving and enjoy your family!
Crafty Hugs,
Pendra
Luz Maria Bruna
November 24, 2011 at 10:59 am (14 years ago)Big congrats Kelly,that´s awesome!! Your layout is fabulous!
Candace
November 26, 2011 at 9:11 am (14 years ago)Wow! I took the G45 Christmas Cards with you and am now a big fan! I love the paint around the photo!
reneabouquets
November 26, 2011 at 4:24 pm (14 years ago)Wow Kelly, this layout is even more gorgeous up close! Love how you created the lamp post and the metal work on it! Your details are amazing!!