
Since my initial goal was to blog about scrapbooking, I’d better get to it! ha ha!
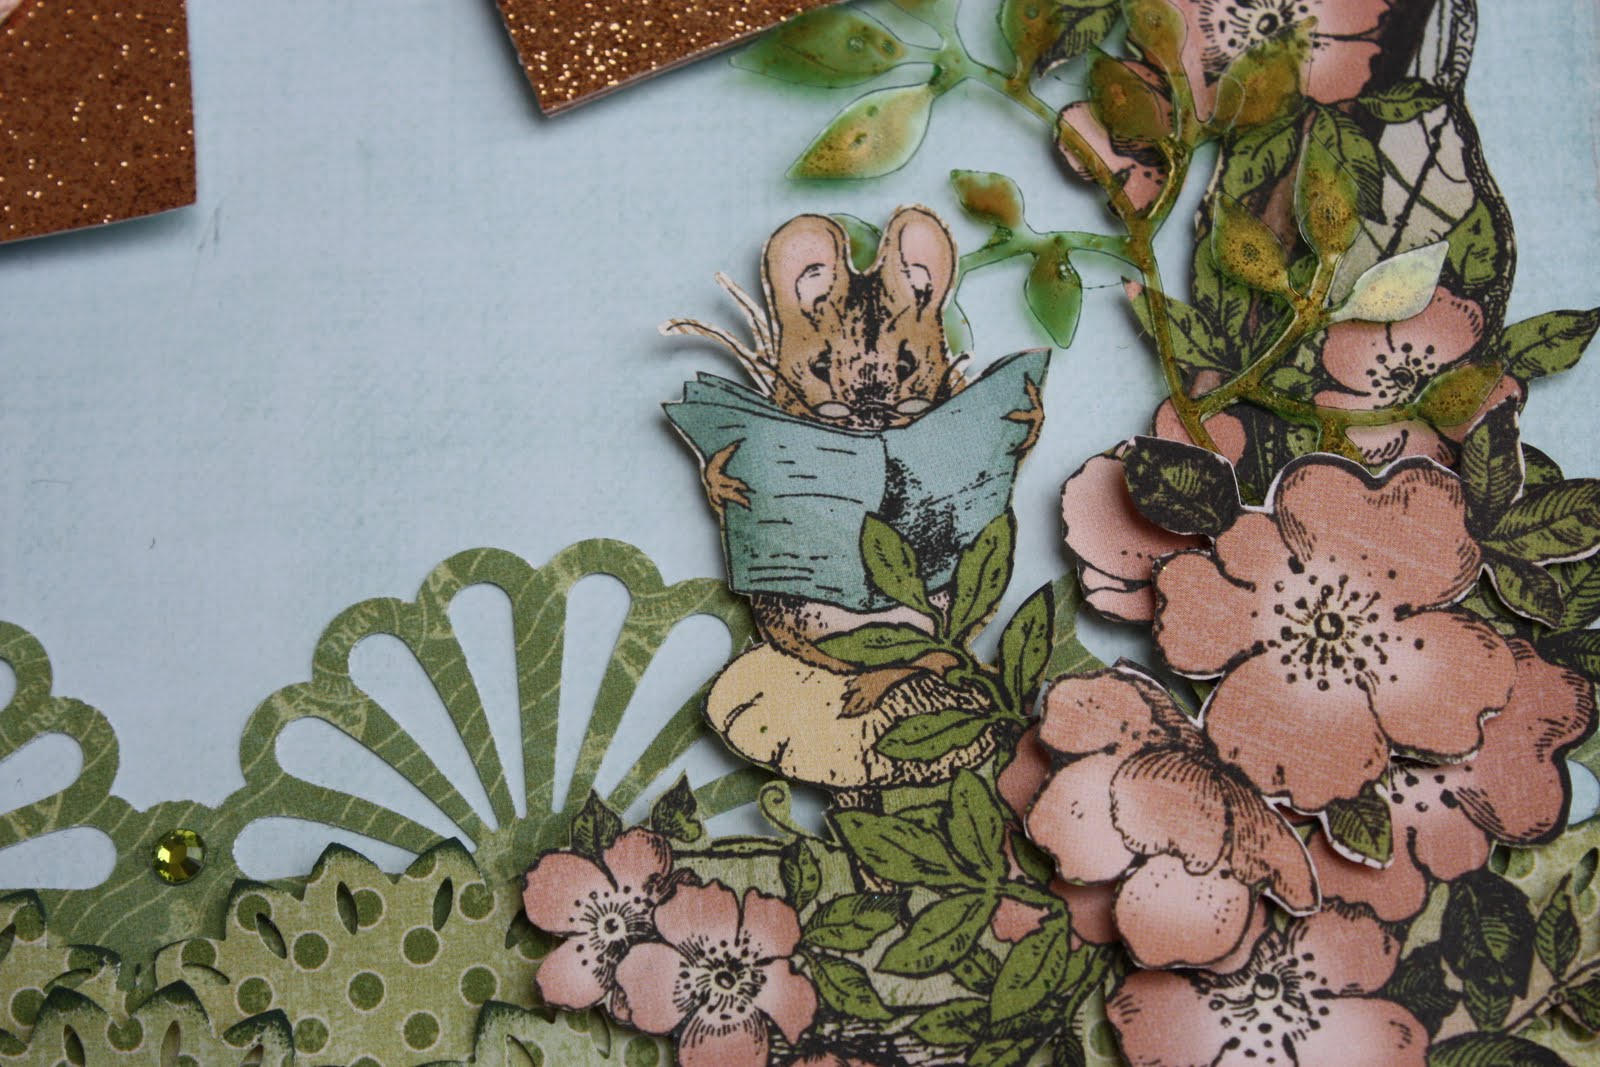
Here’s a better pic of my two-page Graphic 45 Springtime layout, “Our Fairytale,” which I taught at my local scrapbook store called Scrap-A-Lot. I LOVE designing for Kim at the store, and she has soooo many wonderful products and paper collections in stock. All the products used in this tutorial are from Scrap-A-Lot.

When I posted it here on my blog about a week ago, I also had a photo tutorial of how to make that canvas tree. And then I promised another tutorial on the leaves. Better late than never, I guess!
I do have a Cricut and am starting to use it more often, but I find myself pulling out my Big Shot and dies a lot. After creating this layout, however, I was kicking myself that I used a Big Shot to cut ALL those tiny leaves!!


Basically there are two types of leaves cut…paper and transparency. Here is the Sizzlet die I used for the paper leaves up in the tree and the transparency leaves in the bushes below….

And here is the Sizzlet die I used for the paper leaves with the canvas flowers in the bottom left page corner….

Now I got some ‘splaining to do!! Sit tight….and here we go!
 |
|
| Gather your supplies. The Tattered Angels Mist is only for spraying the paper leaves a darker colour, NOT for the transparency leaves. |
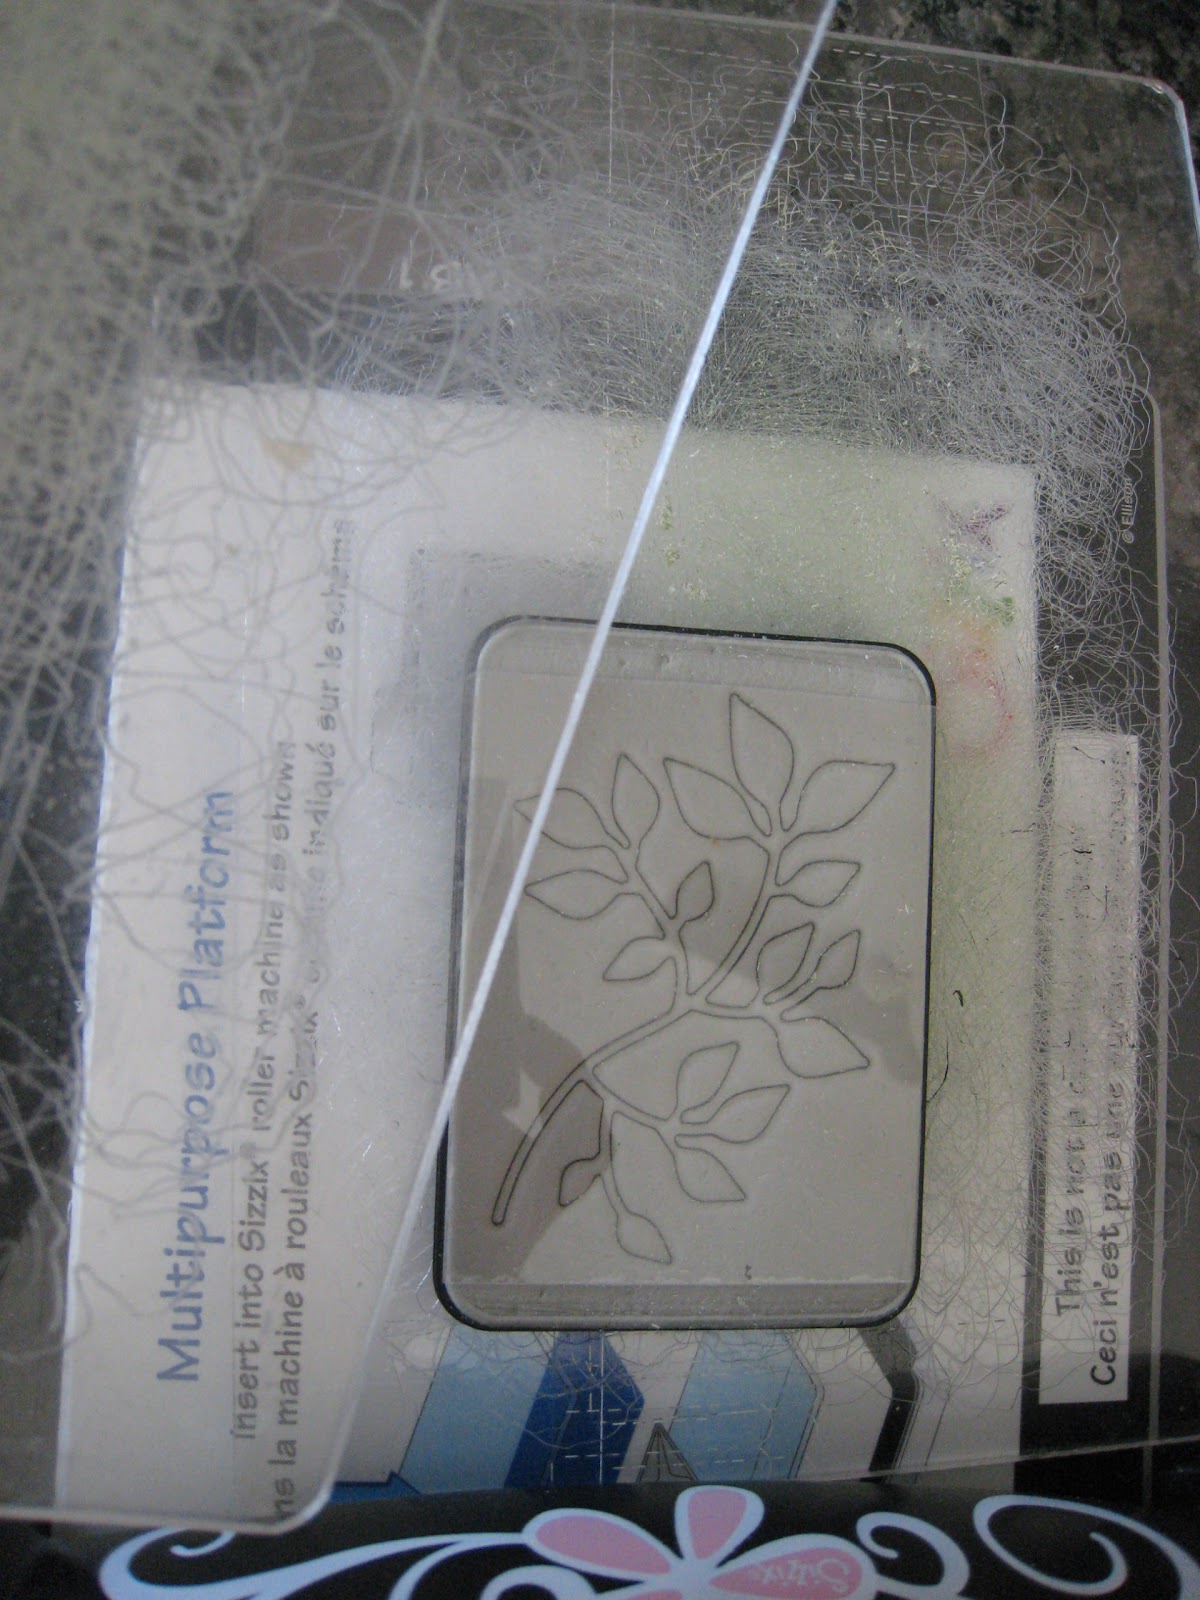 |
| Cut a piece of transparency the size of the Sizzlet die. (Just LOVE that word Sizzlet!) |
 |
| You might have to snip a bit around the die cut if the Sizzlet doesn’t cut through the transparency completely. |
 |
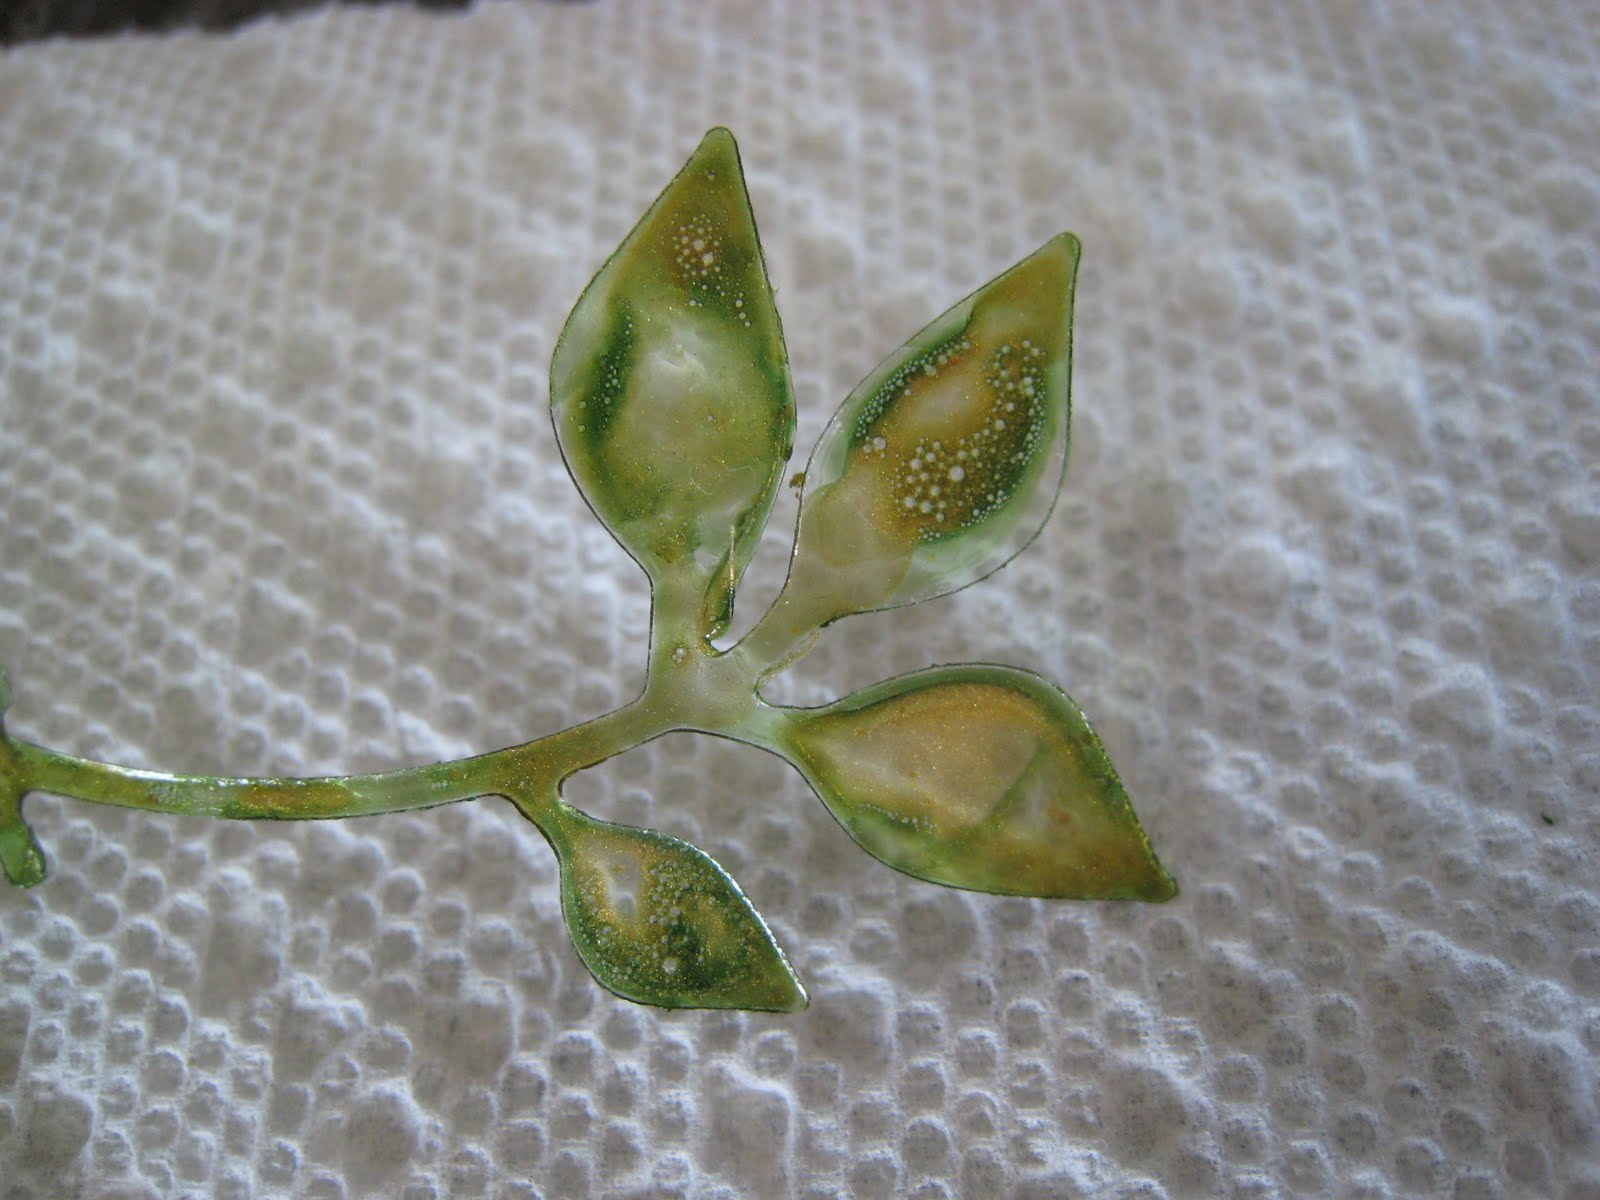
| Pour some Tattered Angels Glimmer Glam “Dirty Martini” into its lid and dip in the leaves. (Hmmm…whoever named that product is GENIUS! I’d actually love a job naming colours of sprays and inks and stuff!) |
 |
| After Glam has dried, add touches of gold toned Tattered Angels Glimmer Glaze “Saffron”. (Sorry, can’t seem to rotate this photo!! Just tilt your head..hee hee!) |
 |
||
| Here is the final effect up close. I did turn the leaves OVER so the Glam & Glaze are on the backside of the leaves when I adhered them to the page. |
You might ask, “Why are you colouring transparency instead of just using paper leaves?? Good question. I wanted to play with the effects of light and colour in the trees, maybe even recreate the sunlight dappling through the leaves. 🙂 Wishful thinking, I know. ha ha!
If you have any questions, feel free to ask! Hope you have fun creating your own transparency leaves!
Sandi Smith
June 14, 2011 at 4:40 am (15 years ago)Awesome tutorial…looks gorgeous!
Lynn Biermann
June 14, 2011 at 5:19 am (15 years ago)Yummmmy! this is a great lo!! Love the tutorial too! I am a sizzix lover too! 🙂
Sandra D
June 14, 2011 at 8:35 am (15 years ago)Great tutorial. The effect of the inks on the plastic is gorgeous. Thanks for posting your beautiful work.
Michelle
June 17, 2011 at 5:55 am (15 years ago)oooo…great tutorial Kelly! I think its cool that you used two different types of leaves!
Pendra
June 18, 2011 at 10:45 pm (15 years ago)Just love it… it just adds more to the dimension and depth of your page! Thanks for the tutorial… and keep them coming!
Gerry
June 20, 2011 at 4:05 pm (15 years ago)Thank you so much for sharing this awesome tutorial with us, Kelly! Your layout is out of this world! Hugs ~Gerry~
Jolaine Frias
June 20, 2011 at 10:40 pm (15 years ago)Thanks for this creative tutorial! I’ll be sure to give it a try. Congrats on your new blog, I just became a follower. Looking foward the inspiration!
Laura
June 27, 2011 at 10:31 am (15 years ago)Your transparency leaves are gorgeous and do capture the look of sunlight passing through the tree boughs.