
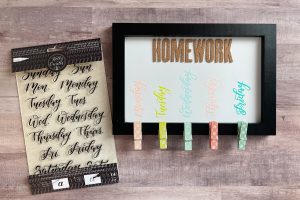
Chasity is here with a Back to School tutorial that will help keep those students of yours on track! This fun DIY can be completed with your own lettering or with Kelly Creates Days of the Weeks stamp set.
 Kelly Creates Supplies: Days of the Week Stamp set, Stamping Blocks
Other Supplies: Embossing Powders, Pigment Ink, Frame (Dollar Store), Clothespins, Heat tool, glue gun
Hey Lettering Friends! It’s September and school is in session here in Utah. Have you ever thought about using your Kelly Creates stash to help your student stay organized and on top of their homework? Today I am sharing a project with you that is inexpensive and easy to make, and you can customize it for your child!
Did you know that Kelly has calligraphy stamp sets that you can use to trace and learn brush lettering? Here is a video that explains how. Click HERE to see all the stamp sets in Kelly’s online store.
Now let’s use the bouncy Days of the Week stamps to create our Homework Chart!
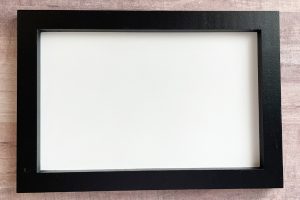
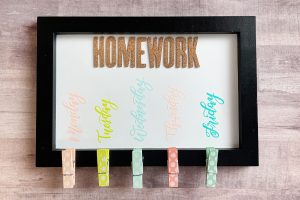
I found this pre painted frame at our Target Dollar Spot for $3 USD. I knew it would be perfect for the project I had in mind. It’s sometimes challenging for any age student to keep track of homework, so I grabbed my Kelly Creates Days of the Week Stamps and started to create!

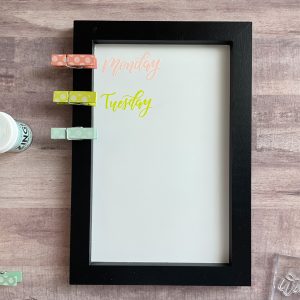
I knew I wanted something to hold papers, so I found 5 clothespins I already had. I lined them up along the bottom edge of the frame equally spaced, and that is how I knew where to stamp the days of the week(don’t glue them to the frame yet). I used pigment ink and embossing powders because the painted inside of the frame was shiny, and regular ink would smear. TIP: Use fine or ultra fine embossing powders for lettering stamps.(Don’t know how to heat emboss? Watch Kelly’s video HERE)

To emboss, the first step is to place the stamp on the stamping block and ink your stamp with a pigment ink. A pigment ink stays wet longer allowing the embossing powder to stick to the stamped image. Sprinkle the embossing powder over the stamped image being sure to cover the entire image. Next, turn the frame upside down over a piece of paper and tap away the extra powder. The excess powder can be returned to the jar and re-used, be sure to save that! Then, heat the powder with a heat tool until all the powder is melted. You will then have a slightly raised, permanent image.
Lining up the clothespins helped, but I did not glue them down just yet. Here is another trick: if your embossing powder sticks in other places than the stamped image, and tapping does not remove it all, use a small brush to brush away the excess powder. (Or you can use a dryer sheet to wipe your card stock first before stamping anything).

I alternated the colors of embossing powders I used to make the project a little more fun, but it would look great all one color as well. I used what I had on hand, so the colors don’t match the clothespins exactly, but they are close enough and fun for all ages.
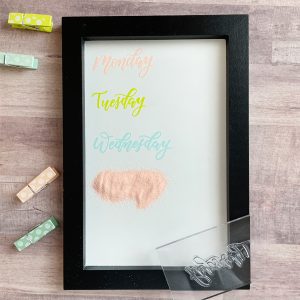
Here is what the Days of the Week look like stamped and embossed. I did intend for days to be vertical, so once I glue the clothespins to the long bottom side of the frame, it will come together.

I love that these stamps give a hand lettered look to the project, but they’re just stamps!

The final step is to add the word “homework” to the blank space at the top of the frame. I used some cork 3 dimensional stickers I had on hand, but it would also look amazing if this was hand lettered with Kelly’s Brush Pens! You could also personalize this with your child’s name instead of the word ‘Homework.’
Isn’t it fun to find new ways to use your Kelly Creates products? Don’t sleep on the stamp sets! They are great for more than just tracing. I hope you enjoyed this project. This can be used for more than just homework – think of chore carts, potty charts and so much more! It’s a great tracker for many other things we need to keep track of in our busy lives. If you give this a try, be sure to share with us all the wonderful projects you create using the hashtag #kellycreates. Happy school year friends!
******************************************
For more crafty and lettering inspiration, follow Chasity on Instagram @chiciscre8ive
Shop the supplies Chasity used by clicking on the products below or visit my online store


Darcy Christensen
September 2, 2022 at 9:31 am (4 years ago)What a great idea! I didn’t know you could emboss on that type of surface! How creative!@