
Bonnie is here today to show you how to have fun making creative watercolour swatches with my new Kelly Creates Watercolor Inks! I absolutely LOVE this idea!

I really like to have swatches of my paints to refer to when lettering or painting, and while this is not a lesson on colour mixing, I will show you how to have fun with your swatches.

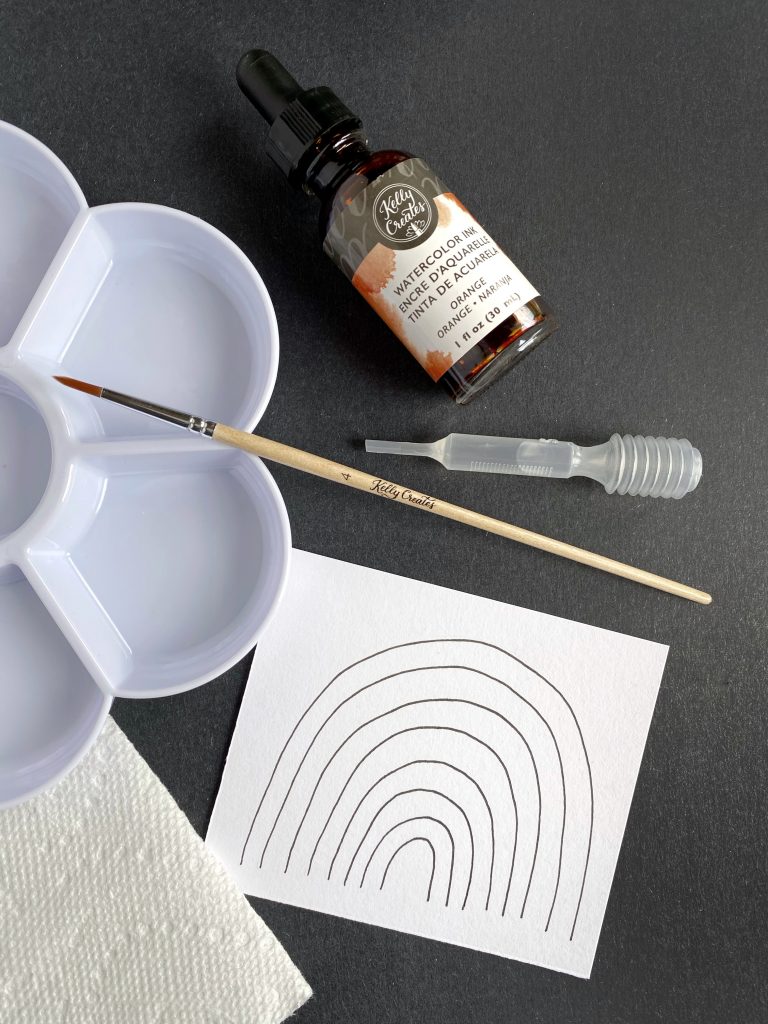
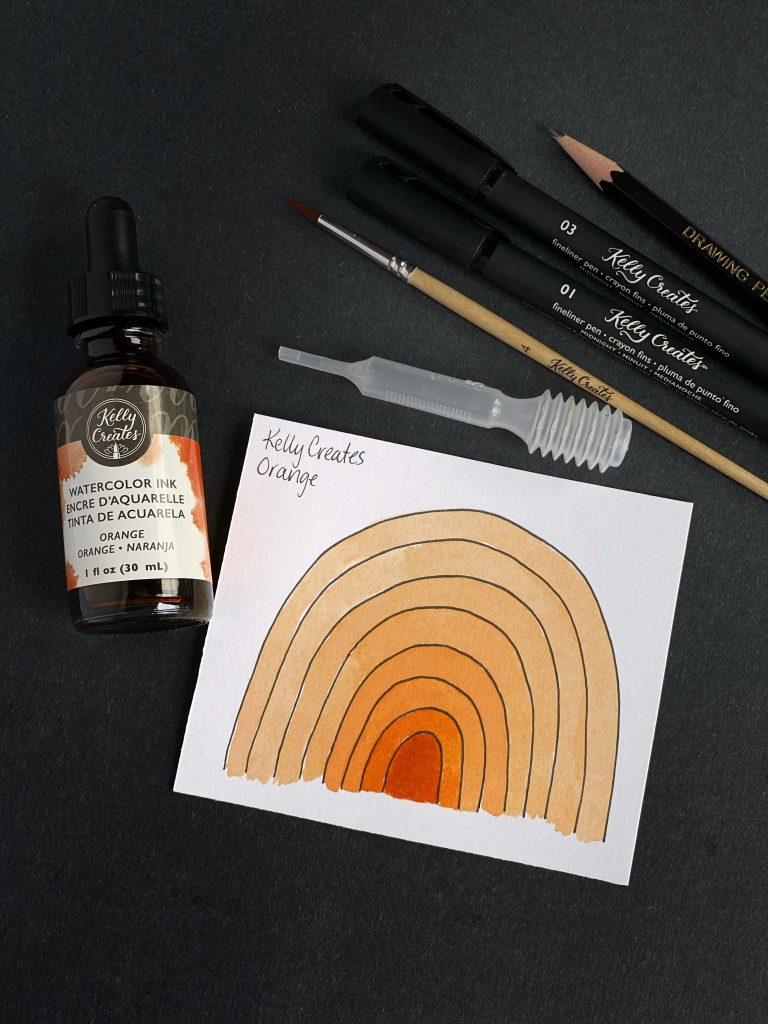
Kelly Creates Supplies: Watercolor Lettering Project Pad, Pencil from Deluxe Lettering Kit, Black Fineliners 01 and 03, Brush Size 4, Palette and Pipette, Watercolor Inks Set 1 and Set 2
To make all these swatches, I’m only adding water to dilute the Kelly Creates Watercolor Inks. There are 3 sets of these inks, and I made swatches for Set 1 “Warm” (Poppy, Orange, Yellow, Rose, and Black) and Set 2 “Cool” (Violet, Blue, Cobalt, Green, Teal). Set 3 has White, Black and Iridescent.
Using the paper from the Kelly Creates Watercolor Lettering Project pad, I cut 2 sheets into six equal pieces.
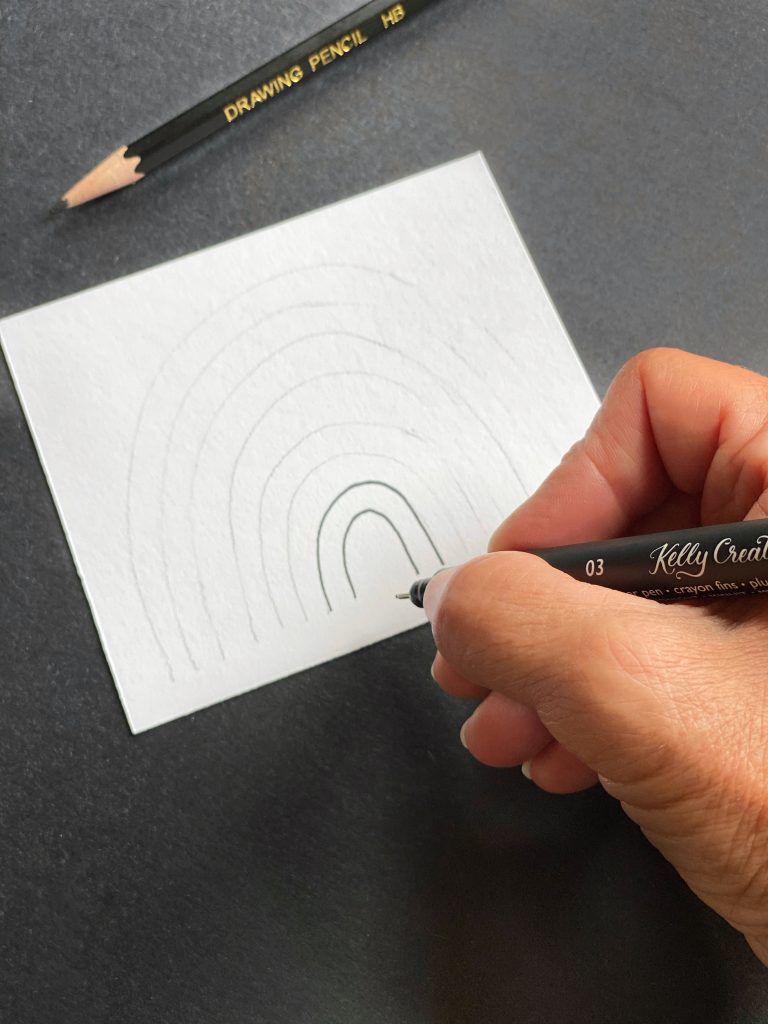
With a pencil from the Deluxe Lettering Kit, I sketched simple shapes on each piece of paper, including a variant of 7-8 sections per piece so I could show the gradient of colour.

Once they were drawn, I outlined them with a Kelly Creates 01 Black Fineliner and erased the pencil lines.
You will begin by using the pipette to pick up one ink colour at a time, and place a single drop into one of the wells in the Kelly Creates Watercolor Palette. (Note: each palette comes with 3 pipettes…in the bottom of the box)
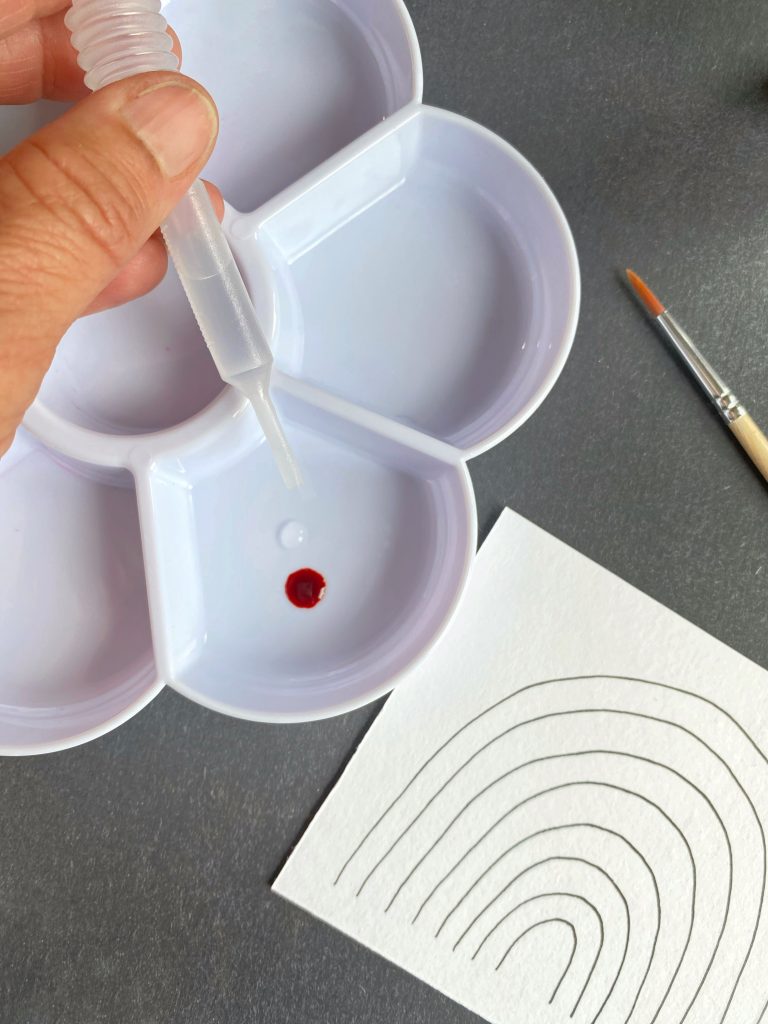
That will be your starting point of the original full concentrated color sample that you will paint into the first section of your picture.

I used the #4 Kelly Creates Brush throughout this exercise, and I started with Orange in a rainbow shape piece.
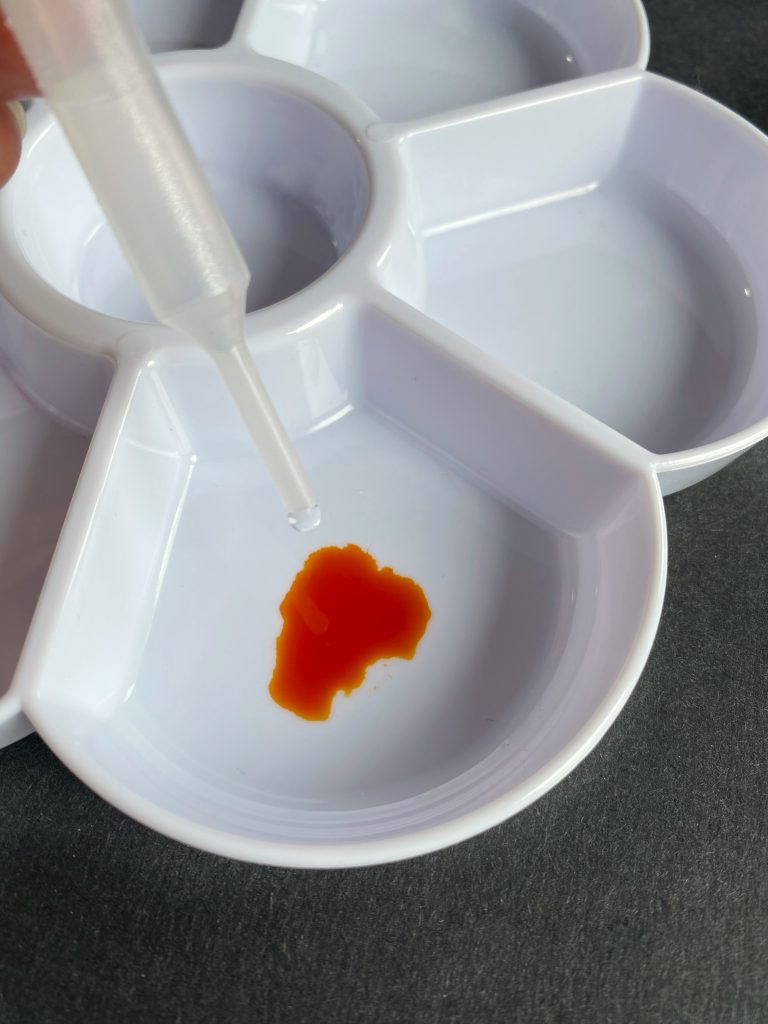

From here on you will add one drop of water from the dropper into the same well and paint the next section.

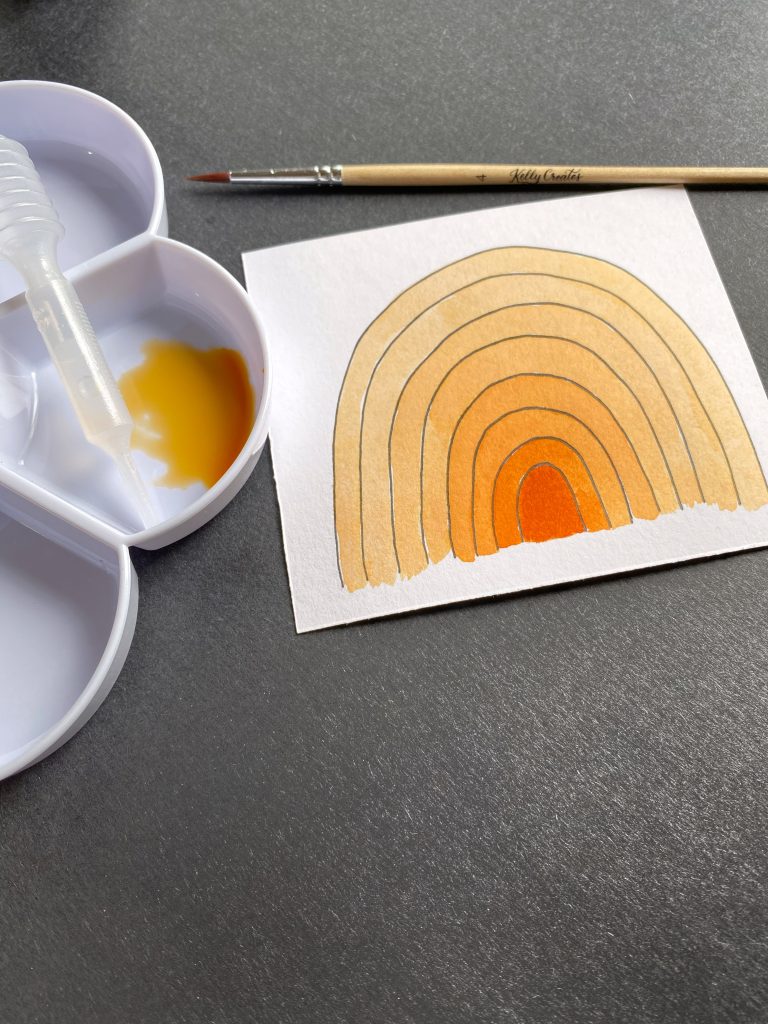
Be sure to let each section dry well before proceeding to the next.
You will continue adding one drop of water each time you paint the next section, getting lighter each time.


Once you’re finished, you just repeat the same process for each Watercolor Ink.


Afterwards, write the name of each Watercolor Ink on the samples for reference.
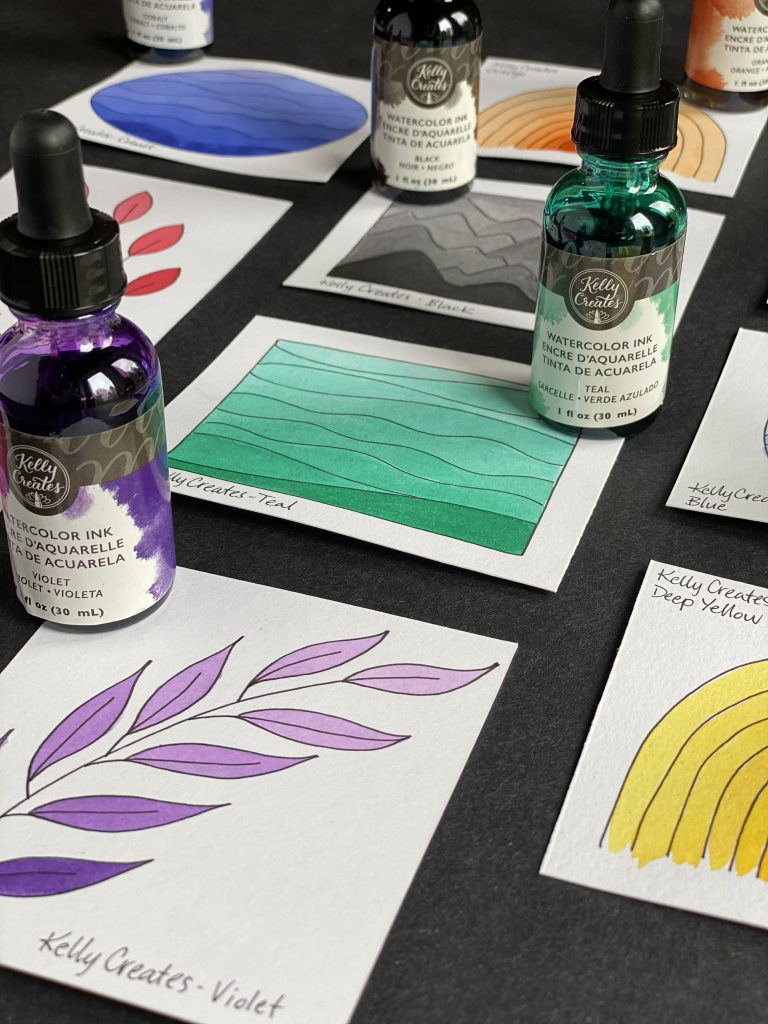
If you’d like a more uniform series you could replicate all rainbows, a series of different shaped leaves, ice cream cones…you name it. Get creative with your swatches and play!
As you can see they’re pretty cute all of their own. Perhaps you could frame them as a tiny gallery for a nursery, turn them into postcards, or create a larger scale one as a decorative piece, and of course there is always the option to letter on it.
Have fun creating!
For more inspirational lettering and art projects, follow Bonnie on Instagram @diamondandwillow and Facebook “Diamond and Willow Artworks.”
Shop the supplies Bonnie used by visiting http://www.KellyCreatesStore.com or clicking the affiliate shopping links below:


Patty
June 12, 2020 at 3:05 pm (6 years ago)Wow! What a fun and creative idea.
Debbie
June 12, 2020 at 8:34 pm (6 years ago)Love this idea ❤️
Sophie
June 12, 2020 at 11:06 pm (6 years ago)Very good idea and it’s look so nice !
Maju
June 13, 2020 at 4:15 am (6 years ago)Love it ?
Linda
June 15, 2020 at 2:24 pm (6 years ago)This is such a great idea, Bonnie. Thanks for sharing it.
Remya
July 8, 2020 at 2:53 pm (6 years ago)Super fun idea Bonnie, i am going to try this,!