
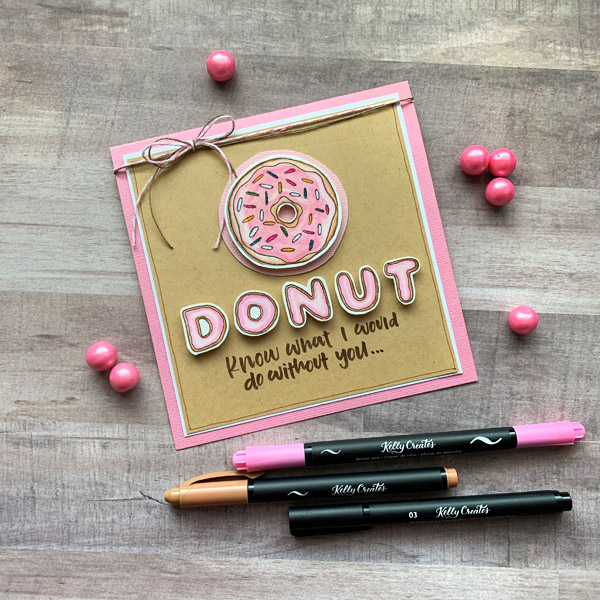
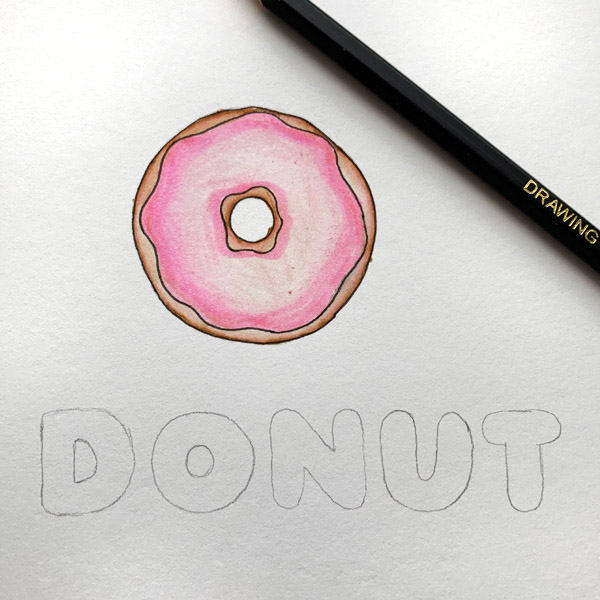
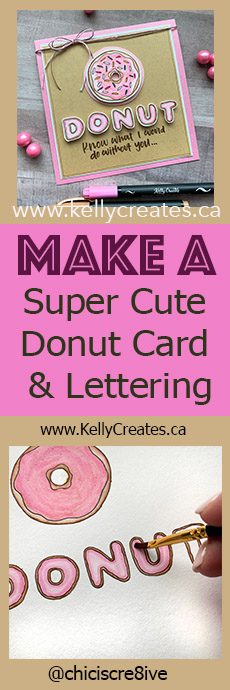
Chasity @chiciscre8ive has made the ‘sweetest’ donut card for Valentine’s Day, along with super cute donut lettering too!
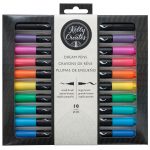
Kelly Creates Supplies: Silky Smooth Project Paper pad, Black Fineliners, Deluxe Lettering Kit, Dream Pens Set 1, Dream Pens Set 2, Multicolor Small Brush Pens, Moonlight Markers
NOTE: I used the NEW Kelly Creates Multicolor Small brush pens that will be available this Spring 2020.
OTHER SUPPLIES: Scissors (or craft knife), Cardstock (any color but I chose Pink), Adhesive Tape Runner & Foam Dots, Paper Trimmer & Score Board, Baker’s Twine, paint brush or water brush, watercolor or mixed media or Bristol paper.
Happy February Friends! We made it through January, the longest month ever!
In this tutorial, I want to share a fun lettering style that is simple to create with supplies from your Kelly Creates stash. This fun donut lettering can be used for Valentine’s Day, but is also great for all year round. Just change up the “frosting” color!
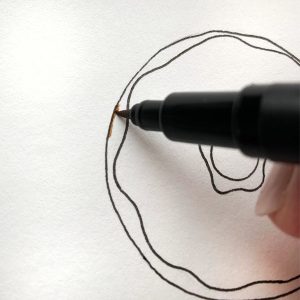
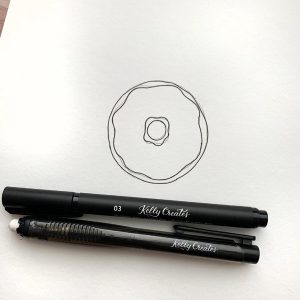
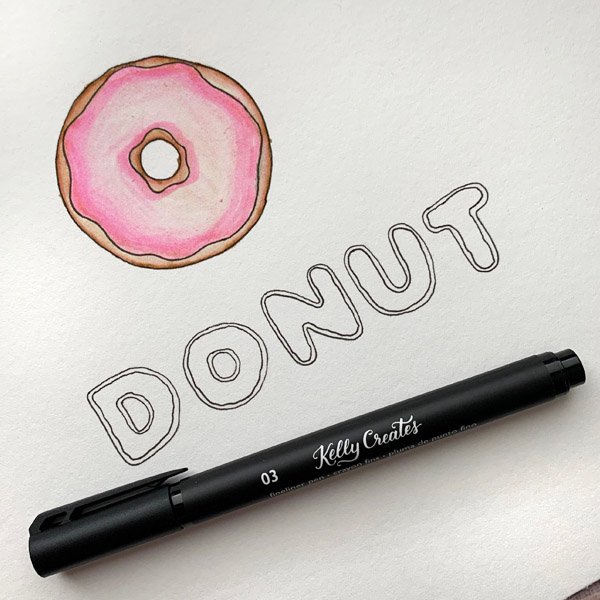
I began by drawing a donut shape and “frosting” with a pencil on my watercolor paper. Once I was happy with the shape, I used the Kelly Creates 03 Black Fineliner to trace over the pencil lines and eraser them when I’m done. One reason I love the Fineliner pens is I can still blend colors with the blender pen or water, and they don’t bleed! This is a game changer!
Then I used the Nest Dream pen to draw a line on the inside of the donut. I kept the line thin so I could blend and give the appearance of a baked donut.
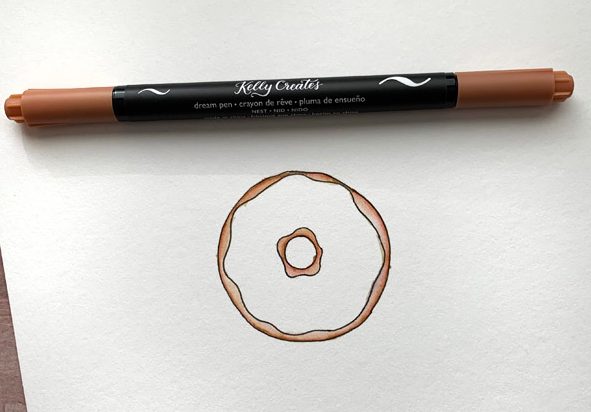
Then with a small paint brush and a little water, blend the ink towards the center of the donut. Repeat this step on the inside of the donut, blending outwards.
Repeat this same technique for the “frosting” part of the donut. I used the Petal Dream pen, but this could easily be changed to a different flavor of “frosting”!
Next, sketch the ‘DONUT” bubble letters with your pencil. Think donut, so no hard corners. Keep them big and round.
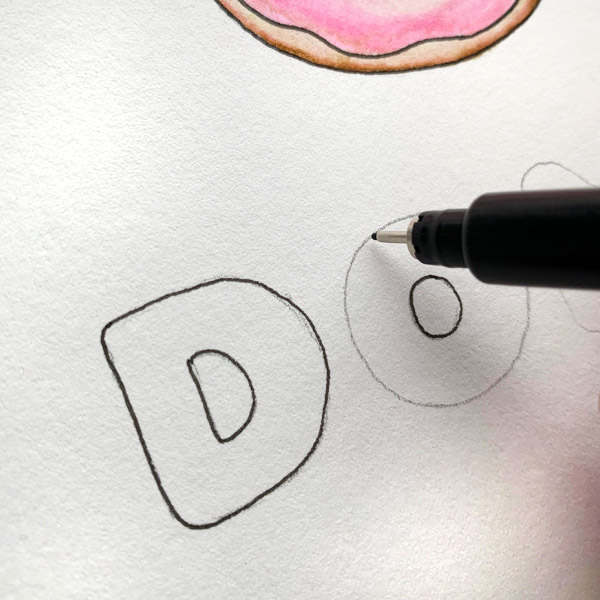
Then outline with your incredible Kelly Creates Black Fineliner 03.
Once you have the letters, draw the wiggly frosting lines on them.
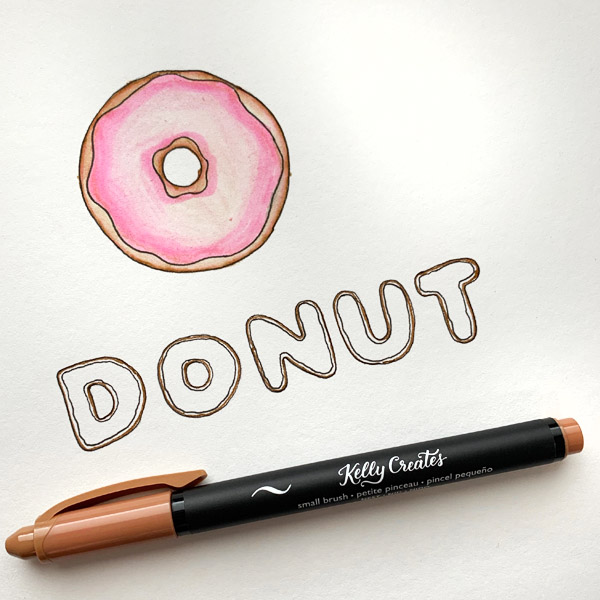
Repeat the process that you used for the donut and recreate the donut and frosting appearance on the letters using the Kelly Creates ‘Nest’ Small brush pen (available soon) or ‘Nest’ Dream pen.
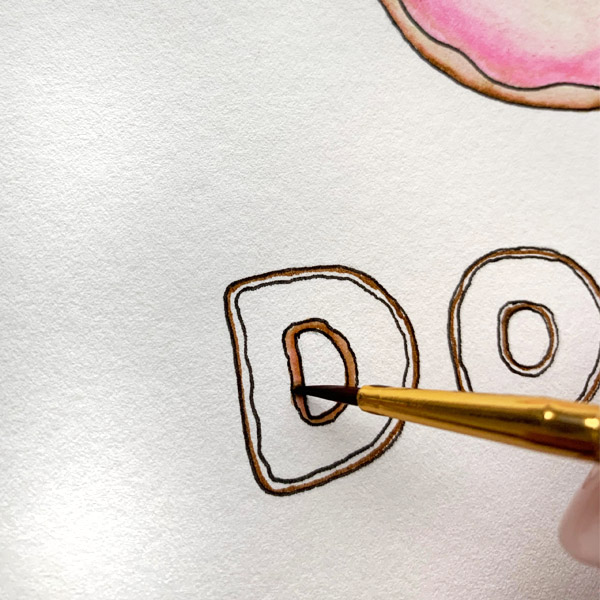
Make sure to use a very fine tip paint brush with water for blending!
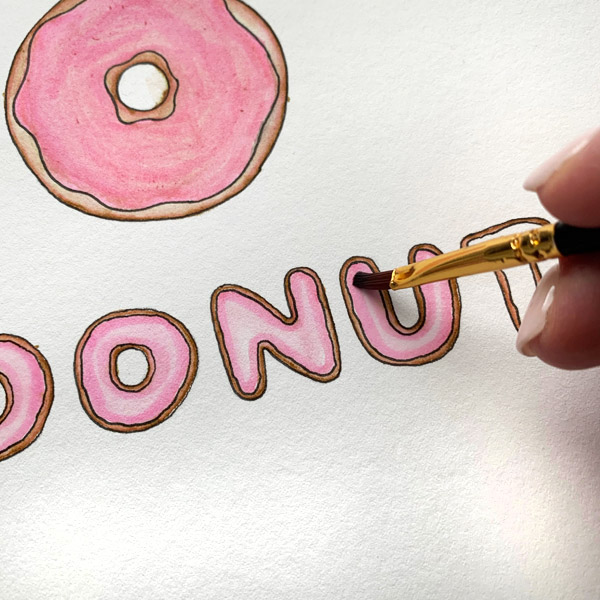
When blending the frosting on the letters, I just used the Petal Dream pen on the outside and blended into the center. It will be a little lighter in the center, creating a round dimensional appearance to the letters.
Then, with the same Kelly Creates 03 Fineliner, draw sprinkles randomly on the donut. You can also do this on the letters if you wish! You can never have too many sprinkles.
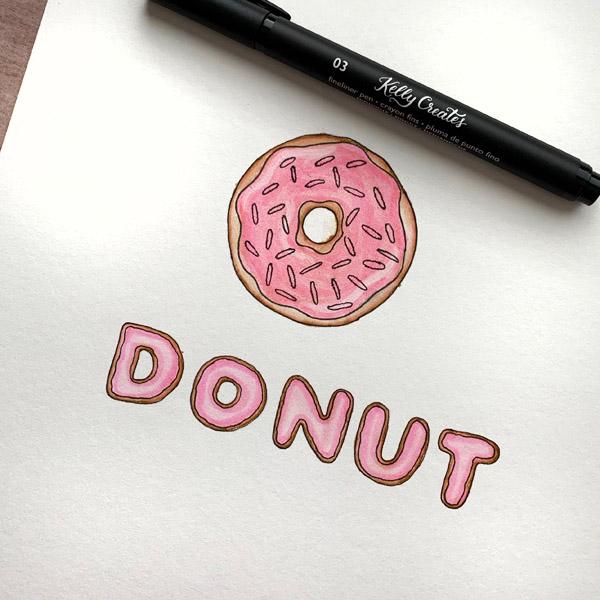
Color in the sprinkles with any of Kelly Creates pens. I used the Dream pens in Turquoise, Sunshine, and Jungle, plus the Moonlight Marker. You could also use the Kelly Creates Multicolor Small Brush pens, Fineliners, or Bullet Tip pens too.
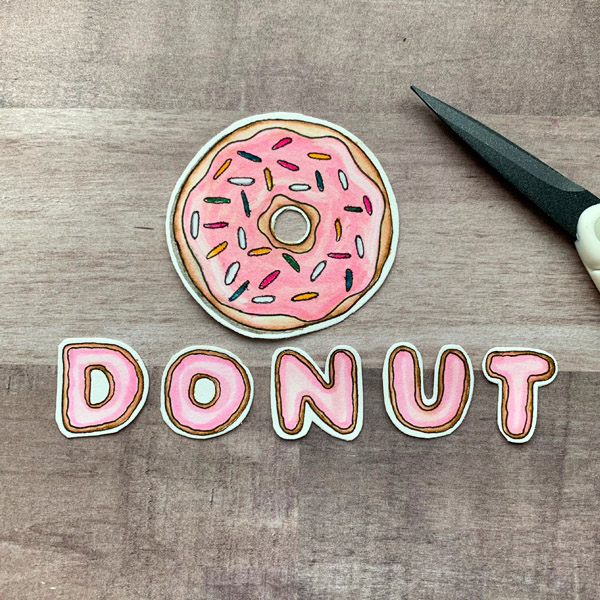
Next, I wanted to give the donut and letters some dimension on my card, so I cut them out of the watercolor paper with my scissors, leaving a narrow white border around the donut and letters edges. (You can also use a craft knife).
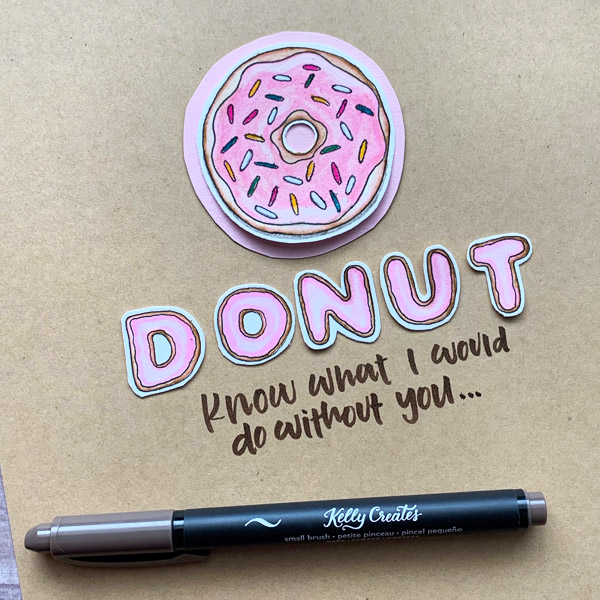
With a piece of Kelly’s smooth Kraft paper from the Project Paper Pad, I layered the letters on top. I also matted the donut on a small piece of pink cardstock.
Using the Kelly Creates Nest Small Brush Pen (or ‘Nest’ Dream pen), I lettered the sentiment on the Kraft paper below the “Donut” letters. There are quite a few ‘punny’ sentiments to use with the word DONUT…have some fun with it!
- Do or donut, there is no try
- Donut be Jelly
- Donut disturb
- Donut enter
- Donut ever let me go
- Donut fear the reaper
- Donut give up
- Donut go breaking my heart
- Donut grow up
- Donut judge me
- Donut kill my vibe
- Donut mind if I do
- Donut stop believing
- Donut stop, get it, get it
- Donut you want me baby
I still wanted to add a little more dimension to my letters and donut, so I added foam adhesive dots to them and popped them up!

This shows where I placed the foam dots to give them the added POP!
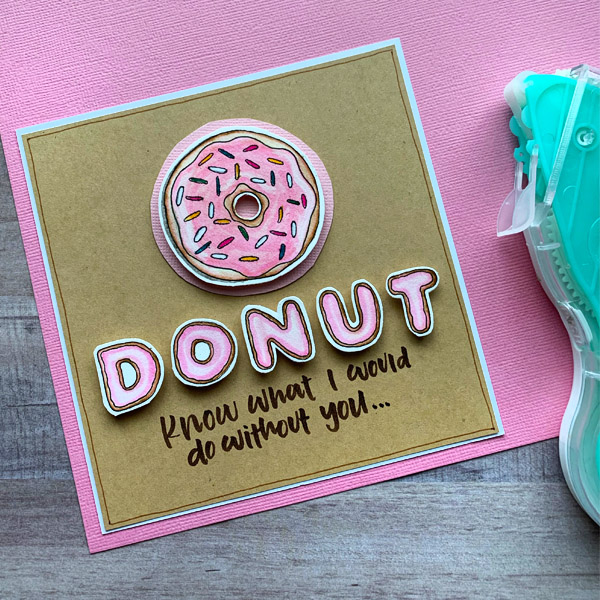
Finally, I trimmed the Kraft paper to my desired size, 5 ½” x 5”, but you can make your card any size. I matted the card on white card stock from the Kelly Creates Project Paper Pad. This paper is so incredibly smooth and scores and folds beautifully. Next I matted the card with pink card stock and created the card base by cutting, scoring and folding the pink cardstock.
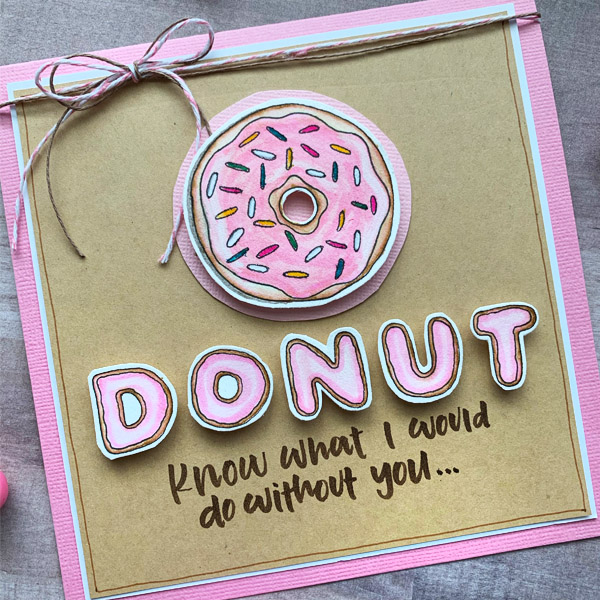
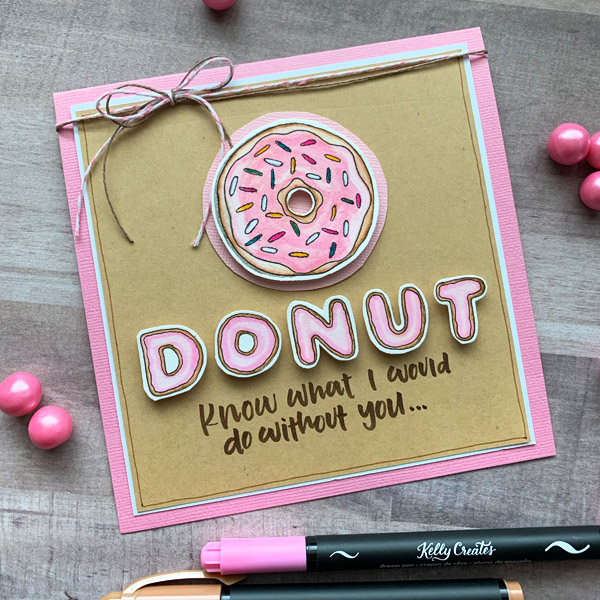
Of course I love to embellish my projects, so I added some pink and brown Baker’s Twine to the top of the card and created a fun bow.
I hope that you give these fun letters a try! Be sure to post what you come up with and share in our Facebook group or tag Kelly #kellycreates. We would love to see what you create! Thanks for stopping by today.
We would love to read your comments about this tutorial….tell us what you think! For more creative, crafty inspiration from Chasity, follow her on Instagram @chiciscre8ive
Shop the supplies Chasity used in my online store http://www.KellyCreatesStore.com or click the affiliate shopping links below:


PIN ME!
Maureen Vickery
February 11, 2020 at 7:45 pm (4 years ago)Love this project! So cute!