
If you think you know how to blend & color with brush pens, then think again…. because Erica (@ericalligraphy2) has some NEW techniques to share with you along with some adorable Halloween lettering!
Kelly Creates Supplies: Metallic Jewel Bullet Tip Pens, Dream Pens Set 1, Moonlight Marker, Metallic Starlight Pencils, Project Pad, Eraser from the Deluxe Lettering Kit

One of the things I love most about brush lettering is trying new things. Styles. Mediums. Tools. Techniques. I want to try it all. And when it comes to lettering, many times I look at it as drawing letters…not writing words.
But I’m going to be honest: some of the techniques I use are born simply because I am trying to cover a mistake or hide something I don’t like.
This month, I’m going to explain two blending techniques that were happy accidents and have become a couple of my go-tos in adding detail to my lettering and art projects: using the Kelly Creates eraser to create highlights and using the Kelly Creates Moonlight Marker to blend.
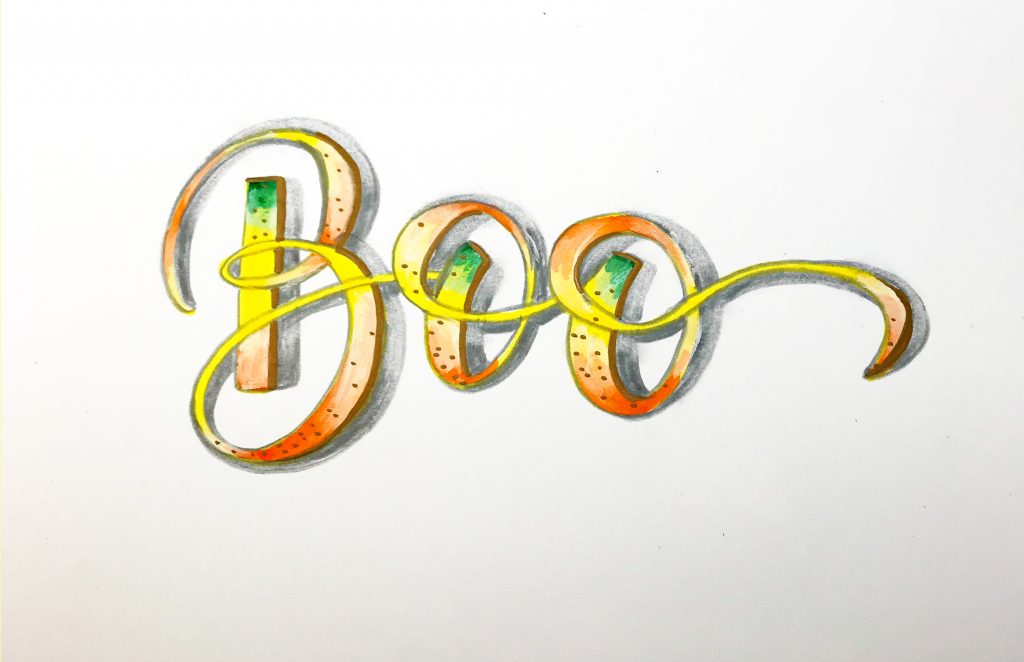
Because it’s October, “Boo” seems like an appropriate word to letter. Plus it’s only 3 letters, which will make it a little easier when practicing these techniques.
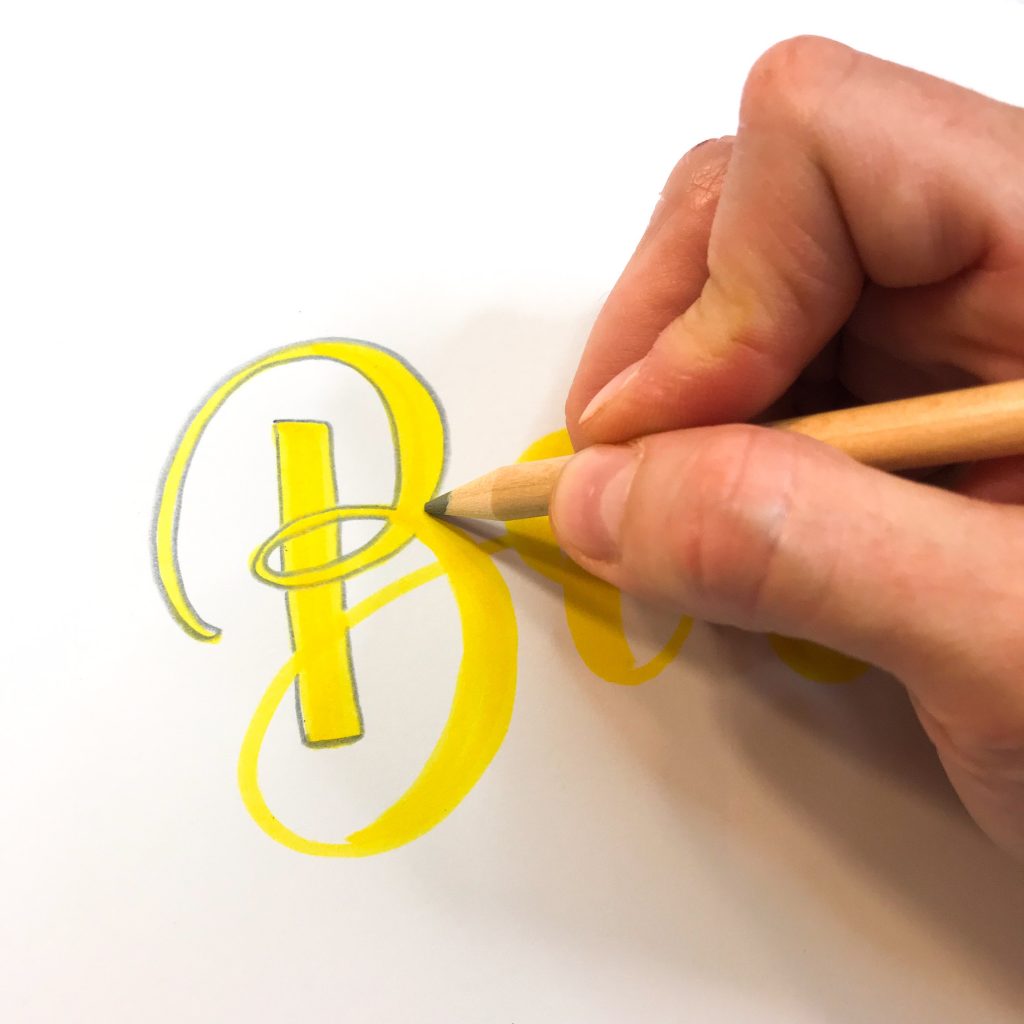
Begin by lettering the word “Boo” on Kelly Creates White Cardstock from the Project Pad with the Kelly Creates Dream Pen Sunshine. TIP: You can also use Bristol or smooth watercolour paper for blending effects.
If you are trying this tutorial, know that the style of lettering is not important here since we are focusing on blending; write in the style you are most comfortable with!

When I am going to add details to a lettering project, I typically go back and thicken the thick lines so I have additional real estate for details.

Next, outline Boo with the Silver Kelly Creates Metallic Starlight Pencil.
Grab your Kelly Creates Dream Pen Sunset and begin adding orange on top of the yellow. Be sure to keep plenty of yellow in between your orange areas! To give a more natural feel to the blending, the ends of the orange areas are not neat and even.

I chose to add a little green in the B and both o’s with Kelly Creates Jungle Dream Pen. Adding green to those spots made me think of pumpkin stalks.
 Now it’s time for blending with the Kelly Creates Moonlight Marker!
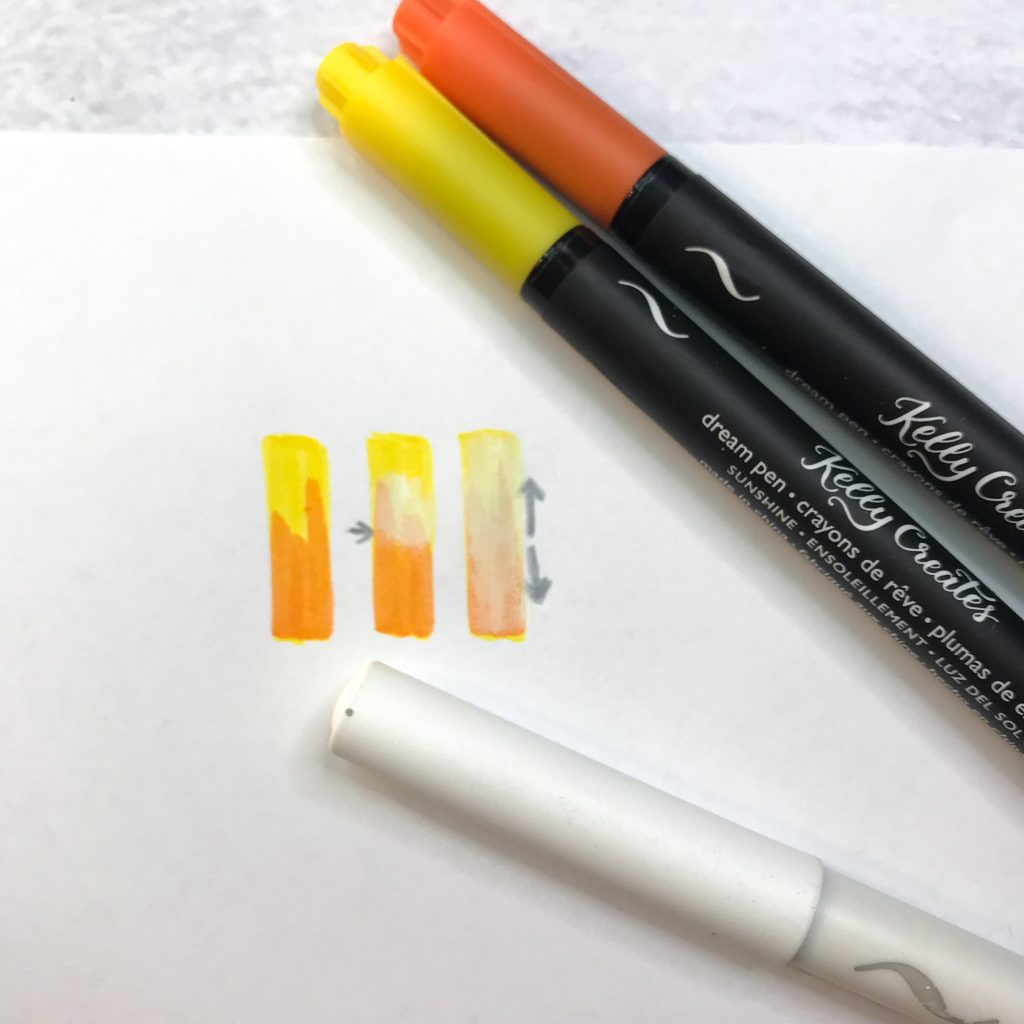
All 3 bars started the same: yellow with orange layered on top. Color over top the area where yellow and orange meet the Moonlight Marker as shown on the middle bar. Then feather the white outward in both directions as shown on the bar on the right.

How do you feather? Brush the pen over the paper with a sweeping motion, similar to brushing something off your clothing.
Why do I do this instead of using the blending palette? I like that the white Moonlight Marker softens the colors. Sometimes a softer look is preferable to the vibrant colors you get when you use a blending palette.
PRO TIP: Have a designated Moonlight Marker you use just for blending since it does discolor the tip a bit.
Oops! Got Moonlight Marker on your outline like I did? No worries! Go back over it with your pencil.
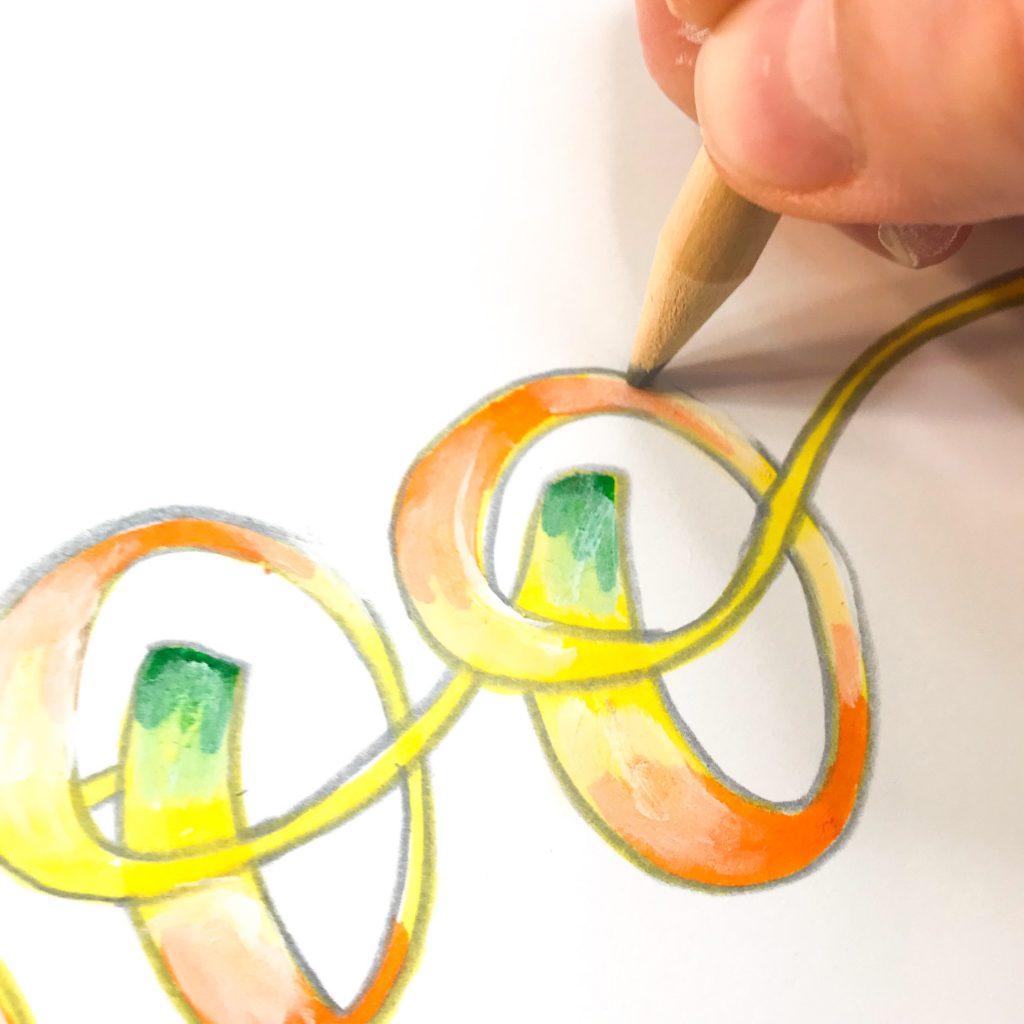
We are going to add a shadow to our lettering. Make an outline with the Kelly Creates Metallic Pencil in silver, following the curves and lines of each letter, to the right of each line. This will create the border of our shadow.

Once you have your outline, completely color the area with the same Kelly Creates Metallic Pencil you used to create the shadow border.

Now for the highlights! I like to use an eraser for this process. As you can see from the image below, there is a difference between using shading from a pencil and from an eraser. I like using an eraser over creating gradients from pencils for four reasons:
- I have more control
- This creates a softer look with a more natural gradient
- Pencil strokes are softened and disappear
- Erase too much pencil? Then just add some pencil back in!
Here’s the gist: I color the entire area with the pencil until it is a solid color. Then using varying pressures (hard to light) and stroke direction (circular, back and forth or one direction), I gradually erase pencil from key areas to create the highlight.
This table illustrates the difference between pressures of using both pencil and eraser. The bars on the right side all started exactly the same.

Apply this technique to your pencil shadows on Boo. Start erasing wherever you like but be consistent from one letter to the next.
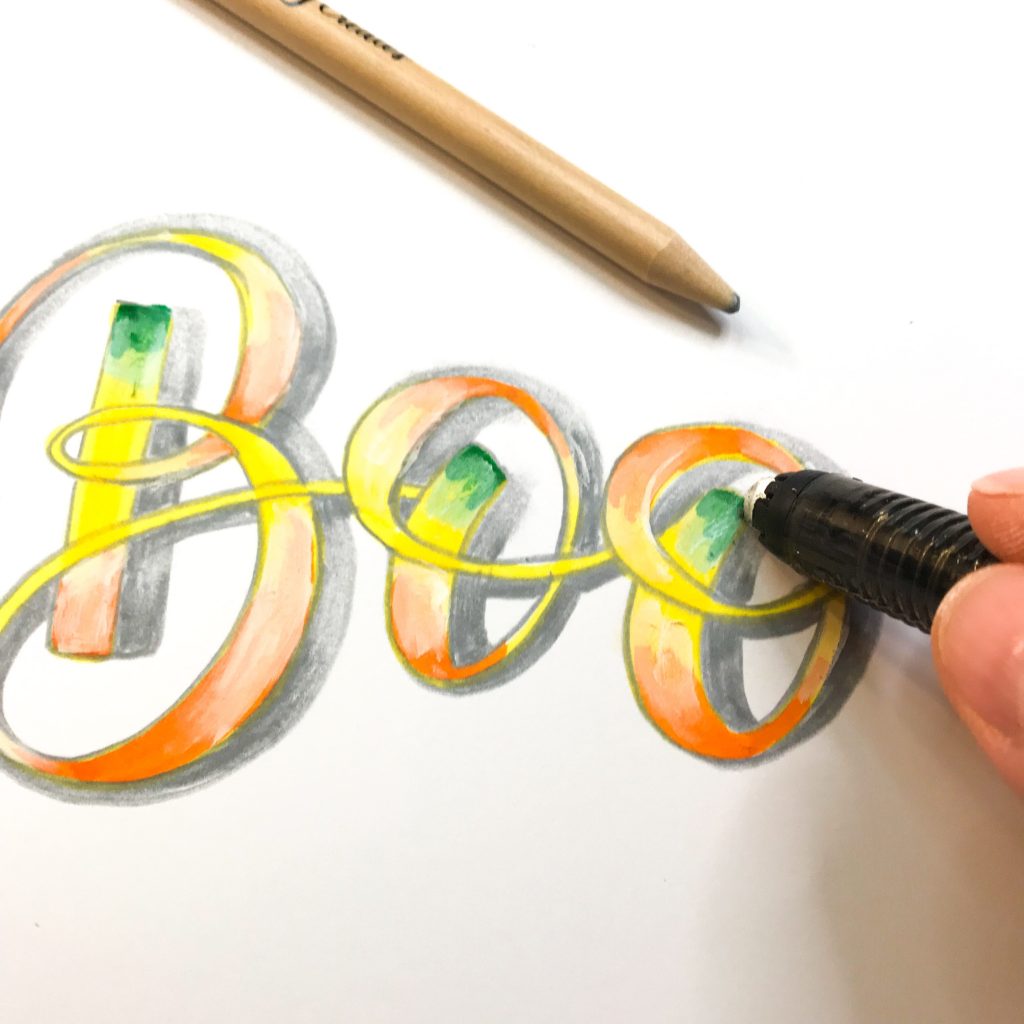
For one last little detail, use the Kelly Creates Metallic Jewel Bullet Tip Pen in Bronze to add a darker line between each thick line and it’s shadow, plus I added a random dotted pattern in the thick downstroke areas of each letter.

I hope you gained a trick or two for your lettering when you want to add some dimension and details.
I never would have thought of using the Moonlight Marker and my eraser to achieve these effects! Thank you Erica for always coming up with innovative lettering techniques.
For more creative inspiration, follow Erica on Instagram @ericalligraphy2
To shop the supplies Erica used, click the affiliate shopping links below or visit my online store KellyCreatesStore.com


PIN ME!

Linda Epstein
October 25, 2019 at 5:00 pm (4 years ago)Very interesting tutorial and techniques. Thanks, Erica.