
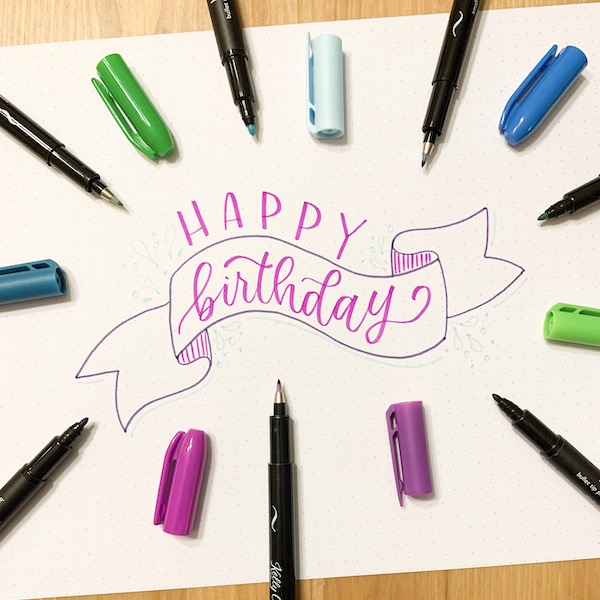
Stephane (@simplystephlettering) is going to show you how to design simple banners for your cards, planners, journals, quotes, and more!
 Kelly Creates Supplies: Dotted Paper Pad, Grid Paper Pad, Multicolor Bullet Tip Pen, Multicolor Fineliners, Multicolor Small Brush tip Pens
Welcome July, my birthday month! I love celebrating birthdays and, of course, making birthday cards! One of my favorite embellishments to add to birthday cards is a hand-drawn banner. For this month’s tutorial, I am going to show you how to draw two styles of banners!

To practice drawing banners, you will need your Kelly Creates Dotted or Grid practice pads, plus Multicolour Small Brush pens and Fineliners. There are many different styles of banners. The two I am going to show you are a straight banner style and a wavy banner style.
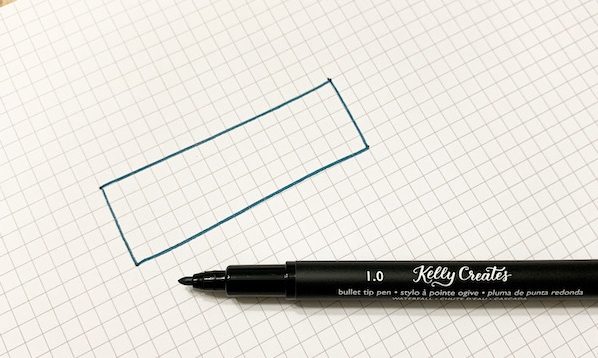
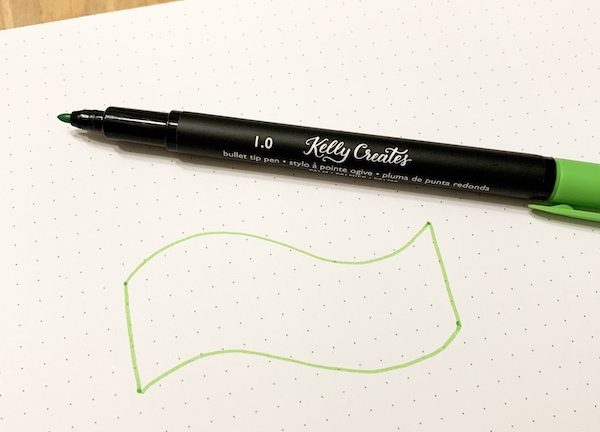
For the straight banner, you will need your Grid Practice Pad. I find it is easiest to practice using the grid paper, because you can follow the nice straight lines.
First, draw a rectangle. I like using my Kelly Creates Multicolor Bullet Tip Pens because of the nice, bold, thick lines. TIP: You can also use a ruler for super straight lines or just draw freehand like me.
 Next, you are going to draw 2 short horizontal lines at each end of this rectangle. Add two small lines, 1 grid line down from the top of the rectangle, and two small lines below the rectangle, 1 grid line down and parallel to your first two lines. Make sure your bottom lines extend past the ends of your rectangle, moving towards the middle.
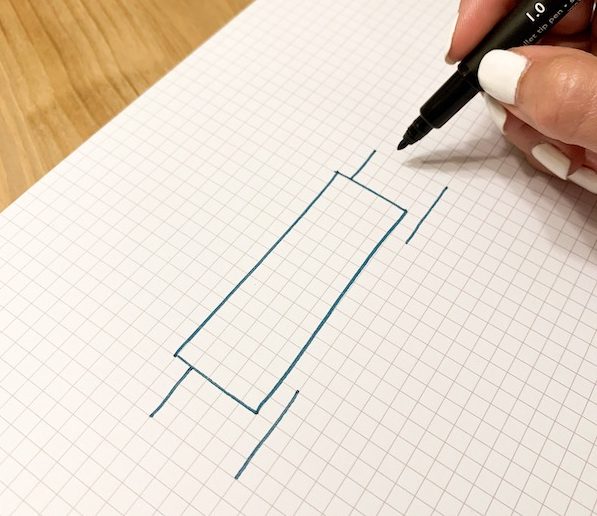
Now, you are going to draw your v-cuts into the ends of your banner. One way to do this is by drawing a dot in between your lines and drawing lines by starting at the end of your horizontal lines moving towards the dot. 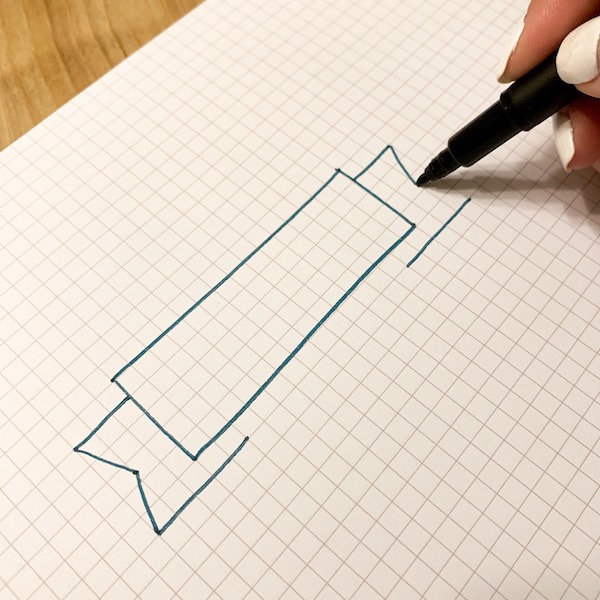
Close up the ends of your banner by drawing two vertical lines from your rectangle down to the last remaining open points. Then, draw a diagonal line from the corners of your rectangle to the corner of the banner fold. Draw vertical lines throughout this small triangular area to define the shadow of the banner. (You could also fill in this tiny triangle with a solid color.)

Now let’s take a look at how to draw the wavy banner. This wavy banner is made in a very similar way, just replacing many of your straight lines with wavy lines. I like to use my Kelly Creates Dotted paper pad for this to help me with my start and end points for each of my lines.
First draw two parallel wavy lines, closing them on the ends with two vertical lines, making it look like a sort of wavy rectangle.
Now, to make the folds in your banner, at the top right-hand and lower left-hand corners of your wavy rectangle you are going to continue your wavy lines making an “s” shape, continuing the end of your “s” beyond the wavy rectangle. Draw lines parallel to these extended lines, somewhat curved, making sure they come in contact with the vertical edges of your banner.
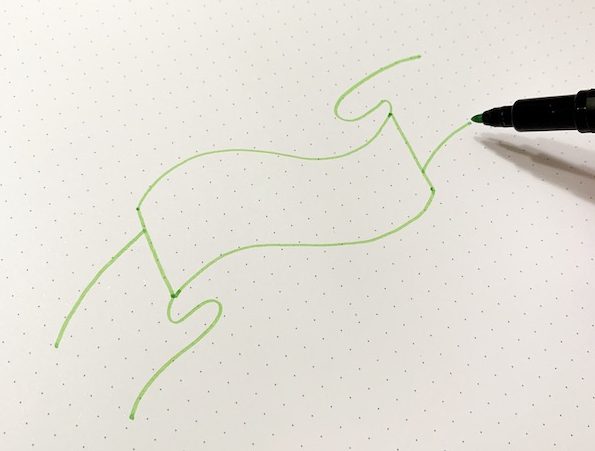
Next, draw your v-cuts into the ends of your ribbon, close up the folds of your banner by drawing vertical lines connecting the inward fold of the banner to the main part of your wavy rectangle, then fill in the folds with repeated vertical lines or solid color.

Use these rough drafts of banners to practice writing your words inside and around them before you commit to your final project. Now, you can incorporate these banner designs into cards and lettered quotes! Cheers to all the July birthday letterers!
Happy Birthday, Stephanie! I hope you celebrated in style…and maybe someone made you a hand lettered card too! I will be using these banner styles in my planners and bullet journal as well.
For more lettering inspiration and ideas, follow Stephanie on Instagram as @simplystephlettering and her Facebook page Simply Steph Lettering.
Shop the supplies used in this project by clicking the affiliate shopping links below:


PIN ME!

Chasity
July 29, 2019 at 9:33 pm (7 years ago)Yay! These are SO FUN! And July Birthdays are the best!