
Today, Stephanie (@simplystephlettering) is showing you how to combine hand lettering and calligraphy to create beautiful, inspirational quotes!
 One of my favorite things about lettering is that I am able to be creative and experiment with different print fonts and script styles. For this tutorial, I am going to design a quote layout and give you some tips on how to combine print and brush lettering for your own composition.
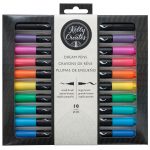
You can use any of your favorite Kelly Creates products for your quote project. I used the following Kelly Creates supplies: Creative Journal, Blank Practice Paper Pad (or Project Pad), Deluxe Lettering Kit, Small Multicolor Brush Pens, and Dream Pens
First, choose your quote. If this is your first time lettering a quote, go for something shorter so that you do not get too wrapped up trying to fit all of the words together. I get a lot of inspiration from music and television shows, but sometimes when I want to letter about something specific, like a feeling or holiday, I do a quick internet search to find inspiration.
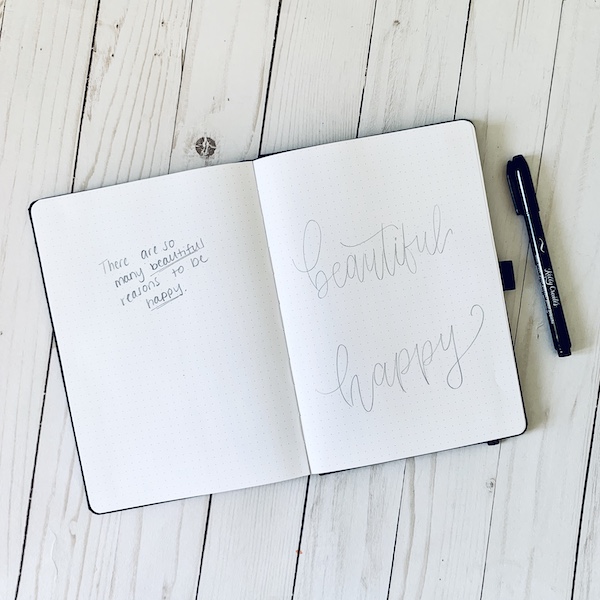
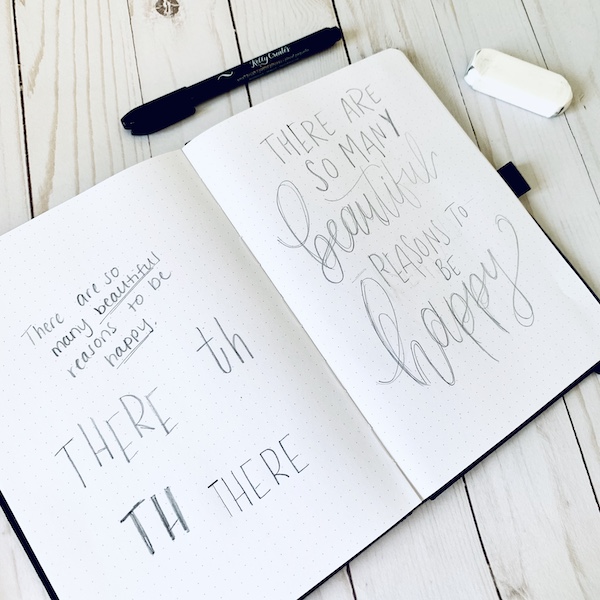
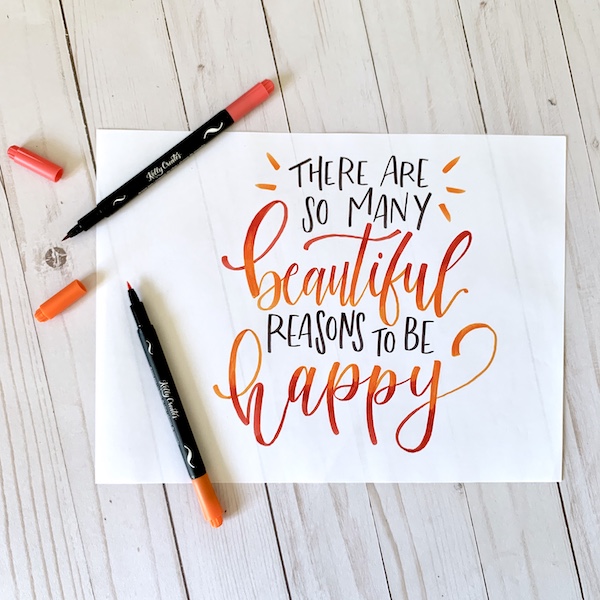
To begin, I like to write down my quote in regular cursive or print. In this case I wrote my quote in my Creative Journal, underlining the words that I want to stand out or be emphasized. These emphasized words are the words that typically will carry the most weight in a quote or are part of the main theme or message, and will serve as the anchors of my composition. The quote I chose to letter is “There are so many beautiful reasons to be happy.” To me, the words that stand out the most are “beautiful” and “happy”, so these are the words that I will hand letter in a large style in my final composition.

Next, I will begin to sketch out my design. Using dot or grid paper is helpful in terms of measurements too. Remember this sketch is not your final project, it’s your practice. I start by lettering my emphasized words first, leaving a little space in between them to fill in the rest of the quote. A rough draft allows you to play around with different layouts and arrangements of words before you make your final draft. It gives you a chance to balance your words evenly before transferring them onto your good copy, making sure both words fit into the designated amount of space, and you do not overcrowd one side of the composition with words and designs.
Next, I experiment with different lettering styles for the rest of my quote. Because my script is a bounce lettering style (see my previous tutorial on bounce lettering!), I decided to go with a similar bouncy style for the printed words. I then begin to fill in the rest of the quote around the lettered words, trying to follow the flow of my bounce lettering style. Again, this is why I love to sketch out my layouts first, because I can always erase and move words around that don’t look right!
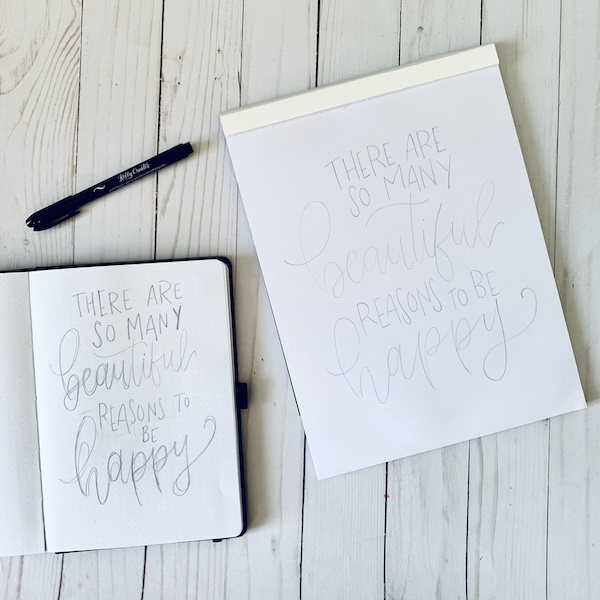
 Once you are pleased with your quote layout design, now you can transfer it to your larger piece of paper for a good copy, either the Kelly Creates blank practice paper or white card stock from the Project pad. Make sure to write your quote lightly with pencil onto your paper so that you can erase it easily. Another option is to use a light box.
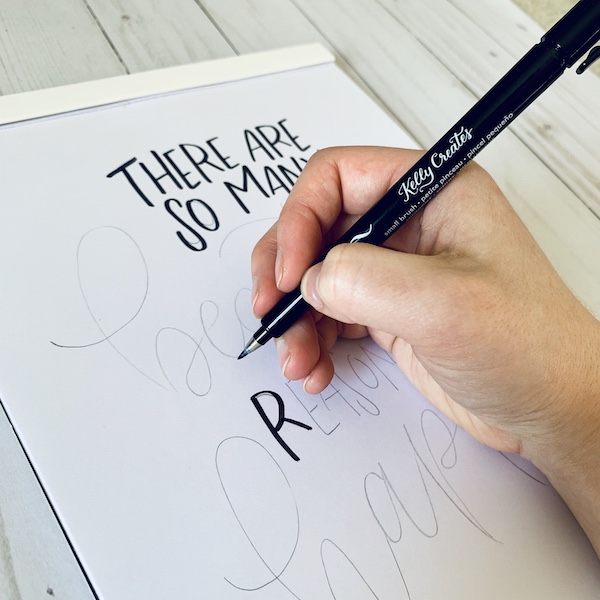
Once your quote is finished with pencil, you can trace over your letters with your Kelly Creates pens. Be sure to erase any visible pencil lines! TIP: If your pen colours are very light, be careful that the pencil lines don’t show through.

A few final tips and ideas:
- Once you have your layout written onto your large paper, if you want to tweak it, go ahead! You want to love your final composition. If you aren’t happy with it, change it.
- You don’t have to follow your pencil lines to a fault, especially with your lettered words. Let your hand lettering style flow naturally.
- Always try to sketch out your quote as a rough draft first before you write out your final composition. This helps you see if your layout idea is aesthetically pleasing and if your words and lettering styles fit together well.
- Be creative! Sometimes, I letter the same quote a few different ways, testing out different lettering styles and designs. As you can see, I tested out some blending of two dream pen colors in my final draft, as well as added some small design features around my plain text.
- As a way to track your own progress with lettering, revisit old compositions. Re-designing an old composition is a great way to see how you have grown in your lettering talents and challenges your creativity by having you improve or change your own work.
I totally agree with this quote, Stephanie….your lettering is one beautiful reason to be happy! I would frame this! Thanks for sharing this informative and uplifting tutorial.
For more lettering inspiration and creative ideas, follow Stephanie on Instagram @simplystephlettering and her Facebook page ‘Simply Steph Lettering.’
To shop for the supplies Stephanie used, click on these affiliate links:


DAYNA YVONNE JACKSON
April 29, 2019 at 10:05 pm (7 years ago)Very cool! I am going to give it a try!
Linda Epstein
April 30, 2019 at 12:33 pm (7 years ago)Wow Stephanie. This is really good information. I wonder, do you find the journal notebook too confining sometimes for your sketches? Thanks for sharing this tutorial. Your lettering is beautiful!
Stephanie Rooney
May 28, 2019 at 8:07 pm (7 years ago)Hi Linda!
I usually start out with a very small sketch, that’s why I love the notebook so much! For commissioned pieces, I usually make a few sketches, sometimes on larger paper! I hope this was helpful, tag me in your photos if you test out my tutorial!
Eva
April 30, 2019 at 3:48 pm (7 years ago)Thank you! Very helpful!
Saher
May 1, 2019 at 9:05 am (7 years ago)This was so helpful ?. Thanks alot.