
Cupcakes with Sprinkles anyone? Bonnie (@diamondandwillow) has the perfect way to help keep track of all the birthdays in your life….and it’s super cute too!
![]()
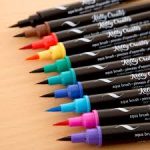
Kelly Creates Supplies: Creative Journal, Dream Pens Set 1, Dream Pens Set 2, Multicolor Fineliners, Black Fineliners, Aqua Brush Pens, Multicolor Small Brush Pens, Tracing Pad, Deluxe Lettering kit
Dot journals are so handy for making trackers because the dots serve as guidelines when dividing up a page into sections. I began by measuring out 12 equal sections over a two-page spread. I used the dots to help guide me. I did this all lightly in pencil first.
![]()
My measurement specifics are as follows:
8.5 dots wide, with 1 dot space between – making 3 rows horizontally per page.
From the top of the page, 1 dot space then create first line, and 4.5 dots down from there to create the box for the months name and cupcake.
Leave one dot space before next starting line, counting 14 dot spaces to the bottom, for the birthday names section.
Now leave 1.5 dots space and repeat once more, to create 4 rows vertically.
Hopefully the photo helps to make this clearer. You should have one smaller box, for the months and cupcake, and a larger box for the birthday names.
Take a sneak peak ahead to one of the photos further on, and this should give you a better idea of placement if I’m at all confusing you.
![]()
I drew a small cupcake design on a piece of transfer paper, slightly larger than my monthly title box, as I wanted it to stray out of the section. You could switch it out and draw a balloon, cake or candle here, if you’d prefer.
I always keep a piece of ‘homemade’ transfer paper, on which I’ve scribbled on one side with pencil. The softer the lead of your pencil, the more carbon that will be left behind. I just used the HB one of Kelly’s Deluxe Lettering Kit on a piece of tracing paper from the Kelly Creates Tracing Pad. This creates a perfect way to transfer your design onto whatever current project you are working on.
![]()
![]() So now, on each monthly, sub-title section, I placed the cupcake where I wanted it to be. I then carefully slide my carbon piece of paper, carbon side down, underneath the cupcake. Trace over the cupcake with pencil. Remove both and you should now have a cupcake sketch in the correct place. Repeat that for the other 11 sections.
So now, on each monthly, sub-title section, I placed the cupcake where I wanted it to be. I then carefully slide my carbon piece of paper, carbon side down, underneath the cupcake. Trace over the cupcake with pencil. Remove both and you should now have a cupcake sketch in the correct place. Repeat that for the other 11 sections.
![]()
Using the Dream pens ‘Nest and Bark’ I drew the cupcake liners. From there I used a variety of Dream Pens and Aqua Brushes to draw in the icing swirls, lighter on top, darker below each to create a shadow to each swirl. ![]()
I used the .01 Fineliner to trace over my pencil lines of each section. I went freehand here following the dots.
![]()
There should be some broken lines in the smaller top boxes if your cupcake extends past the allotted space. Once you’re finished the outlines, you can erase your pencil lines and smudges.
![]() If you’ve followed my other tutorials, you’ll know I love drop shadows. So I took the grey brush pen from the Deluxe Lettering Kit and drew shadow lines to the right and bottom of each section.
If you’ve followed my other tutorials, you’ll know I love drop shadows. So I took the grey brush pen from the Deluxe Lettering Kit and drew shadow lines to the right and bottom of each section. ![]()
Time to add in your abbreviated months. I lettered the months using the Kelly Creates Small black brush pen. Then I wrote the birthday names & dates with a Black Fineliner.![]()
I decided to add in tiny balloons beside the birthdays I need gifts for. I will colour in the balloon when that’s completed. If you look closely at March and April, I only did a portion of the balloon. This lets me know that I have more to purchase, but it also reminds me that I already have something.
Maybe you don’t need the reminder ? but I do.
![]()
As an extra, I did a simple design on the next page to keep track of ideas for gifts and when I have completed the purchases needed. ![]()
Have fun creating your birthday tracker! I hope these cute designs make your journal a happy place to create and be organized.
Who knew being organized could be cute and pretty too?! Thanks Bonnie for the detailed and helpful instructions.
For more artistic and creative inspiration, follow Bonnie on Instagram @diamondandwillow and her website http://www.diamondandwillow.ca
SHOP SUPPLIES: Click the images below for affiliate shopping links


![]()
Linda Epstein
February 27, 2019 at 4:48 pm (7 years ago)This is such a great idea. The colors are so pretty, and they look yummy enough to eat. Thanks Bonnie for sharing this.
Lisa Faamasino
January 6, 2021 at 8:43 pm (5 years ago)Do you have a premade template that I can purchase? I am not creative not do I have the patience to draw this myself.
Kelly
January 16, 2021 at 10:03 am (5 years ago)Maybe you can search online for a cupcake drawing template. They’re fun to draw!