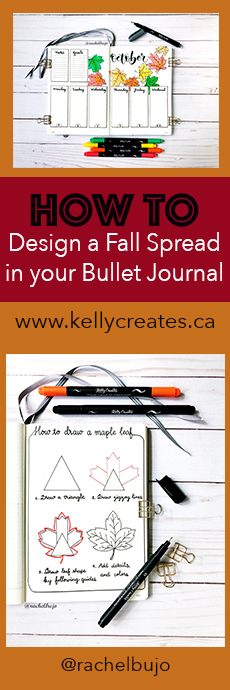
Rachel Doan (@rachelbujo) always has informative tutorials on spreads for our bullet journals! Here is this month’s lesson about designing a weekly spread with bonus instructions for drawing a maple leaf to help you get ready for Fall in your journals.
As a bullet journal user, weekly spreads are very useful for me. That is where I really plan for my days, arrange events and activities, take notes and make goals for the week, and in general, it helps me to organize my life a lot better. I thought it would be a good idea if I show you how to make an effective and visually appealing weekly spread!
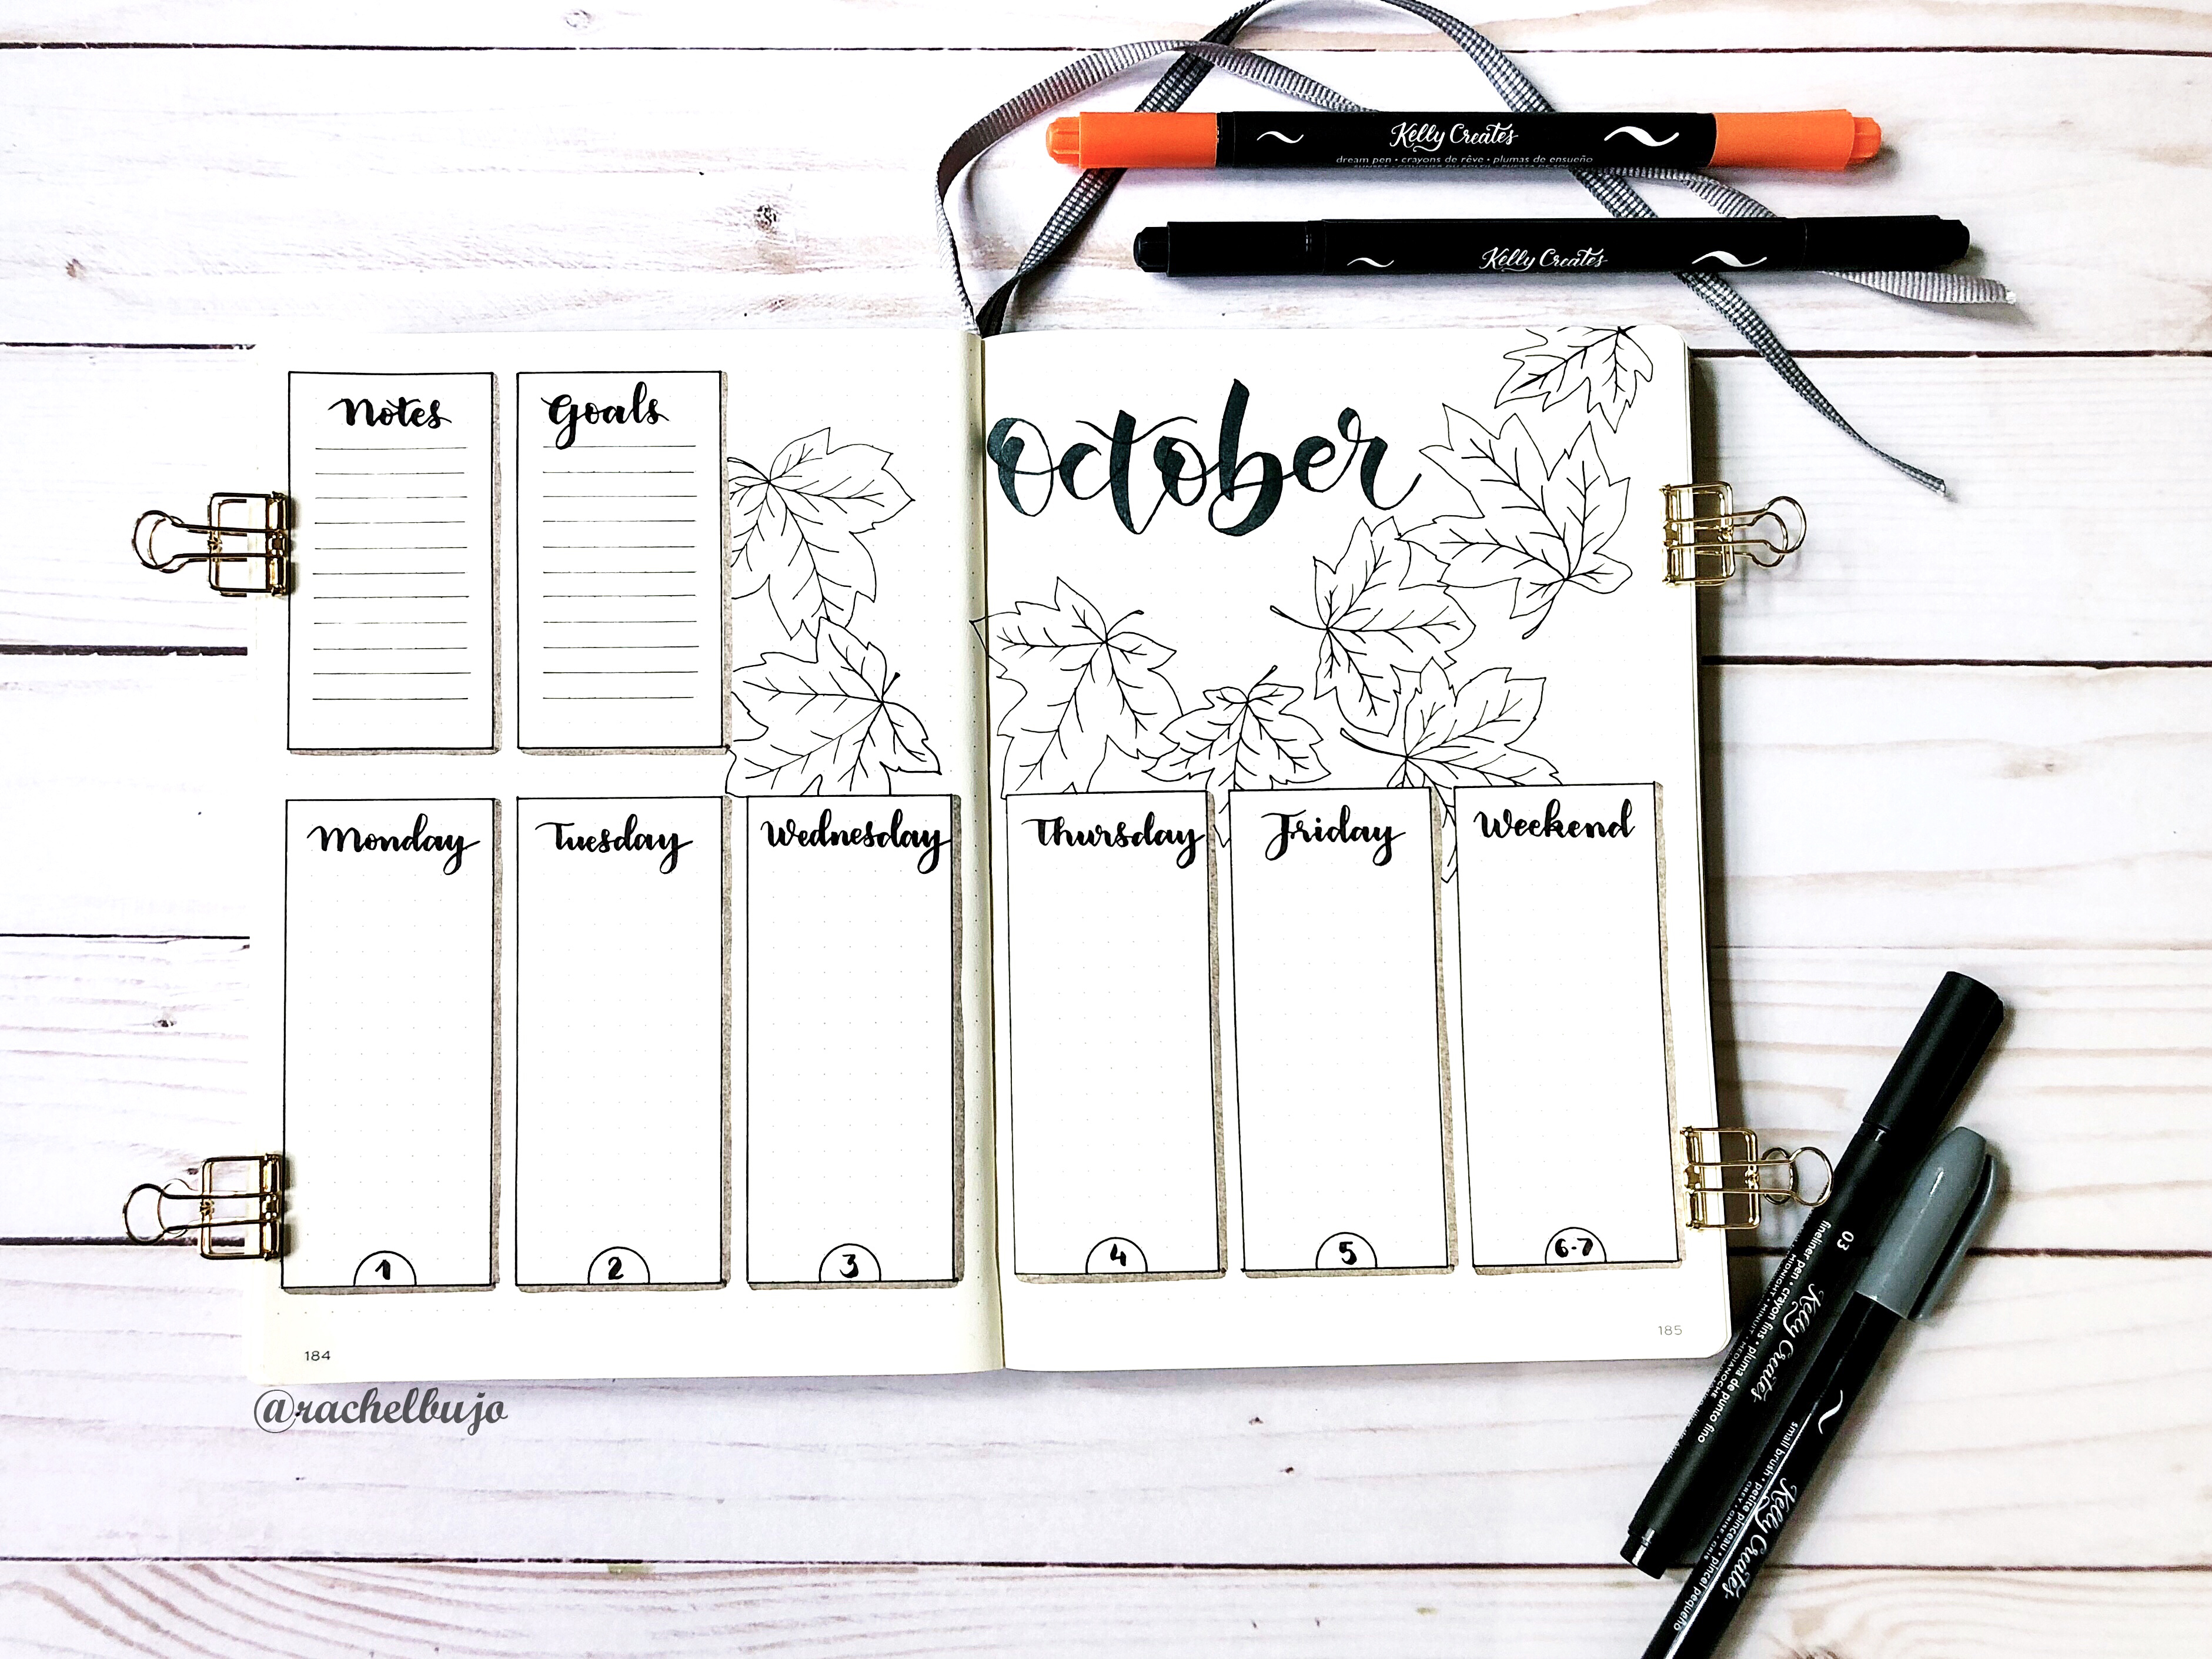
Step 1: First, let’s divide the page into three main sections: days, notes and goals and title with decoration. I always use two pages for a week so that I can have enough space to plan for my week and my drawings too. In this tutorial, I use columns to make the days section because it works best for me, but you always can change it based on your preferences.

Step 2: Let’s go into a bit more detail in each section. In this step, I used the Kelly Creates Black fineliner size 03 to draw all the details. In the days section, divide it into six columns for seven days of the week ( I combine the two weekend days together). In the notes and goals section, divide it into two columns to separate the notes and goals for the week. I leave a tiny space between each box to add shade along the side and bottom edges using the Kelly Creates Multicolor Grey Small brush pen in order to give it a more dimensional look. We will leave the title and decoration section blank for now.

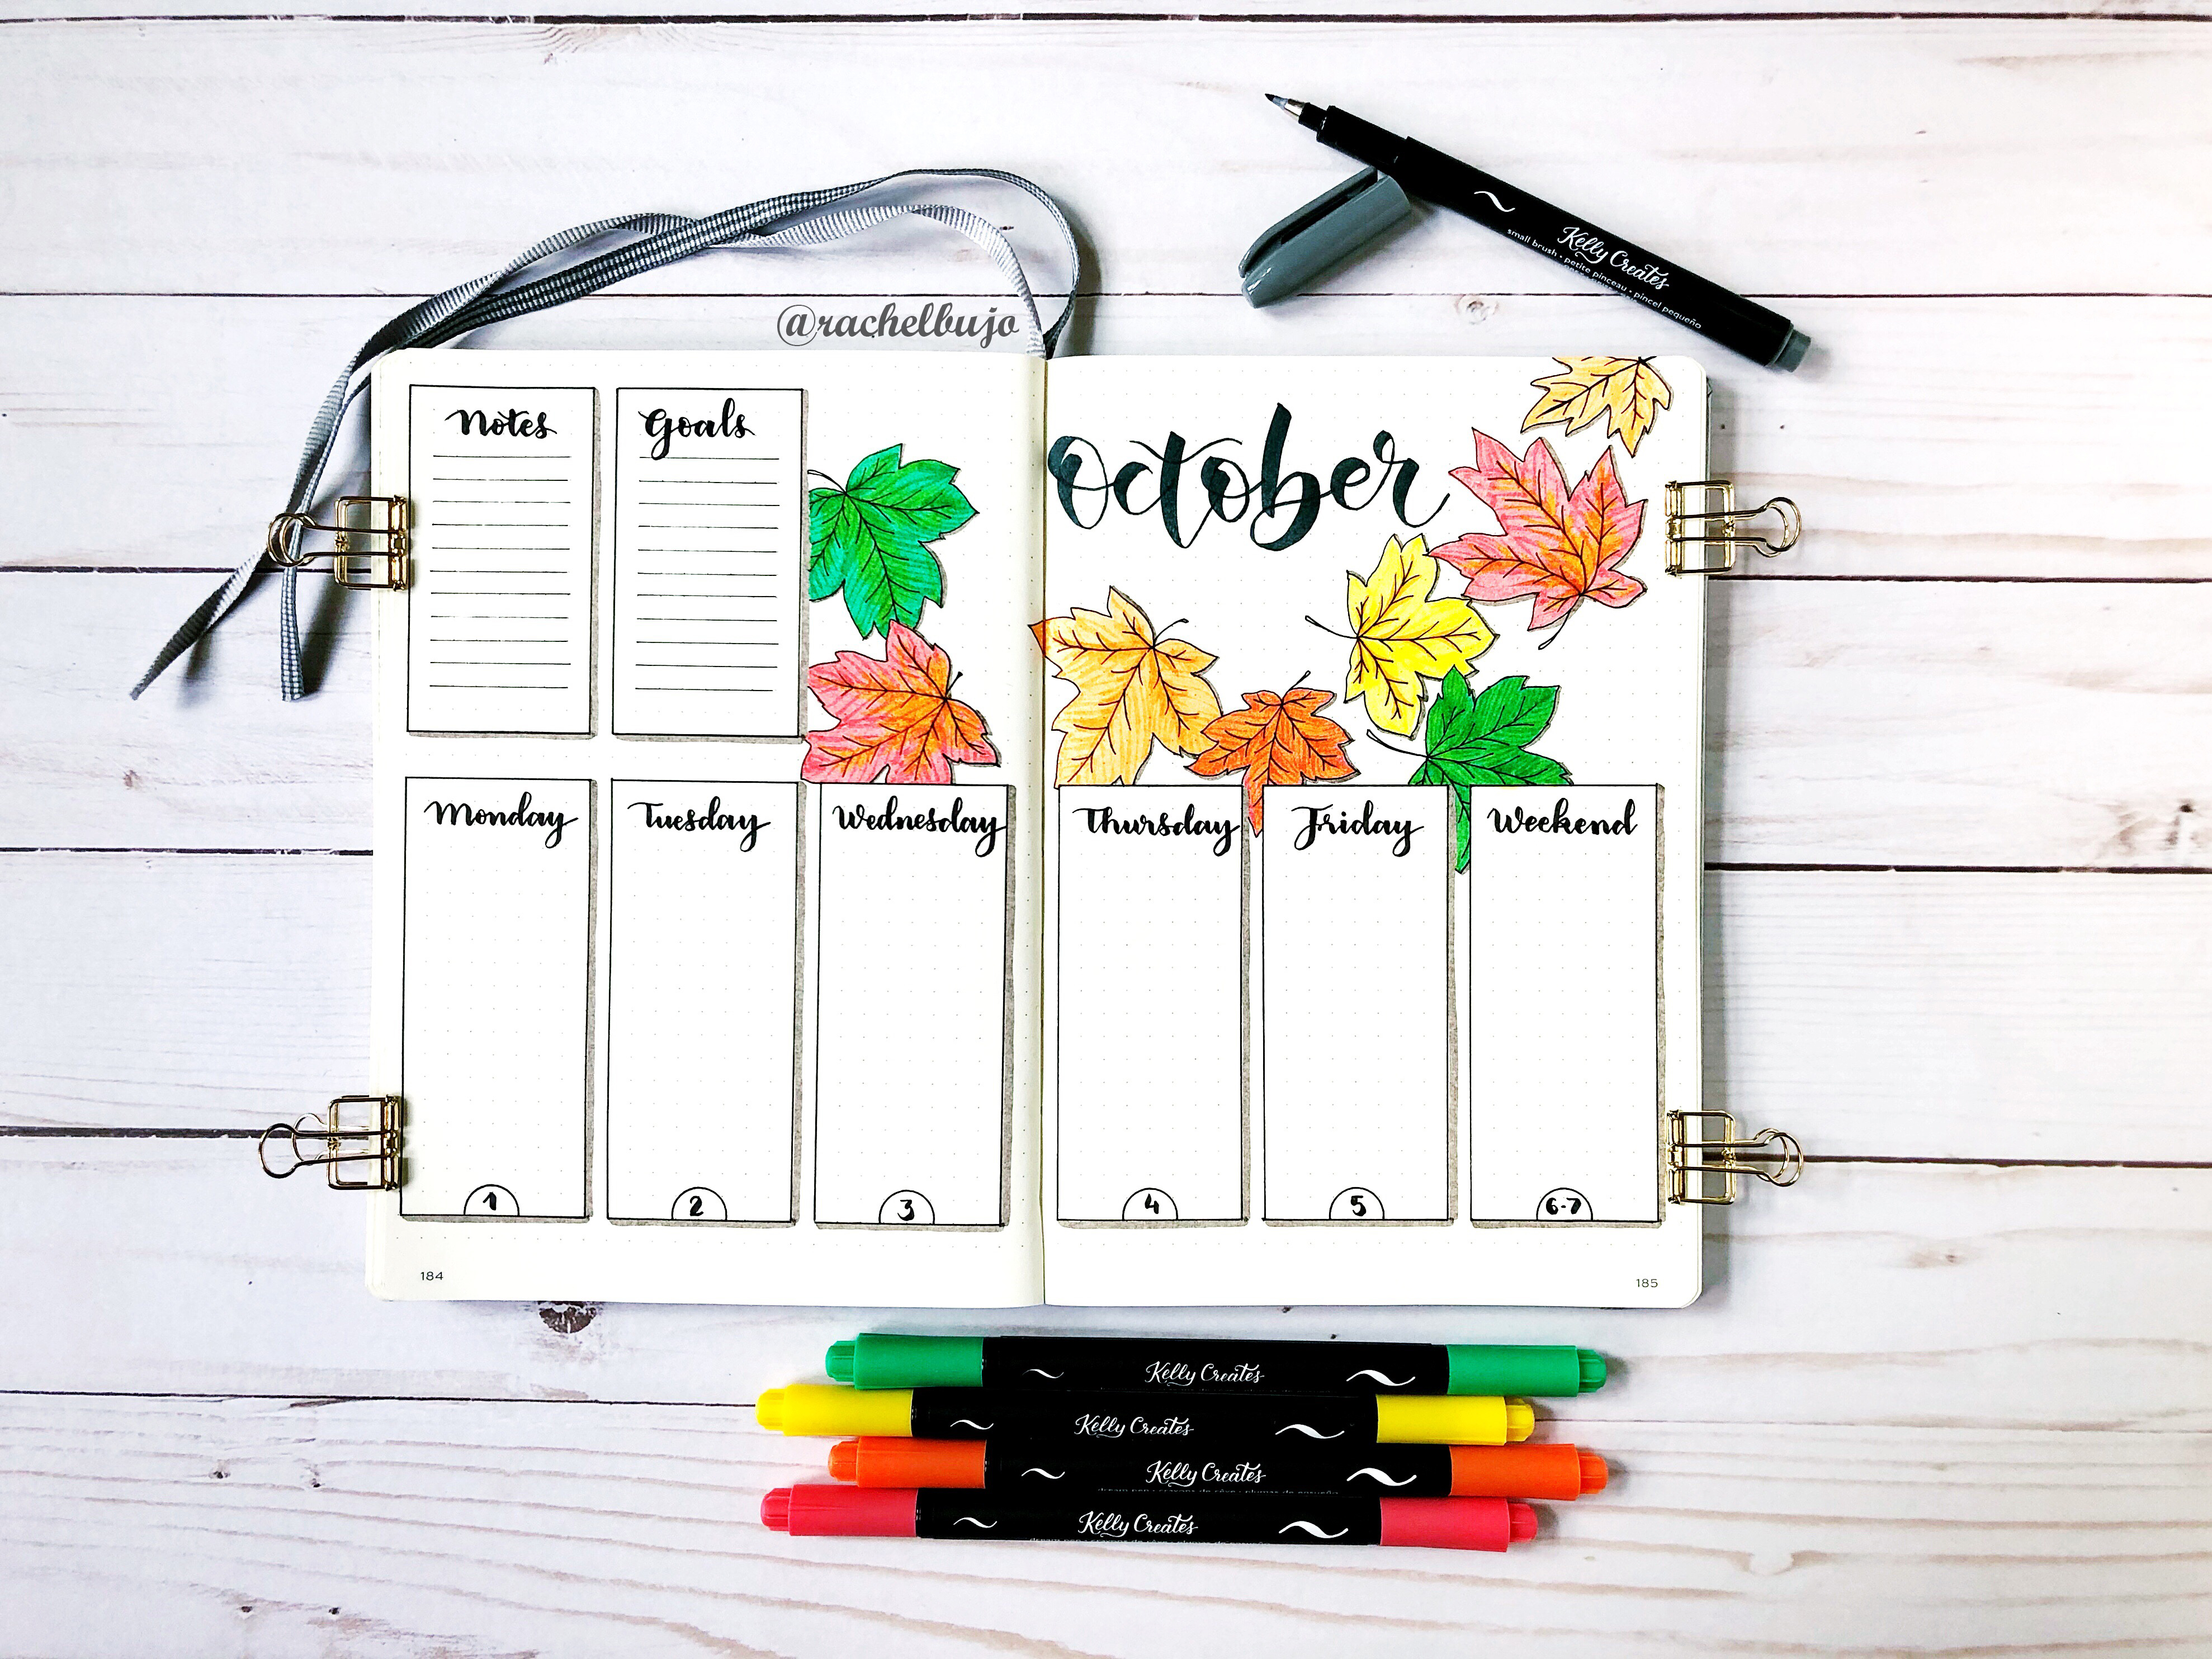
Step 3: Now that you have the main outline ready, we can write all the days with dates, titles and also add your preferred illustration. I used the Kelly Creates Fine Black brush pen to write the dailies and notes/ goals and the Kelly Creates Midnight Dream Pen for the month’s title “October”. When illustrating, I just draw whatever comes to my mind at the time. I decided to use the Kelly Creates Black Fineliner size 03 and Dream Pens to draw some colorful maple leaves, creating a warm and cozy feeling for Fall.
Here is a quick tutorial on how to draw a maple leaf for this spread. Add colour and you instantly have Fall on a page! Now you are ready to plan for the week. I hope this tutorial is helpful for you and makes it easy for you to organize and plan for your days.

Thank you Rachel! I am going to get busy and draw some maple leaves in my October spreads! For more journal inspiration from Rachel, click here to visit her on Instagram @rachelbujo
To shop for the supplies Rachel used in this tutorial, visit www.kellycreatesstore.com by clicking on the images below.