
Today on my blog, Elizabeth Wise (@wiseletters) has an awesome tutorial on how to add dramatic shadows to hand lettering.

Add a little dimension to your letters!

What you’ll need: Pencil, paper (I used the Kelly Creates Blank practice pad), Kelly Creates Fineliner (size 1.0) and the Kelly Creates Large Brush Pen.

Step 1: To begin, draw the outline of any word, in any style of lettering.
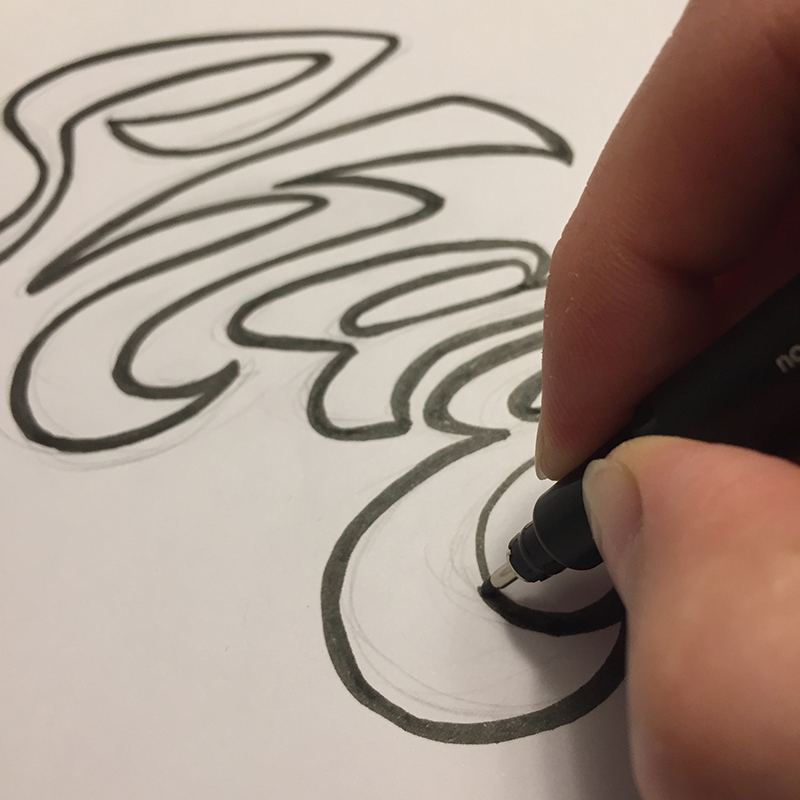
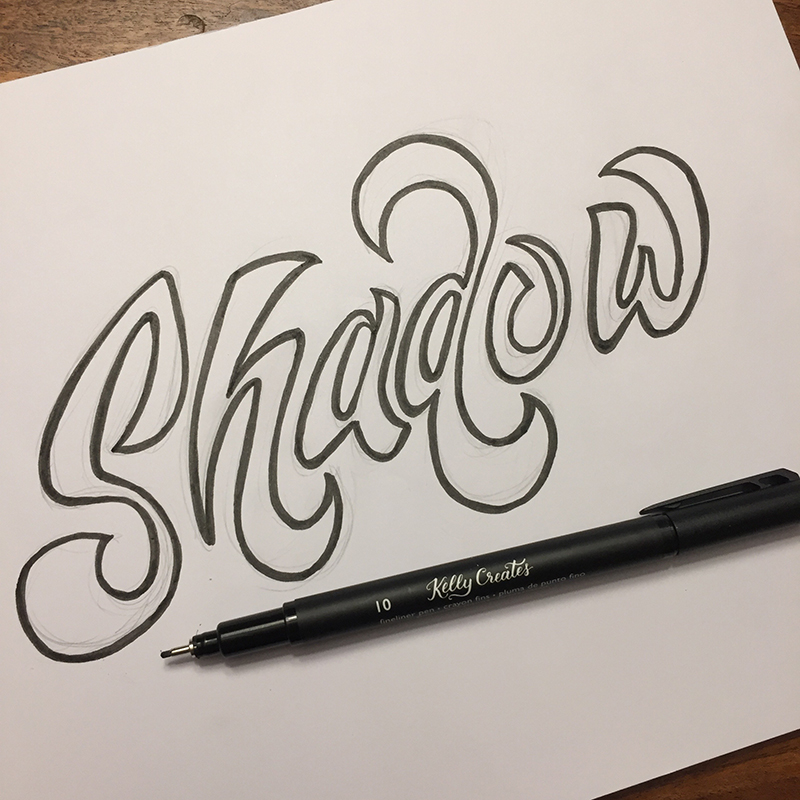 Step 2: Using the #1.0 Fineliner, start outlining the word. You can make this line as thick or thin as you’d like, just make sure that you’re leaving some white space in the bulk of the letter so you’re able to easily identify each letter. I like using a Fineliner for this part because the pen tip is very hard, you have complete control over the width of the line as it doesn’t fluctuate with varying pressures.
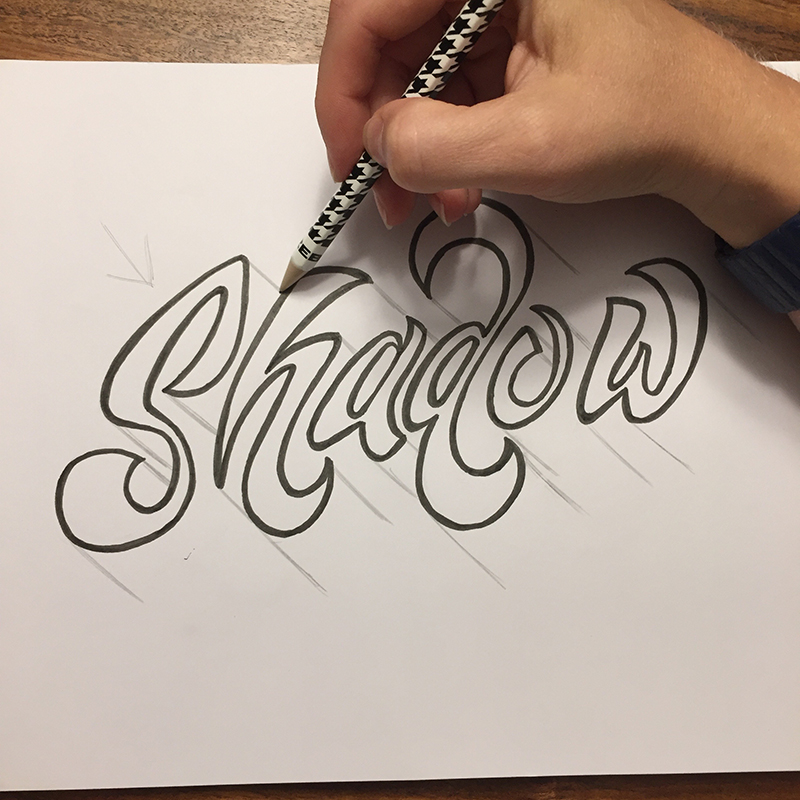
Step 3: This is the most important step. Using a pencil, you need to first identify where your light source will be coming from. In this case, I picked the top left corner. If you’re having trouble remembering what direction you’re going to be using, draw an arrow to keep that direction top of mind. Next, draw lines that extend from the end/edge of each different letter. Make sure the length of the line you’re casting is the same length throughout; this will ensure that the shadow looks consistent across the word. 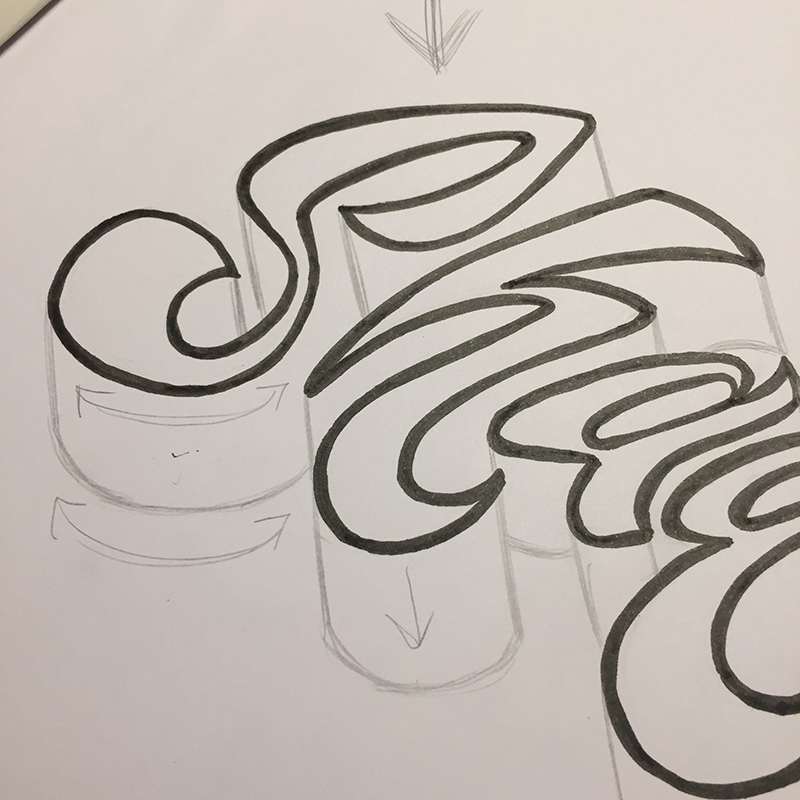

Step 4: The next step is to connect the downward cast lines to each other to complete the shadow. The connecting lines should mirror the lines of the letter you’re shadowing.
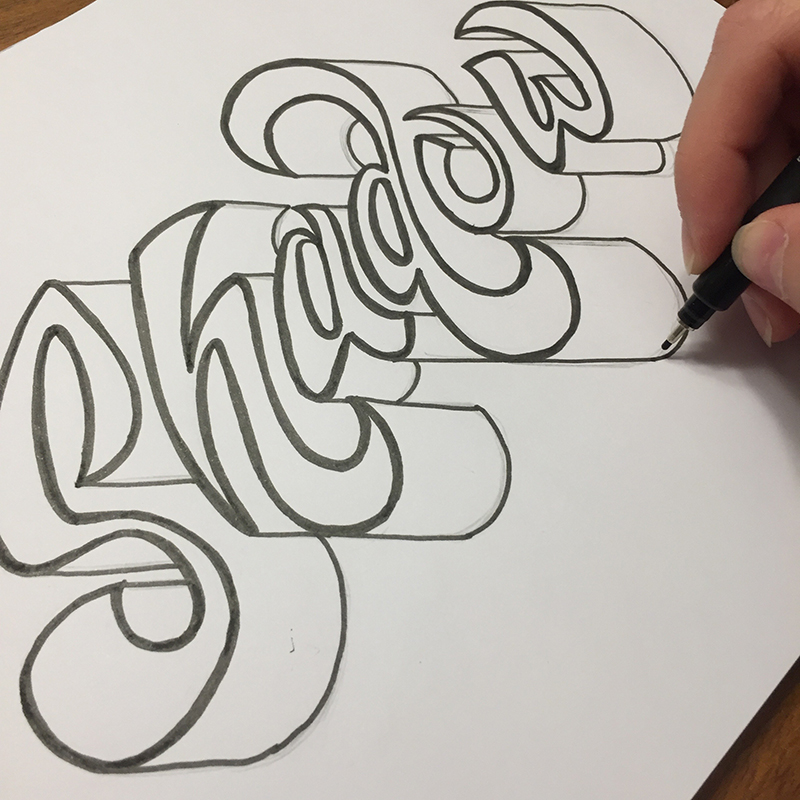
Step 5: Using the Fineliner again, outline the shadows you’ve drawn in pencil.

Step 6: Now using the Large Brush pen, fill in the areas of shadow that you have created. To give it some extra dimension, especially if you’re using paper that shows the marker strokes, keep all of your strokes consistent with the direction of the shadow you originally identified.
You have now created a bold shadow that makes any word really stand out off the page! If you would like to practice this 3D shadow technique, here is a pdf of the outlined word “Shadow” for you to download and print. Click on the image below…

—————— I just love this dramatic shadow Elizabeth has designed! To learn more about Elizabeth’s lettering art work, visit her website http://www.wiselettering.com or check out her Instagram @wiselettering
To shop for the supplies used in this tutorial at KellyCreatesStore.com, click the photo links below:


Bonnie
August 27, 2018 at 1:51 pm (8 years ago)Great tutorial Elizabeth! Bold statement lettering on par!
Christina Ambros
August 27, 2018 at 10:23 pm (8 years ago)Love this. I really need to get moving and start!
Helen Gullett
August 28, 2018 at 7:09 am (8 years ago)Thank you for the tips and tutorial, Kelly!
Kim
August 30, 2018 at 12:54 am (8 years ago)Thank you, Kelly and Elizabeth!
Loke
March 30, 2022 at 5:05 pm (4 years ago)This is a great tutorial! So helpful.