
Bonnie Peters (@diamondandwillow) always shares such wonderful illustration tutorials! Learn how to draw 3D ribbons with beautiful patterns by following her step by step process.

Kelly Creates Supplies used: Blank Practice Pad, Project pad, Deluxe Lettering Kit (Pencil, eraser, grey Dream pen & Fine Black brush pen), Black Fineliners Set 005, 01, 05

To begin the design, I used the HB pencil and a piece of smooth blank paper, to sketch the idea of ribbon being draped over a stick. To create interest, I looped them back and forth amongst one another.

From there I flipped over the sketch, and using the pencil I scribbled on the back to produce a carbon, for which I would then transfer the design onto the cardstock. (You could also use transfer paper for this step)

You can now layer the sketch over a piece of Kraft, black or white cardstock from the Project Pad and trace over the design with your pencil to transfer it from one to the other. I chose Kraft paper.
 Using the 05 Fineliner I outlined the ribbon.

To keep track of drawing the different ribbon patterns, I used pencil to label them, A for the front side of one ribbon, and B for the reverse side of the same ribbon. I continued that process using C-D, and so on.

I used the 005 and the 01 black Fineliners to draw the patterns on the ribbon. You can use your imagination and make up designs of your own, or use the Kelly Creates Multicolor Fineliners instead of only black.

The grey Dream Pen was then applied to any area that over lapped another ribbon. This creates the appearance of a shadow and adds depth to the ribbons.
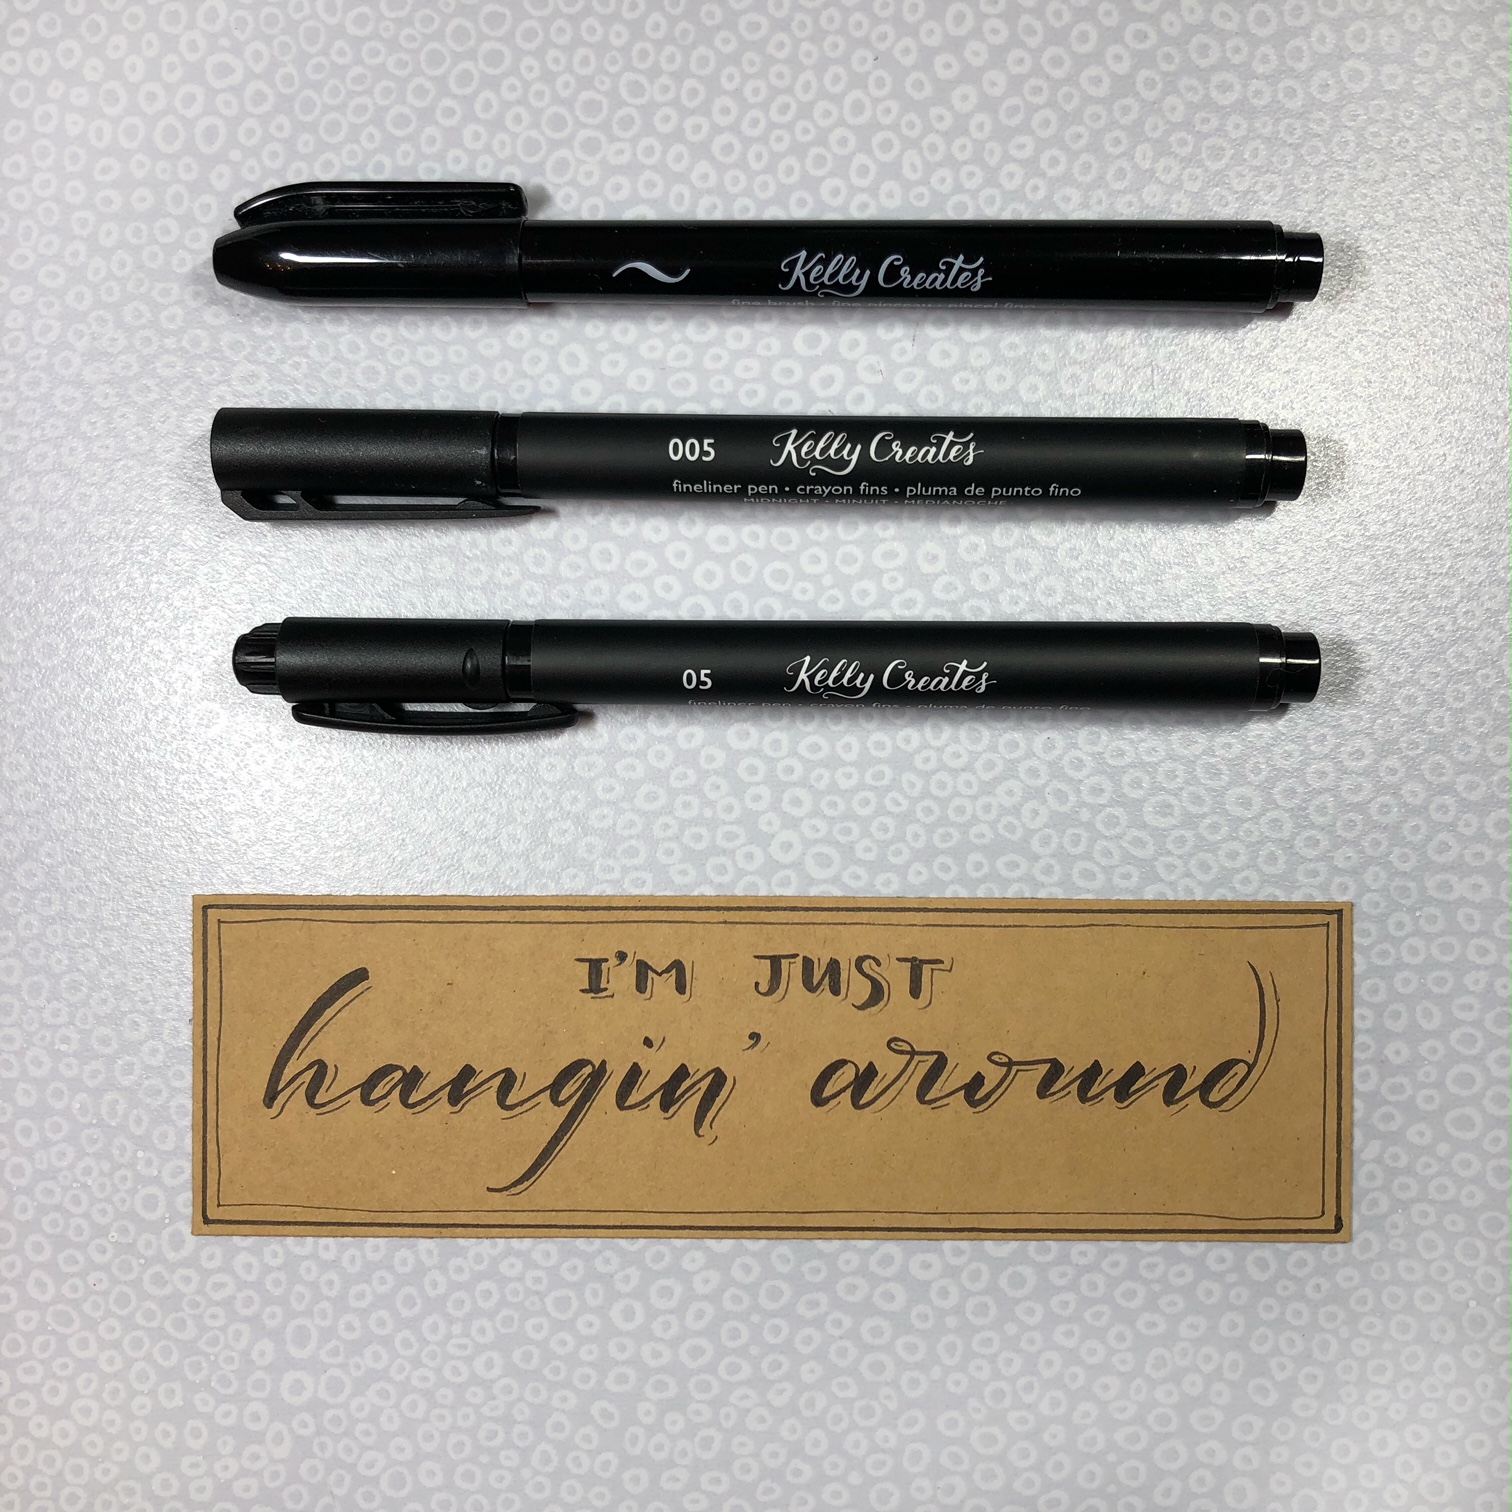 I wanted to make a simple quote to lay on top. On a separate piece of cardstock, I lettered “I’m just hangin’ around” with the Kelly Creates Fine black brush pen, applying a fine shadow line for depth with the 005 liner, and lastly the 005 and 01 liners to make a border on the outside edge.
There you have the completed piece!
Bonnie, I have never seen anything like this before! The dimension and curves of these ribbons are beautiful.
For more inspiration and art work from Bonnie, follow her on Instagram @diamondandwillow and visit her website http://www.diamondandwillow.ca
To shop for these supplies, click the images of affiliate shopping links below:


Andrea H
November 20, 2018 at 6:07 am (5 years ago)Beautiful ribbons.
Bonnie
November 20, 2018 at 10:50 am (5 years ago)Thank you Andrea ?
Bonnie
November 20, 2018 at 10:50 am (5 years ago)Awe, thanks Kelly. Glad you like itt ?
Bonnie
November 20, 2018 at 10:52 am (5 years ago)Awe, thanks Kelly…so glad you like it ?
Gemma
November 21, 2018 at 9:26 am (5 years ago)Oh my gosh, I need to try this… Looks awesome!