
It seems I’m getting a little carried away with my family anecdotes (and teenage horror stories), so I’m going to make a concerted effort to post more scrapbooking pages.
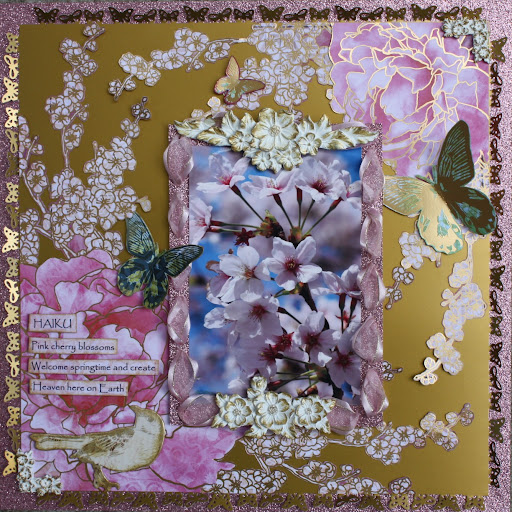
When I started this blog in June, I was working with the new Creative Imaginations “Sakura Collection” and created a couple of display layouts for my local scrapbook store Scrap-A-Lot.

I was pretty excited about these papers because back in the “olden days” (according to my kids), 1980 to be exact, I travelled to Japan on an exchange with the Lions Club. All my photos and memorabilia from that 6-week trip are suffering their fate in a humongous magnetic album….yes, the kind where the plastic page cover lifts up and you place your photos on a sticky page background, knowing the contents will disintegrate within 10 years.
Ironically, however, I used a photo from a Scrap-A-Lot friend named Fran, who was also excited about scrapping her trip to Asia….which was much more recent than mine. So while I was looking at her photos, I found the most lovely pic of cherry blossoms and was inspired to create this page for Fran.
 |
| Gosh, it was hard to photograph this shiny gold paper! |
I wrote the Haiku…as I’m sure you all did in Grade 8 middle school English class…
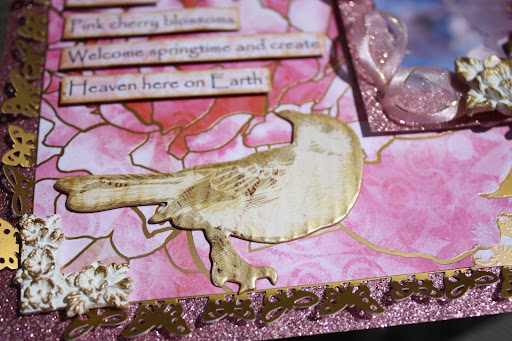 |
| The chipboard bird comes from a package of chipboard elements, all in neutral cream and brown…I added some gold metallic paint to coordinate with all the gold on the page. |
I cannot for the life of me remember the name of the package of chipboard…grrrrrr.
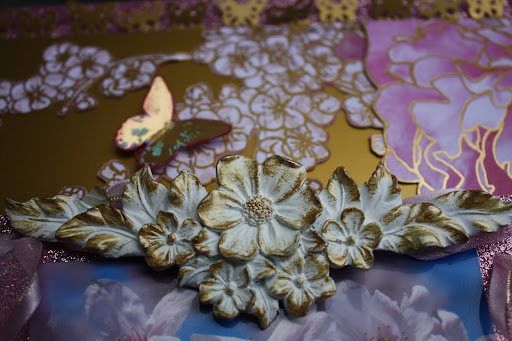 |
| Just love working with the Melissa Frances elements…I gilded her white resin pieces. |
For the pro scrapbookers out there, you can probably skip this next tutorial, but I thought I’d post LOTS of photos that show how I created this page. Just because I always like lots of photos when I read a blog. LOTS.
Here goes…
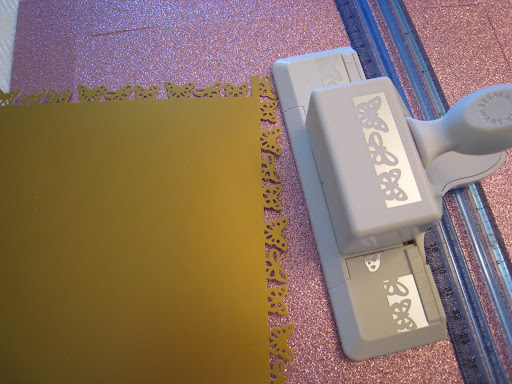 |
| One of my favourite Martha Stewart border punches of all time…I punched the edges of the heavy gold metallic cardstock. |
 |
| I gently lifted up the butterflies from the background glitter paper to give them dimension. |
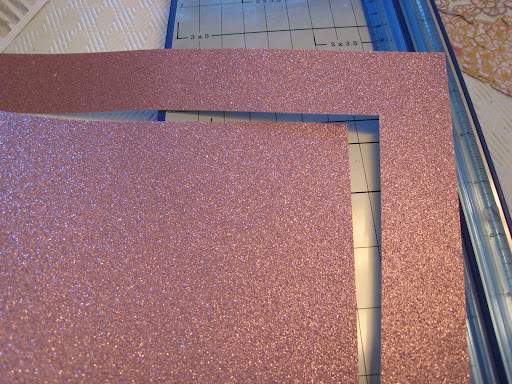 |
| The thrifty scrapbooker cuts away the section of her background glitter paper that will be wasted and unseen beneath the gold metallic background paper. I placed the gold cardstock on top of this pink glitter frame. |
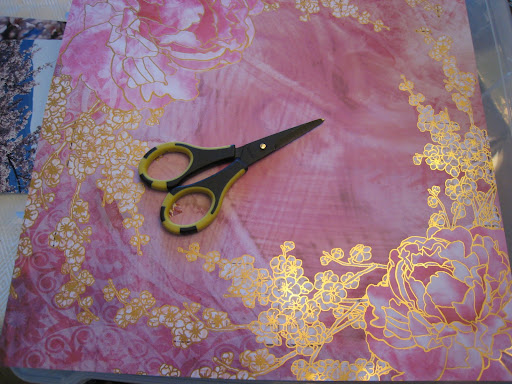 |
| Yikes! Who in their right mind wants to cut out ALL these lovely blossoms? |
Not me! My sweet super fussy cutting friend Kim, the owner of Scrap-A-Lot, cut this paper for me!
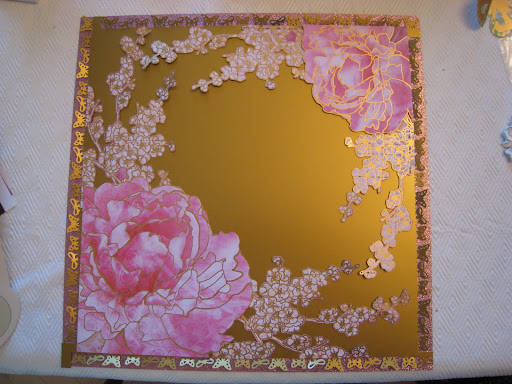 |
| I placed these gorgeous floral cuttings on top of the gold cardstock. |
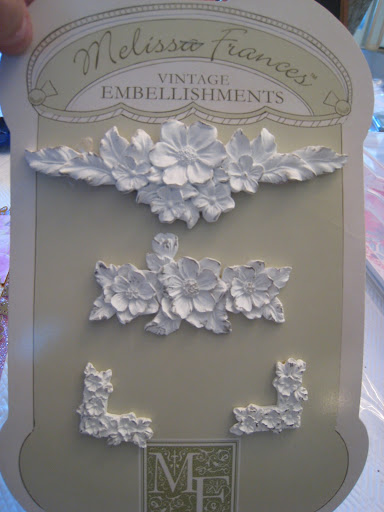 |
| I adore these Melissa Frances vintage embellishments! |
To gild them (add gold accents), I simply used my metallic gold Ranger paint dauber. That paint is the best and I use it all the time to add beautiful gold touches to lots of my page elements….you could say it’s worth its weight in “gold”…hee hee!
 |
| Just touch the raised edges of the resin designs. |
Here’s a closer look of the finished result…
 |
| These corners ended up at the bottom of the gold metallic background as page corners. |

I used the two floral gilded elements to frame the photo….


To weave the ribbon along the edges of the glitter cardstock mat, I punched holes with my Crop-a-dile…2 holes at about 1 1/2″ intervals…and yes, I used a ruler to measure.
 |
| Yikes! that Crop-a-dile looks like a monster next to these delicate cherry blossoms…kinda like the Godzilla of scrapbooking tools! |
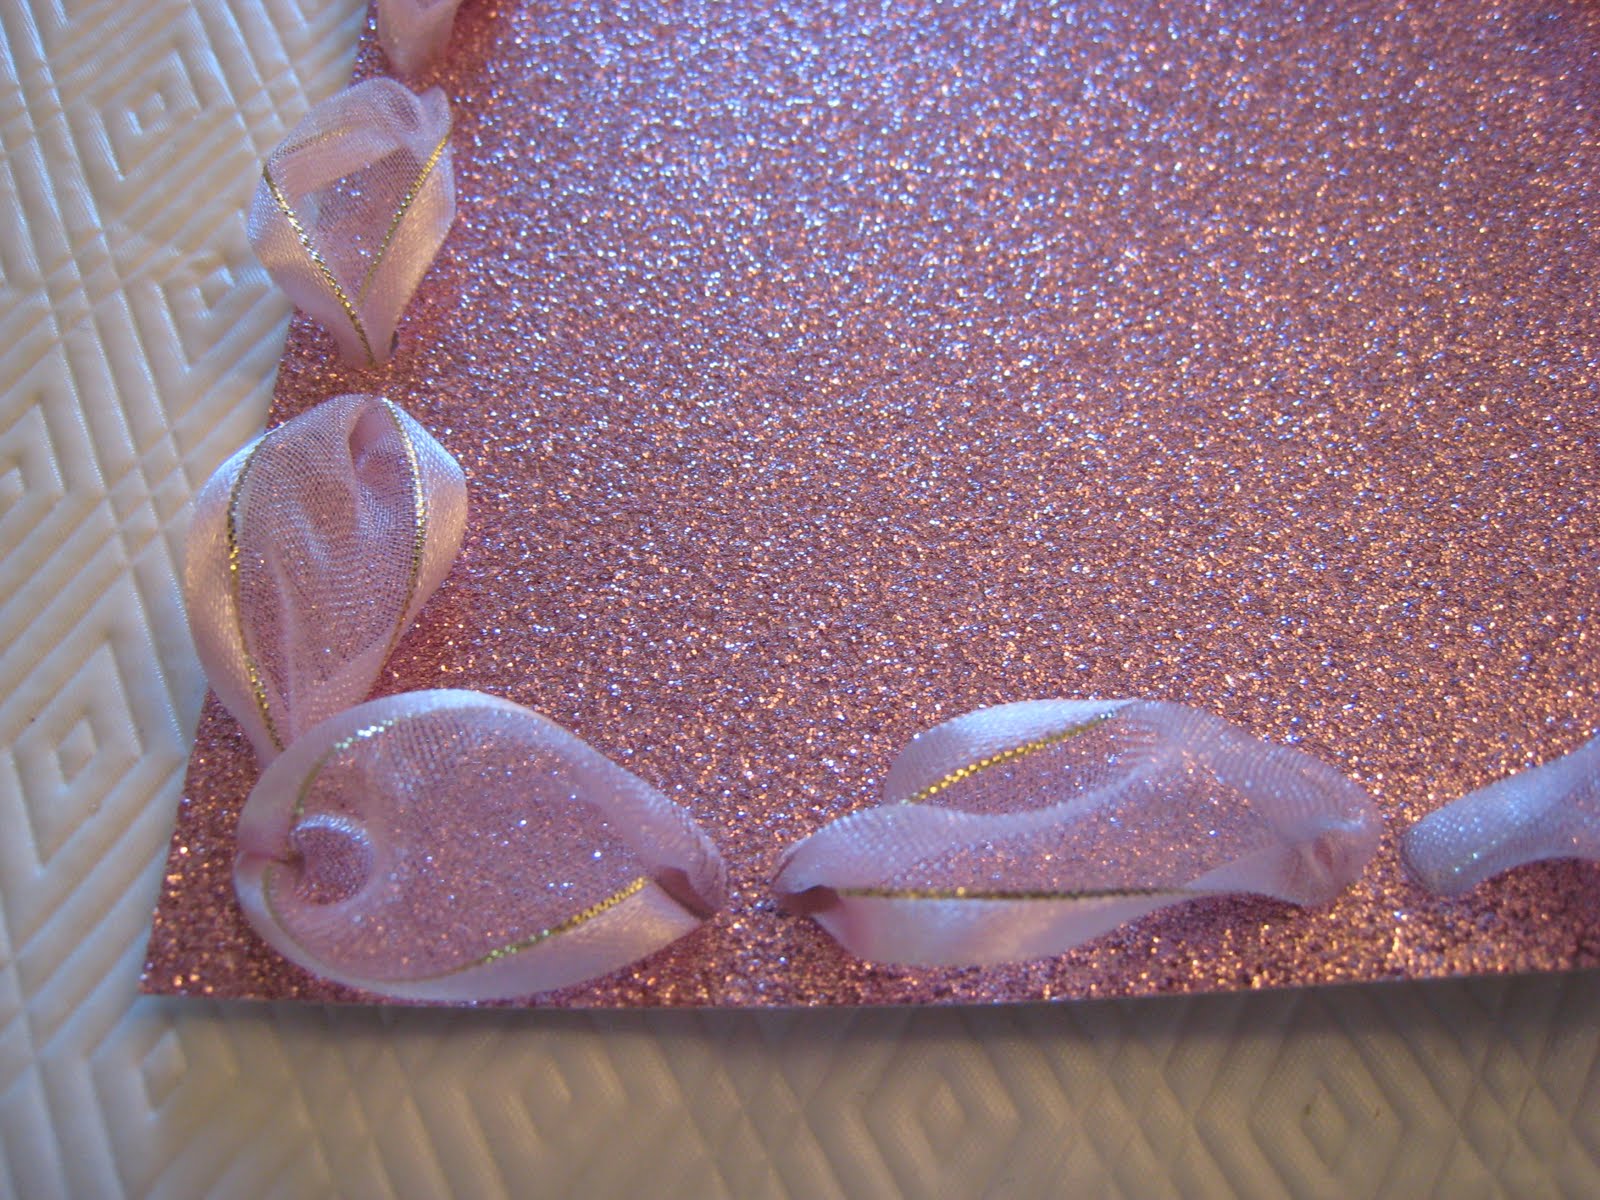 |
| A wide soft sheer pink ribbon worked well to create this effect…. |
Here is another photo I took of the page outside in the sunlight…so you could see it SHINE!

And now you know all the deep dark secrets behind creating this Cherry Blossoms layout!
Hope you enjoyed looking at LOTS of photos 🙂
Wendy Rasbach
August 22, 2011 at 12:15 pm (13 years ago)Wow, Kelly! Your layout is gorgeous! Good for you finding a way to get out of fussy cutting that paper. 🙂 I think it’s quite a work of art, and your friend will love it.
P.S. I rather enjoy the teenage horror stories. They make me giggle…probably because I don’t have teenagers yet…(yet)
Lisa Barrie
August 22, 2011 at 12:20 pm (13 years ago)Just stunning! I love the gold accents on the white washed embellies!! I’m definitely looking forward to some more storytelling too!
Karen Jones
August 22, 2011 at 12:56 pm (13 years ago)Incredible! Loving your blog.
Michelle
August 22, 2011 at 2:00 pm (13 years ago)Wow! stunning LO Kelly. It is so rich! Love all the fussy cutting …God bless Kim I’d say LOL!The weaved ribbon frame is beautiful! and I do that cut out the center thing too ….especially if I don’t have a second sheet ! great minds think alike!
Sandra D
August 22, 2011 at 2:57 pm (13 years ago)Beautiful job of creating a gorgeous layout and then teaching us how to recreate one for ourselves. The bird and butterflies are the perfect additions to this nature-inspired page. The sheer ribbon really adds another dimension and is the perfect girly finish.
Sandi Smith
August 22, 2011 at 3:26 pm (13 years ago)Just beautiful Kelly…love every detail. I too cut out the centers of my paper and please don’t change a thing about your blog…your stories always make me chuckle!!!
Cindy Gay
August 22, 2011 at 5:13 pm (13 years ago)It’s very pretty Kelly and I like the part about the dauber metallic paint.
Sabrina
August 22, 2011 at 7:18 pm (13 years ago)Absolutely beautiful!! 🙂 Thanks for sharing this, Kelly!
Vicky Alberto
August 22, 2011 at 8:16 pm (13 years ago)I love your stories and teen horror, LOL… love your layout too! I only fussy cut flowers if the project demands it otherwise I rather make 3D flowers 🙂
Micupoftea~
August 23, 2011 at 12:08 am (13 years ago)Ahhh, so elegant, Kelly! I LOVE LOTS of pics too~ Great close-ups of the punching, lacing and MF pieces. Your work is always so detailed and eye catching. Have a great week 🙂
xox
shawn
Kazza
August 23, 2011 at 12:16 am (13 years ago)Soooo gorgeous Kelly!!!!Love your techniques but really love your stories behind everything!!Thx for the smile and giggle…..Kxx
Renee VanEpps
August 23, 2011 at 4:46 am (13 years ago)Wow Kelly, this is so beautiful!! Yes, I love looking at the photos to see all the up close gorgeous elements!! Those MF resin pieces are so pretty, will have to get some (and some gold paint!).. Been wanting to try the Distress Stains 🙂
María Castillo
August 23, 2011 at 8:48 am (13 years ago)Gorgeous page Kelly and love the step by ste´you made!!
scrapbookertink
August 23, 2011 at 11:37 pm (13 years ago)Stunning page Kelly, love all the pics never to pro to learn something new, take care, Doreen x
Pendra
September 14, 2011 at 7:53 am (13 years ago)Wow Kelly, this page is stunning! You have the patience of a saint and nerves of steel because I would be a nervous ninny, (spelling???) cutting up that beautiful paper. But it came out GORGEOUS! I just adore the ribbon weaving around the photo! Thanks for sharing how you do what you do! It means a lot to this newbie!
Izzyb
September 20, 2011 at 6:22 pm (13 years ago)Oh, my stars! This is one amazing creation. Please tell me you submitted this to Scrapbooking and Beyond. The spring call is due Oct. 1. This is right up their alley.